apple-cinnamon-muffins-66-700x1020.jpg

Healthy Apple Cinnamon Muffins

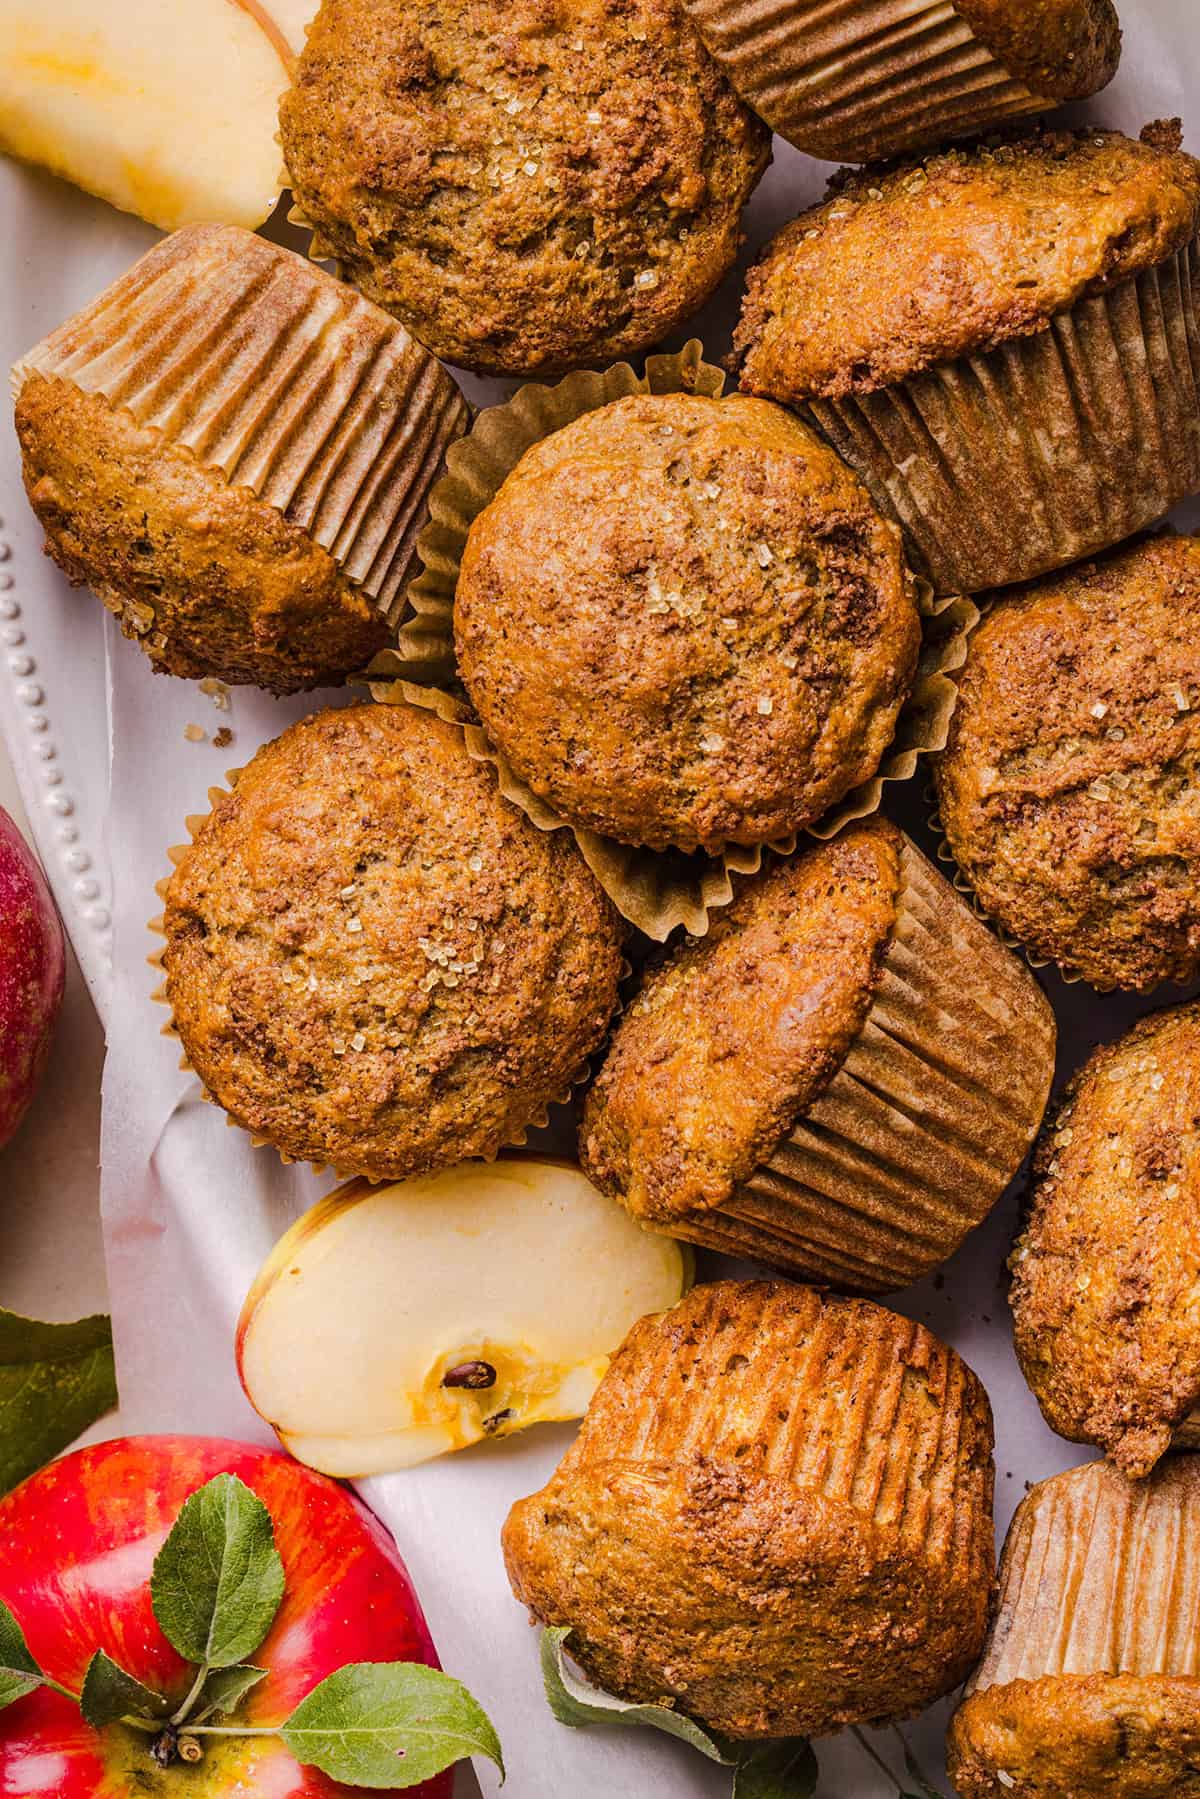
These Healthy Apple Cinnamon Muffins are soft, fluffy and packed with fresh shredded apple, warm cinnamon and cozy fall spices. Made with Greek yogurt, whole wheat pastry flour and pure maple syrup, then topped with cinnamon sugar for the perfect bakery-style muffin!
Healthy apple cinnamon muffins made with Greek yogurt and fresh apples
Want to save this recipe?
Just enter your email and get it sent to your inbox! Plus you’ll get new recipes from us every week!

Please enable JavaScript in your browser to complete this form.

Please enable JavaScript in your browser to complete this form.

Loading

It’s officially apple season, which means it’s time for all the cozy fall baking! These Healthy Apple Cinnamon Muffins are soft, fluffy and packed with fresh shredded apple and warm cinnamon in every bite. They’re naturally sweetened with pure maple syrup and made with Greek yogurt and whole wheat pastry flour for a wholesome twist on classic apple muffins.

Best of all, these muffins come together in just 30 minutes and are perfect for the whole family. Enjoy them warm for breakfast, pack them in lunchboxes or keep a batch on hand for an easy afternoon snack. You can even freeze them for later!

Why You’ll Love These

  • Soft and fluffy – a combination of all-purpose and whole wheat pastry flour gives these muffins a light, tender texture.
  • Naturally sweetened – the muffin batter is sweetened with pure maple syrup, with just a touch of cane sugar on top for that bakery-style finish.
  • Made with wholesome ingredients – whole wheat pastry flour adds whole grains while still keeping the texture light.
  • Perfect for fall – fresh apples and warm cinnamon make these such a cozy breakfast or snack.
  • Easy to make – the batter comes together quickly and the muffins are ready in about 30 minutes.
  • Great for meal prep – make a batch for easy breakfasts, lunchboxes and snacks throughout the week.

Ingredients for healthy apple cinnamon muffins

Ingredients You’ll Need

  • whole wheat pastry flour – my favorite flour for healthier baking because you get the benefits of whole grains while still keeping the muffins light and tender. You can also use white whole wheat flour, all-purpose flour or a 1-to-1 gluten-free baking flour.
  • all-purpose flour – using some all-purpose flour keeps these muffins soft, light and fluffy.
  • baking powder + baking soda – using both gives these muffins plenty of lift and helps create those tall, fluffy muffin tops.
  • cinnamon + nutmeg – warm spices that pair perfectly with fresh apple and give these muffins their cozy fall flavor.
  • salt – enhances all the flavors and balances the sweetness.
  • apple – you’ll need about one medium apple, peeled and shredded. I love Honeycrisp, but Granny Smith, Pink Lady, Braeburn and Golden Delicious are all great choices.
  • eggs – give the muffins structure and help them rise.
  • pure maple syrup – naturally sweetens the muffin batter and adds moisture. Honey can also be used.
  • Greek yogurt – adds moisture and tenderness while allowing us to use less oil. I recommend plain Greek yogurt.
  • milk – I use unsweetened almond milk, but any milk you have on hand will work.
  • olive oil – adds moisture and keeps the muffins soft without using butter. Use a mild-flavored olive oil so it doesn’t overpower the apple and cinnamon.
  • vanilla extract – adds a little extra warmth and sweetness to the muffins.
  • cinnamon sugar topping – a simple mixture of cane sugar and cinnamon sprinkled over the muffins before baking gives them a sweet, bakery-style finish.

Best Apples for Apple Cinnamon Muffins

I love using Honeycrisp apples because they’re naturally sweet with a little tartness and hold up really well when baked. Granny Smith is another great choice if you prefer a more tart apple flavor.

Other good baking apples include Pink Lady, Braeburn and Golden Delicious. You can even use a combination of sweet and tart apples if you’re making a double batch.

For this recipe, I prefer to shred the apple rather than dice it. Shredded apple distributes evenly throughout the batter and adds moisture and apple flavor to every bite without leaving large chunks. You can leave the peel on if you prefer, but I usually peel the apple first for the softest muffin texture.
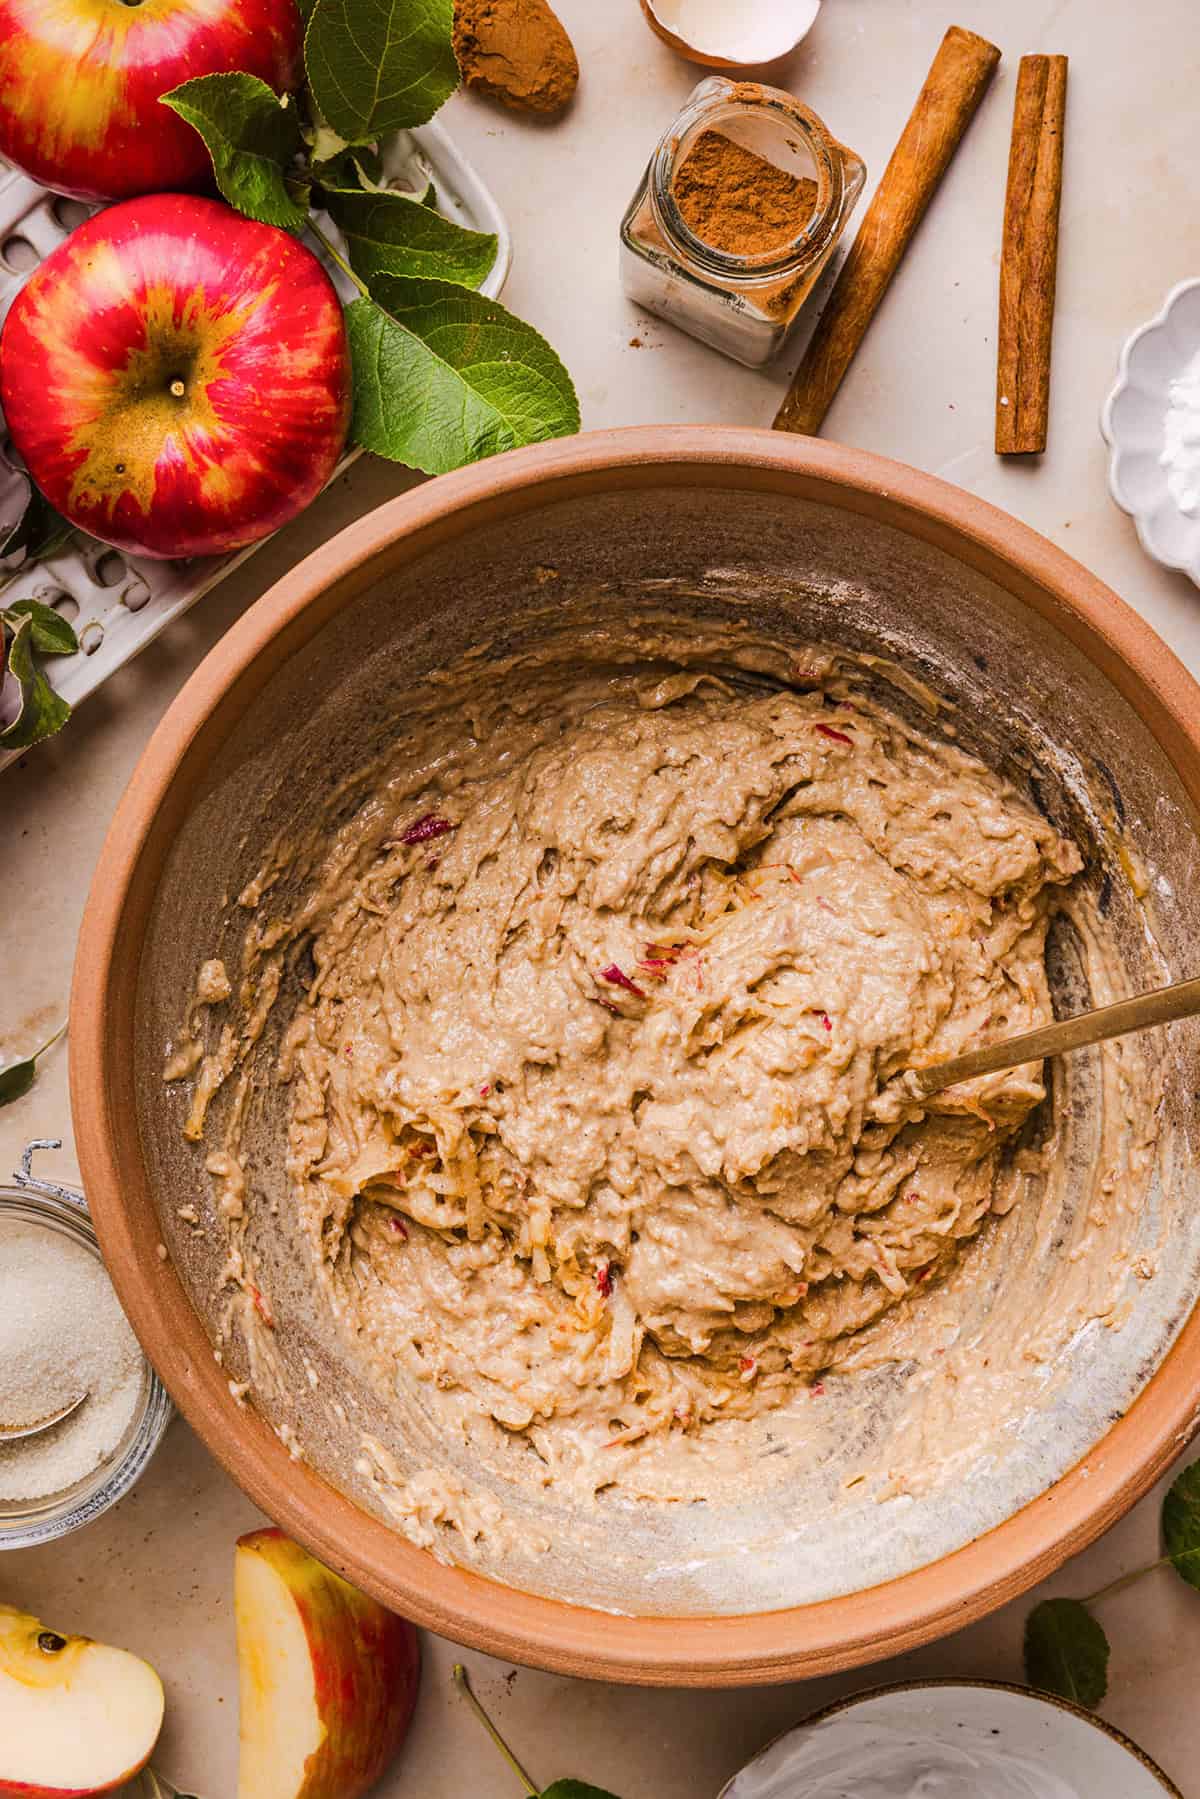
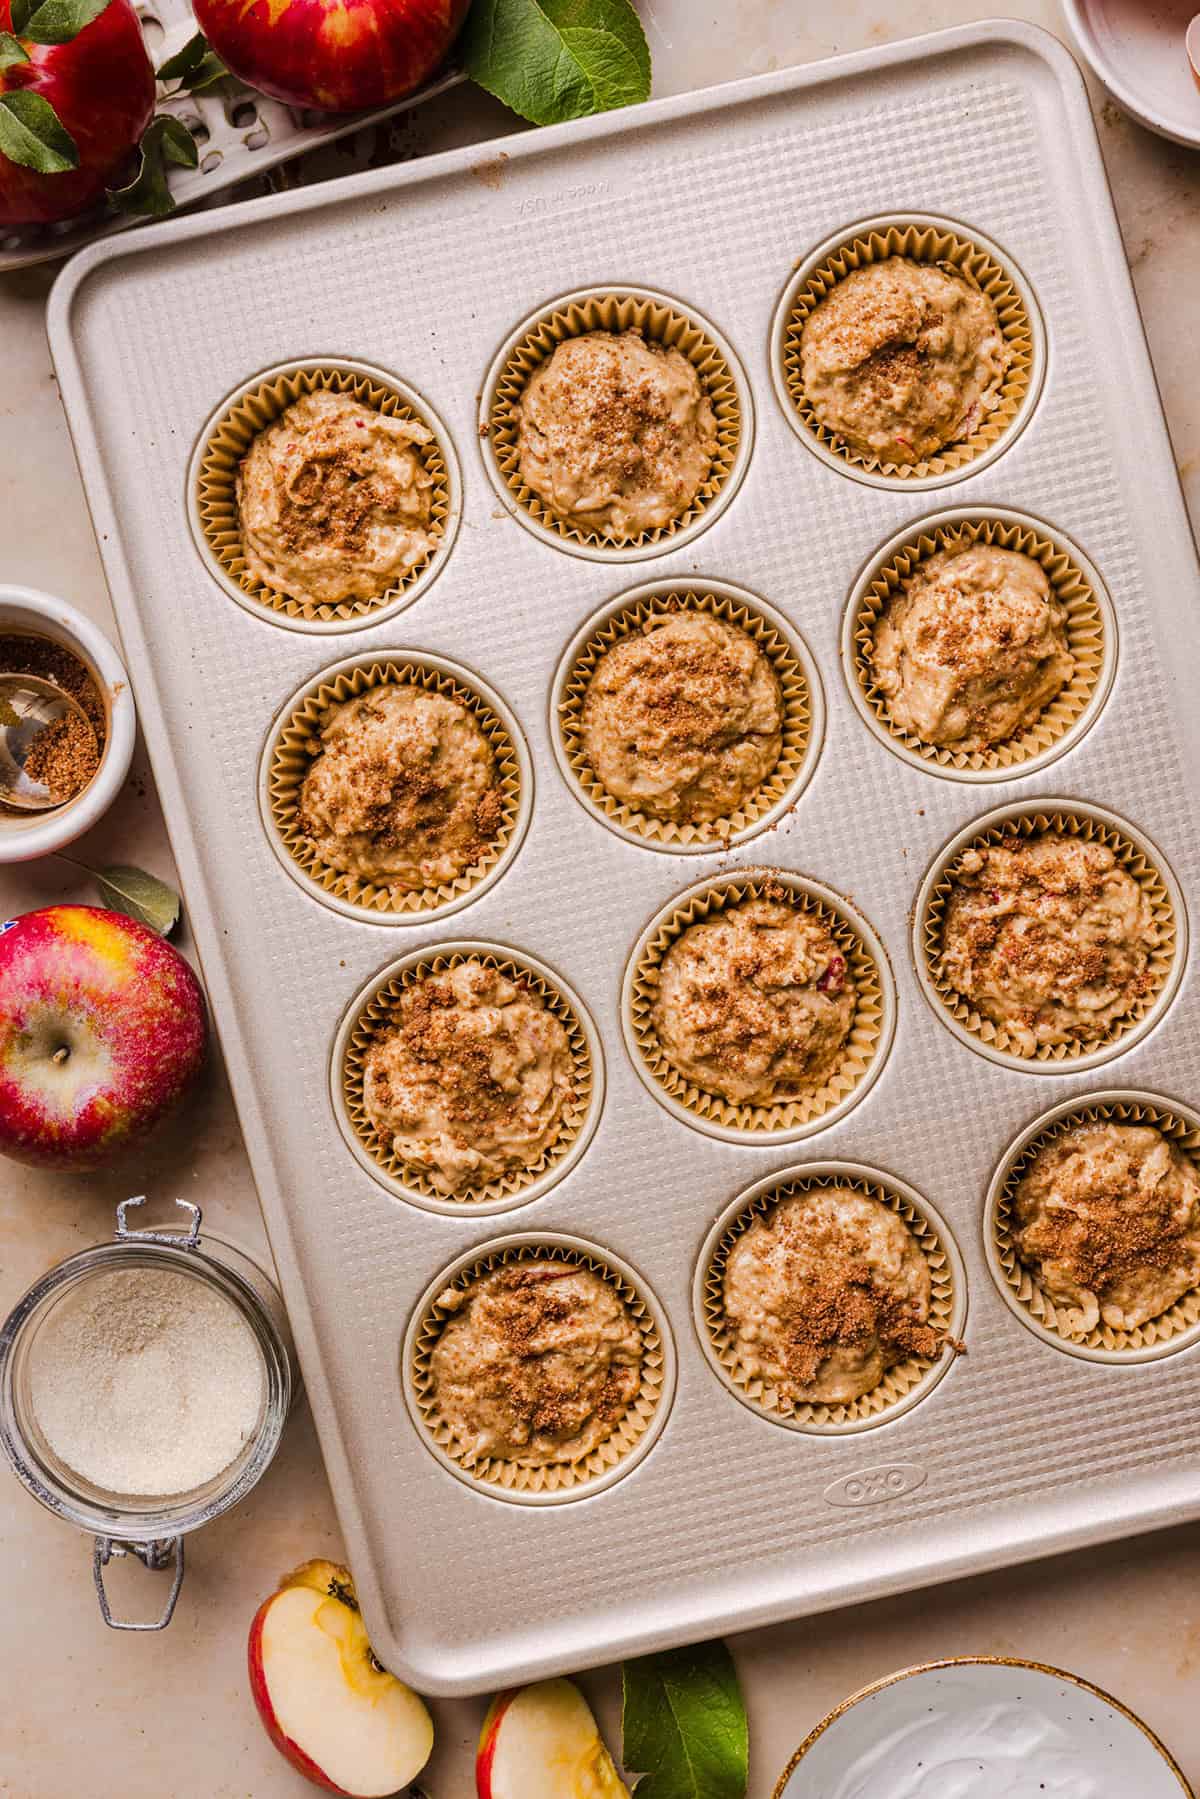
Apple cinnamon muffin batter made with shredded fresh apple
Healthy apple cinnamon muffin batter in a muffin tin

How to Make Healthy Apple Cinnamon Muffins

  1. Prep the apple. Preheat the oven to 425°F and spray a 12-cup muffin pan with nonstick cooking spray or line with paper liners. Peel the apple and shred it using the large holes of a box grater.
  2. Mix the dry ingredients. In a large bowl, whisk together the whole wheat pastry flour, all-purpose flour, baking powder, baking soda, cinnamon, nutmeg and salt.
  3. Combine the wet ingredients. In a separate bowl, whisk together the eggs, maple syrup, Greek yogurt, milk, olive oil and vanilla until smooth and well combined.
  4. Make the batter. Pour the wet ingredients into the dry ingredients and gently mix with a spatula just until combined. Be careful not to overmix.
  5. Fold in the apple. Gently fold the shredded apple into the batter until evenly distributed.
  6. Rest the batter. Let the batter sit at room temperature for 10 to 15 minutes. This allows the flour to hydrate and the batter to thicken, helping create taller, fluffier muffin tops. Don’t stir the batter again after resting.
  7. Make the cinnamon sugar topping. While the batter rests, combine the cane sugar and cinnamon in a small bowl.
  8. Fill the muffin cups. Divide the batter evenly between 12 muffin cups, filling each almost to the top. Sprinkle the cinnamon sugar mixture evenly over each muffin.
  9. Bake. Bake at 425°F for 5 minutes, then, without opening the oven door, reduce the temperature to 350°F. Continue baking for another 13 to 16 minutes, or until the muffin tops are domed and a toothpick inserted into the center comes out clean.
  10. Cool and enjoy. Let the muffins cool in the pan for about 5 minutes before transferring them to a wire rack to finish cooling.
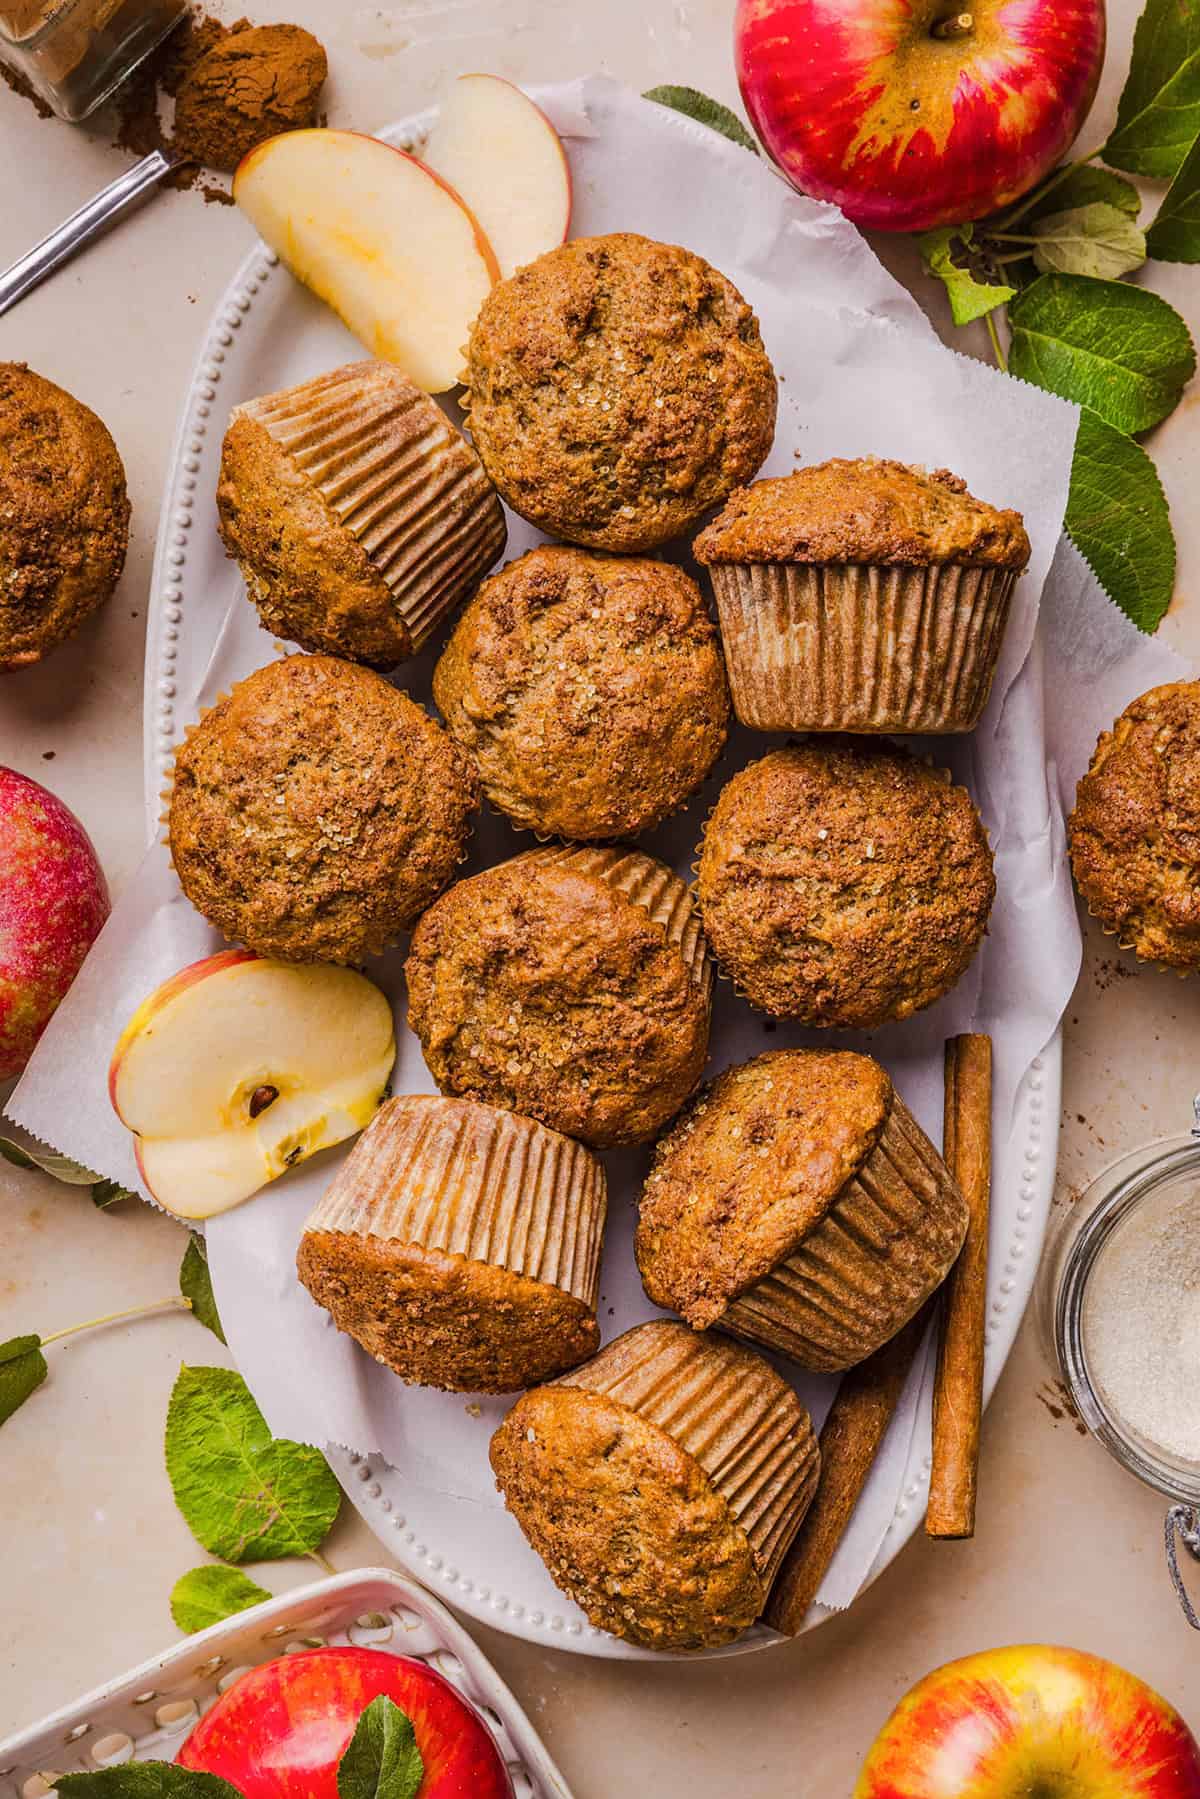
Healthy apple cinnamon muffin with fresh apple and warm spices

Tips for Moist and Fluffy Apple Muffins

  • Use room-temperature ingredients. This is especially helpful with the eggs and Greek yogurt so the batter combines evenly.
  • Don’t overmix. Gently fold the batter just until combined for the softest, fluffiest texture.
  • Lightly blot the apple. Shredded apples can release quite a bit of liquid. Remove some excess moisture without squeezing them completely dry.
  • Let the batter rest. That 10 to 15-minute rest gives the flour time to hydrate and helps the batter thicken before baking.
  • Don’t stir after resting. Scoop the rested batter directly into the muffin cups so you don’t knock out the air that’s developed.
  • Fill the cups almost to the top. This helps create those big bakery-style muffin tops.
  • Start with high heat. The initial 425°F blast gives the muffins a quick rise. Lowering the oven to 350°F allows the centers to finish baking without over-browning the tops.
  • Don’t open the oven when lowering the temperature. Simply change the setting from 425°F to 350°F and keep the door closed.
  • Don’t overbake. Start checking after the additional 13 minutes at 350°F.

Variations and Substitutions

  • Add nuts – chopped walnuts or pecans would be delicious.
  • Add raisins – fold in raisins or dried cranberries for extra sweetness and texture.
  • Add more spice – add a little ginger, cloves or apple pie spice for even more fall flavor.
  • Skip the topping – you can leave off the cinnamon sugar if you’d prefer the muffins without added cane sugar.
  • Use a different oil – melted coconut oil or avocado oil can be substituted for the olive oil.
  • Make mini muffins – for mini muffins, I wouldn’t use the high-temperature method because they bake so quickly. Bake them entirely at 350°F and start checking around 10 minutes.

Healthy apple cinnamon muffins made with Greek yogurt and fresh apples

What to Serve with Apple Cinnamon Muffins

These muffins are delicious on their own for breakfast or a snack, but you can easily turn them into a more filling breakfast.

  • Greek yogurt – pair a muffin with Greek yogurt and fresh fruit for an easy protein-packed breakfast.
  • Eggs – serve alongside scrambled eggs, hard-boiled eggs or an egg casserole for extra protein.
  • Smoothie – a fruit or protein smoothie makes these muffins an easy grab-and-go breakfast.
  • Fresh fruit – serve with berries, banana slices or extra fresh apple.
  • Nut butter – spread a warm muffin with peanut butter or almond butter for a satisfying snack.
  • Oatmeal – pair with a smaller serving of oatmeal or these apple pie overnight oats for an extra-cozy fall breakfast.

Healthy apple cinnamon muffins stacked on top of each other

Frequently Asked Questions

Do I need to peel the apple for apple muffins?

No, you don’t have to peel the apple, but I prefer to for the softest texture. If you don’t mind little pieces of peel throughout your muffins, feel free to leave it on.

Can I use all-purpose flour instead of whole wheat pastry flour?

Yes. This recipe already uses a combination of all-purpose and whole wheat pastry flour, but you can replace the whole wheat pastry flour with additional all-purpose flour for an even lighter muffin. I wouldn’t recommend using regular whole wheat flour for all of the flour, as it can make the muffins much denser.

Can I substitute the Greek yogurt?

Yes. Unsweetened applesauce, mashed banana or pumpkin puree can be substituted for the Greek yogurt, although each will change the flavor and texture slightly.

Can I make these muffins gluten-free?

A 1-to-1 gluten-free baking flour should work in place of the whole wheat pastry flour.

Can I freeze apple cinnamon muffins?

Absolutely! These muffins freeze really well. Let them cool completely before placing them in a freezer-safe container or ziplock bag and freeze for up to 3 months. Thaw at room temperature or warm briefly in the microwave before serving.

Healthy apple cinnamon muffins made with Greek yogurt and fresh apples

Pin this now to find it later

Pin It

Follow on Instagram

Follow

More Apple Recipes You’ll Love

More Muffin Recipes You’ll Love

Hope you all enjoy these Healthy Apple Cinnamon Muffins and if you love this as much as we do, please leave me ⭐⭐⭐⭐⭐ below and don’t forget to tag me on Instagram using the hashtag #eatyourselfskinny! I love seeing all your delicious recreations!

Print

Healthy Apple Cinnamon Muffins

#wprm-recipe-user-rating-0 .wprm-rating-star.wprm-rating-star-full svg * { fill: #343434; }#wprm-recipe-user-rating-0 .wprm-rating-star.wprm-rating-star-33 svg * { fill: url(#wprm-recipe-user-rating-0-33); }#wprm-recipe-user-rating-0 .wprm-rating-star.wprm-rating-star-50 svg * { fill: url(#wprm-recipe-user-rating-0-50); }#wprm-recipe-user-rating-0 .wprm-rating-star.wprm-rating-star-66 svg * { fill: url(#wprm-recipe-user-rating-0-66); }linearGradient#wprm-recipe-user-rating-0-33 stop { stop-color: #343434; }linearGradient#wprm-recipe-user-rating-0-50 stop { stop-color: #343434; }linearGradient#wprm-recipe-user-rating-0-66 stop { stop-color: #343434; }

These Healthy Apple Cinnamon Muffins are soft, fluffy and packed with fresh apple and warm spices. Made with Greek yogurt, whole wheat pastry flour and maple syrup, then topped with cinnamon sugar for the perfect bakery-style muffin!
Course Breakfast, Dessert, Snack
Cuisine American
Keyword apple cinnamon muffins, apple muffins with Greek yogurt, Healthy Apple Cinnamon Muffins, healthy apple muffins, healthy apple muffins with Greek yogurt, healthy fall muffins, maple sweetened apple muffins, whole wheat apple muffins
Prep Time 10 minutes
Cook Time 20 minutes
Total Time 30 minutes
Servings 12
Calories 153kcal

Ingredients

  • 1 cup whole wheat pastry flour
  • 3/4 cup all-purpose flour
  • 2 tsp baking powder
  • 1/2 tsp baking soda
  • 2 tsp cinnamon
  • 1/4 tsp nutmeg
  • 1/2 tsp salt
  • 2 eggs room temperature
  • 1/2 cup maple syrup
  • 1/2 cup plain Greek yogurt room temperature
  • 2 Tbsp almond milk or milk of choice
  • 3 Tbsp olive oil
  • 1 1/2 tsp vanilla
  • 1 cup shredded apple lightly squeezed/blotted

For the Cinnamon Sugar Topping:

Instructions

  • Preheat the oven to 425°F and spray a 12-cup muffin pan with nonstick cooking spray or line with paper liners. Peel the apple and shred it using the large holes of a box grater.
  • In a large bowl, whisk together the whole wheat pastry flour, all-purpose flour, baking powder, baking soda, cinnamon, nutmeg and salt.
  • In a separate bowl, whisk together the eggs, maple syrup, Greek yogurt, milk, olive oil and vanilla until smooth and well combined.
  • Pour the wet ingredients into the dry ingredients and gently mix with a spatula just until combined. Be careful not to overmix.
  • Gently fold the shredded apple into the batter until evenly distributed.
  • Let the batter sit at room temperature for 10 to 15 minutes. This allows the flour to hydrate and the batter to thicken, helping create taller, fluffier muffin tops. Don’t stir the batter again after resting.
  • While the batter rests, combine the cane sugar and cinnamon in a small bowl.
  • Divide the batter evenly between 12 muffin cups, filling each almost to the top. Sprinkle the cinnamon sugar mixture evenly over each muffin.
  • Bake at 425°F for 5 minutes, then, without opening the oven door, reduce the temperature to 350°F. Continue baking for another 13 to 16 minutes, or until the muffin tops are domed and a toothpick inserted into the center comes out clean.
  • Let the muffins cool in the pan for about 5 minutes before transferring them to a wire rack to finish cooling.

Notes

Storage: Store cooled muffins in an airtight container at room temperature for up to 1 day, then refrigerate for up to 1 week.

Freezing: Let the muffins cool completely, then place in a freezer-safe bag or container and freeze for up to 3 months. Thaw at room temperature or microwave for about 30 to 40 seconds until warmed through.

Make ahead: These muffins are perfect for meal prep and can be baked ahead for easy breakfasts and snacks throughout the week.

Nutrition
Serving: 1muffin | Calories: 153kcal | Carbohydrates: 25g | Protein: 4g | Fat: 4.5g | Saturated Fat: 3.2g | Cholesterol: 32mg | Sodium: 172.2mg | Fiber: 2.6g | Sugar: 9.2g

tomato-basil-soup-10-700x1049.jpg

Creamy Tomato Basil Soup

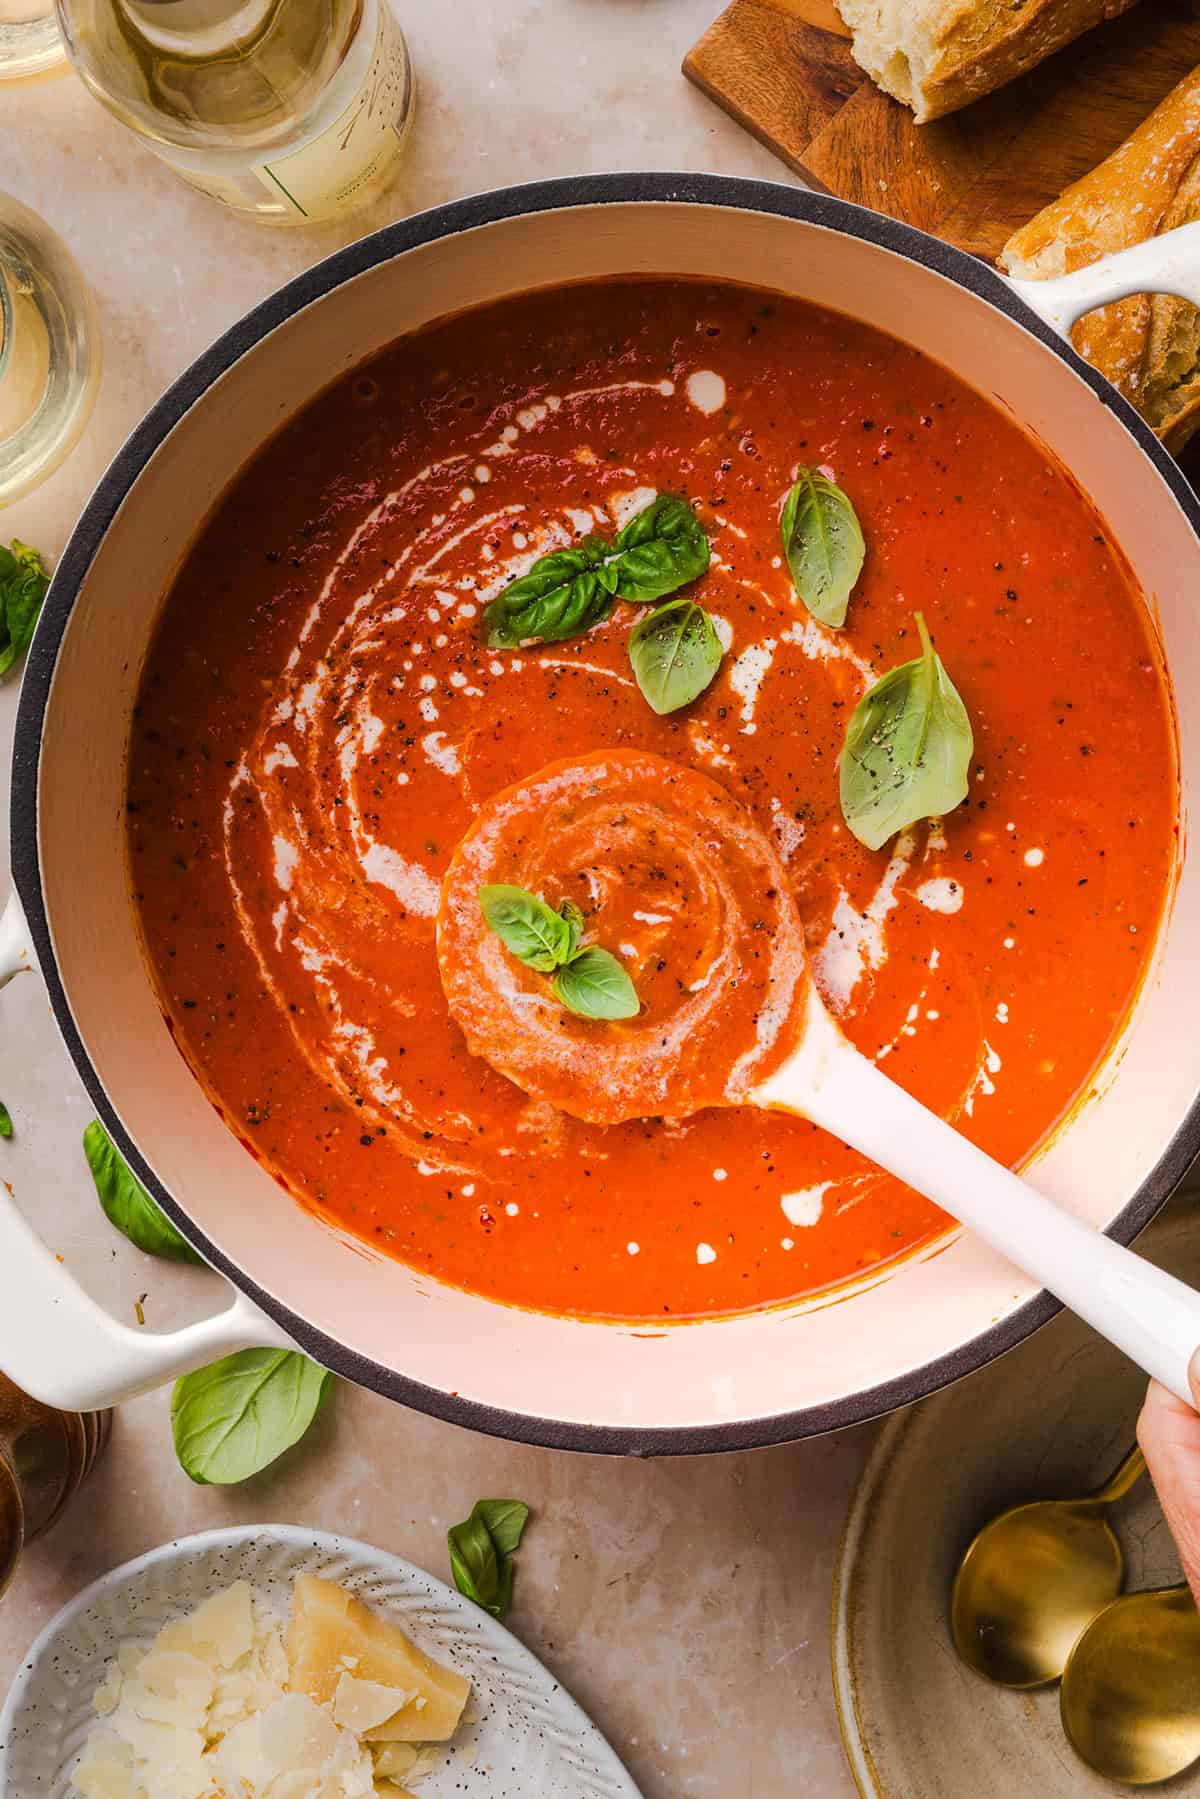
This Creamy Tomato Basil Soup is rich, cozy and full of fresh tomato flavor! Made with San Marzano tomatoes, fresh basil and a touch of creaminess, this easy one-pot soup is the ultimate comfort food. Serve it with crusty bread or a classic grilled cheese for the perfect cozy meal.

This Creamy Tomato Basil Soup is rich, cozy and full of fresh tomato flavor! Made with San Marzano tomatoes, fresh basil and a touch of creaminess, this easy one-pot soup is the ultimate comfort food. Serve it with crusty bread or a classic grilled cheese for the perfect cozy meal.

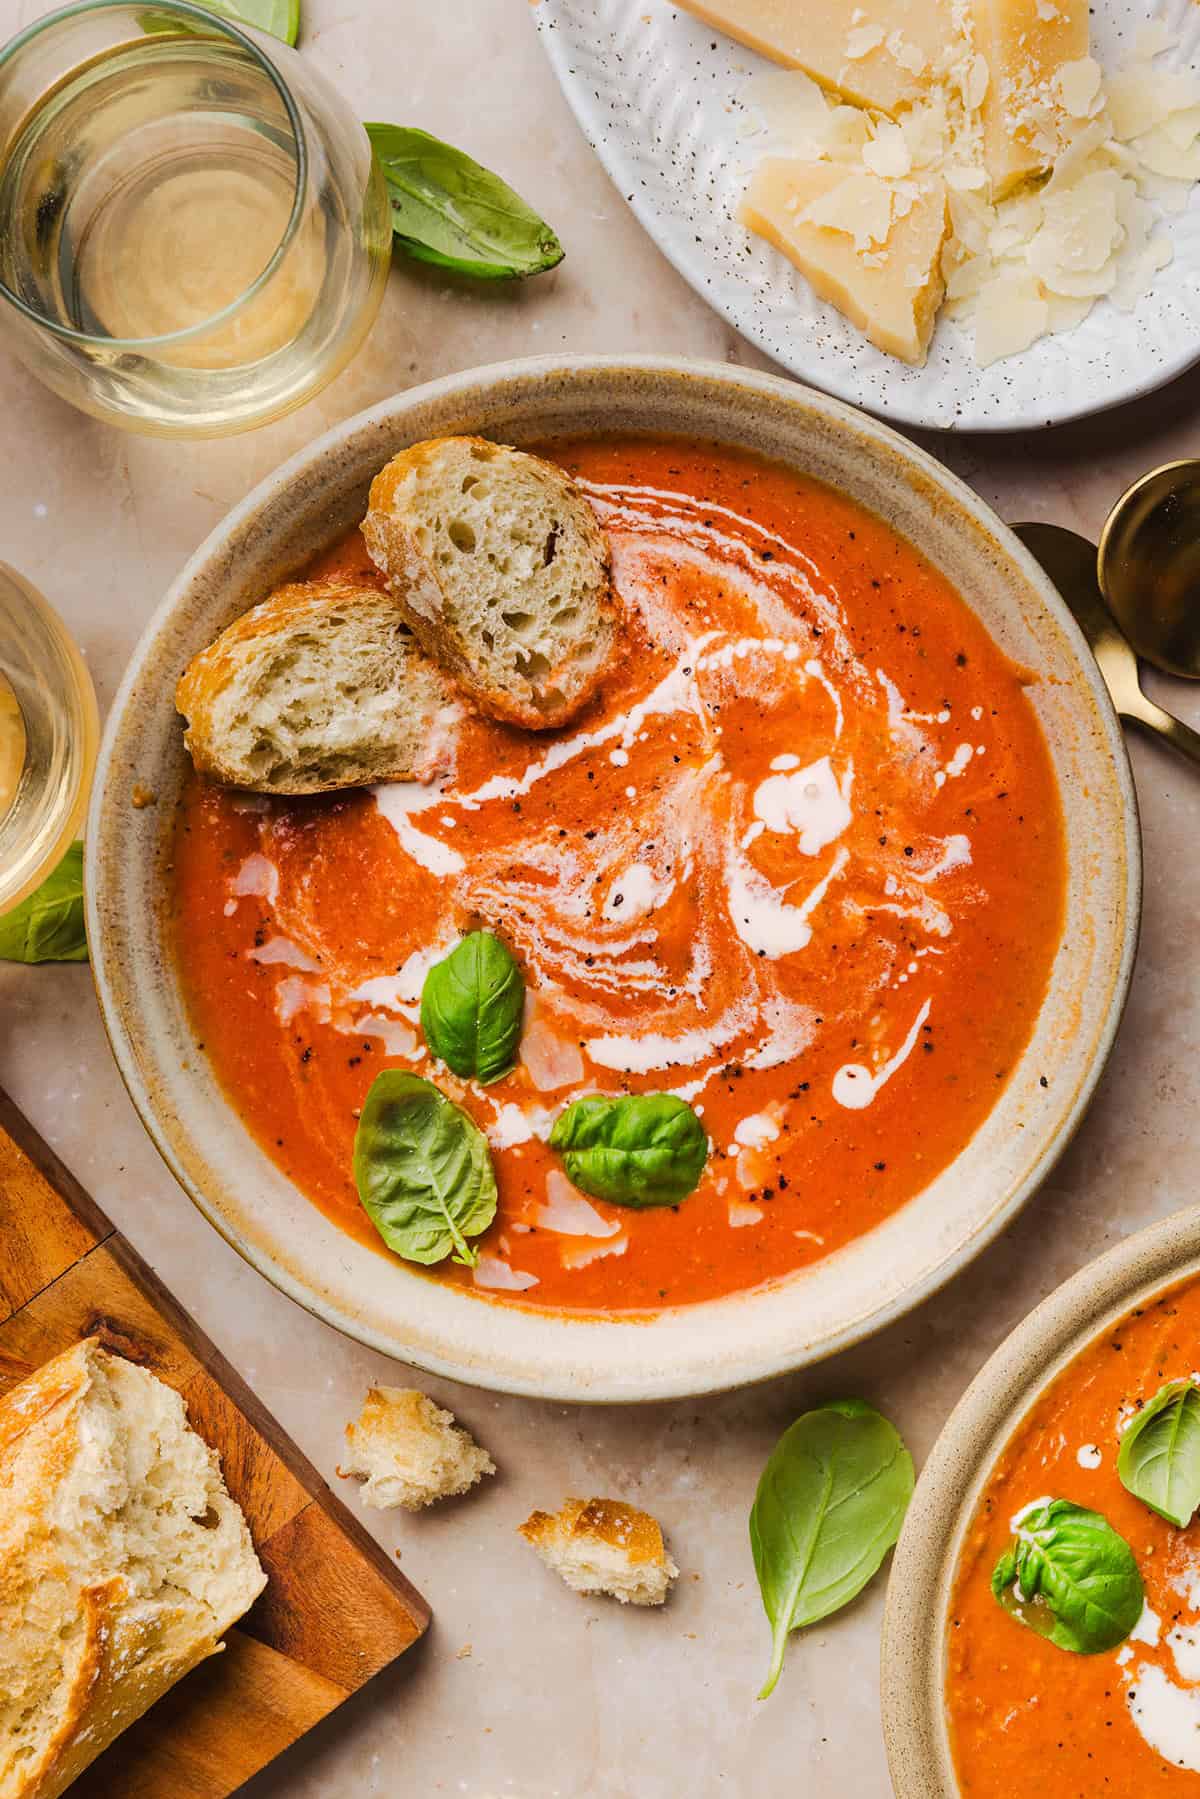
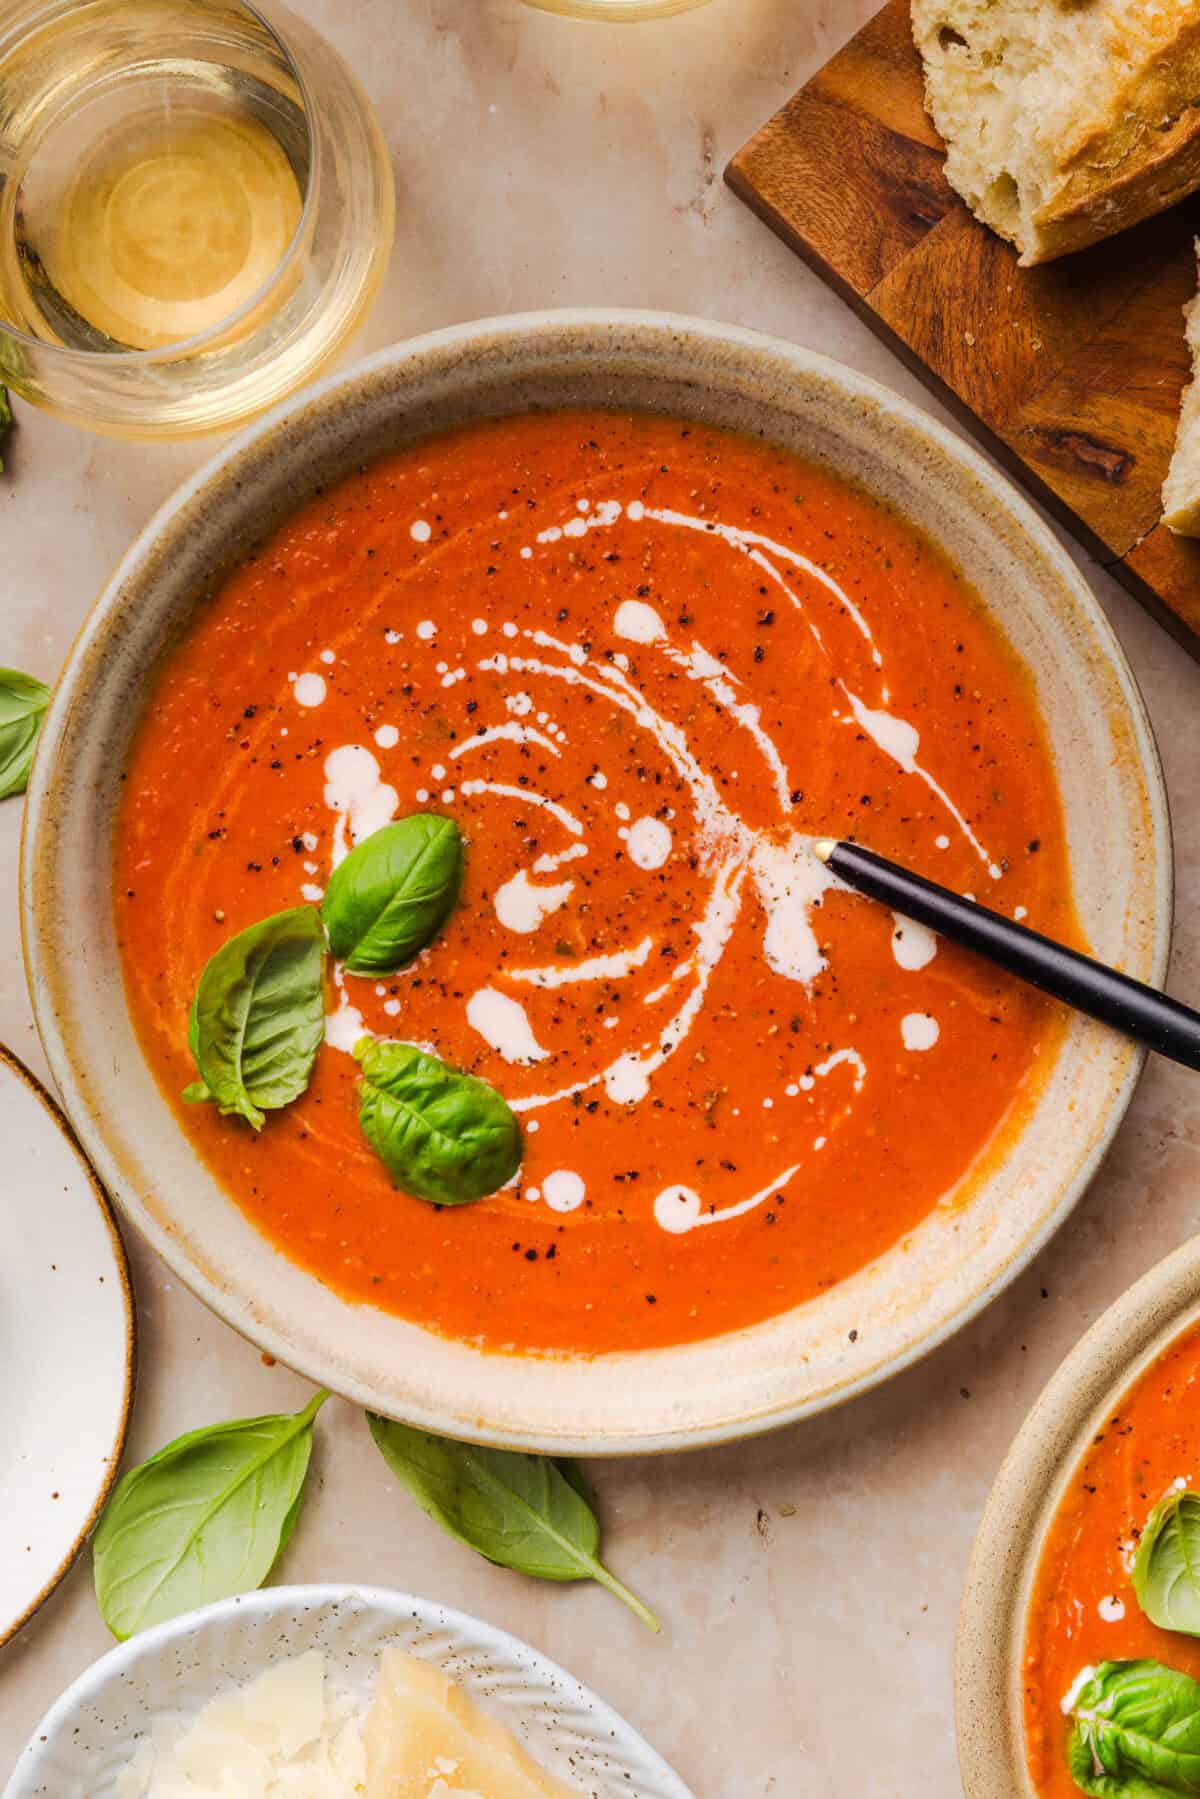
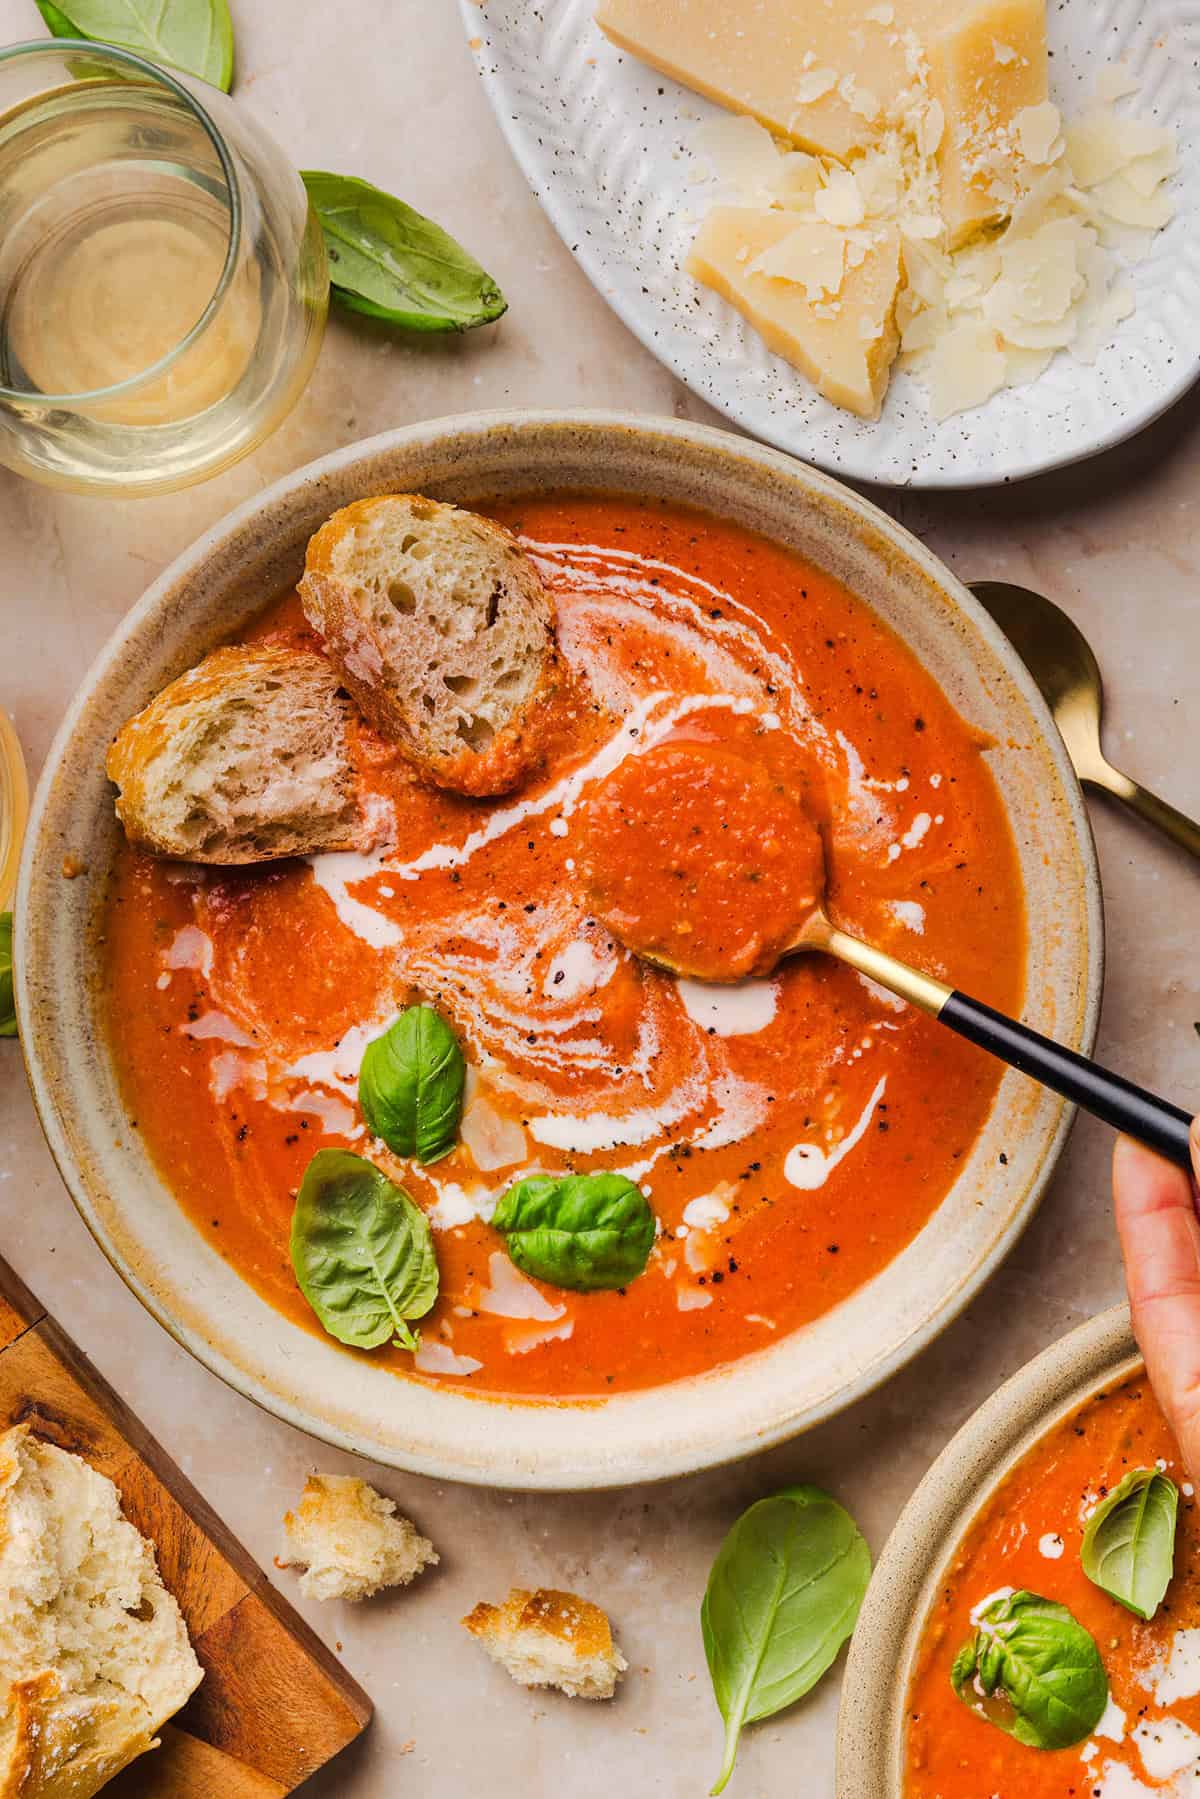
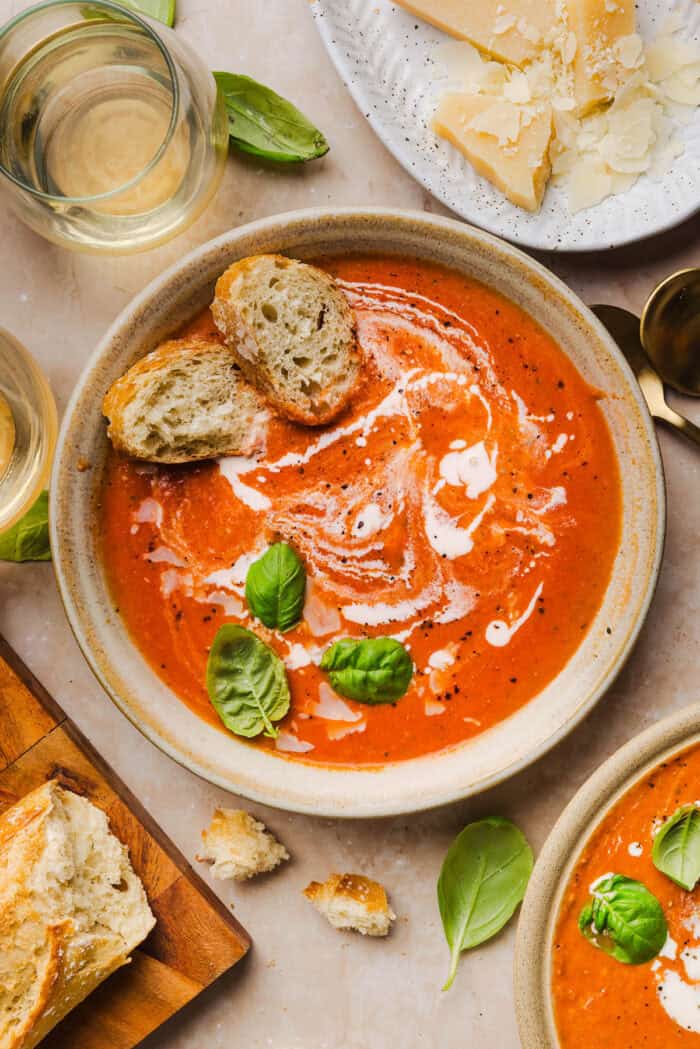
Creamy tomato basil soup served in a bowl with crusty bread
Want to save this recipe?
Just enter your email and get it sent to your inbox! Plus you’ll get new recipes from us every week!

Please enable JavaScript in your browser to complete this form.

Please enable JavaScript in your browser to complete this form.

Loading

This Creamy Tomato Basil Soup recipe is rich, comforting and full of delicious tomato flavor! Made with sweet San Marzano tomatoes, fresh basil, tender vegetables and just enough cream cheese and half-and-half to make it silky smooth, this easy soup is the ultimate cozy meal. Serve it with crusty bread or warm grilled cheese sandwiches for a simple lunch or dinner the whole family will love.

There is just something so comforting about a warm bowl of homemade tomato soup, especially once the weather starts to cool down. This version has everything you want in a classic creamy tomato basil soup, but it is made without a ton of heavy cream. A small amount of cream cheese, half-and-half and freshly grated Parmesan gives the soup its rich, velvety texture while still allowing the tomato and basil flavors to shine.

Everything comes together in one pot using simple pantry ingredients, and the soup tastes even better the next day. It is perfect for an easy weeknight dinner, a cozy weekend lunch or meal prep for the week.

Why You’ll Love This

  • Rich and creamy – cream cheese, half-and-half and Parmesan create a silky, creamy texture without needing a large amount of heavy cream.
  • Made in one pot – everything cooks and blends right in the same pot for easy preparation and cleanup.
  • Full of vegetables – onion, carrots, garlic and tomatoes add flavor, nutrients and natural sweetness.
  • Easy to make – this homemade tomato basil soup requires minimal prep and is ready in under an hour.
  • Perfect for meal prep – the flavors become even better after the soup has had time to sit in the refrigerator.
  • Freezer-friendly – make a double batch of this fresh tomato basil soup and freeze some for an easy meal later.
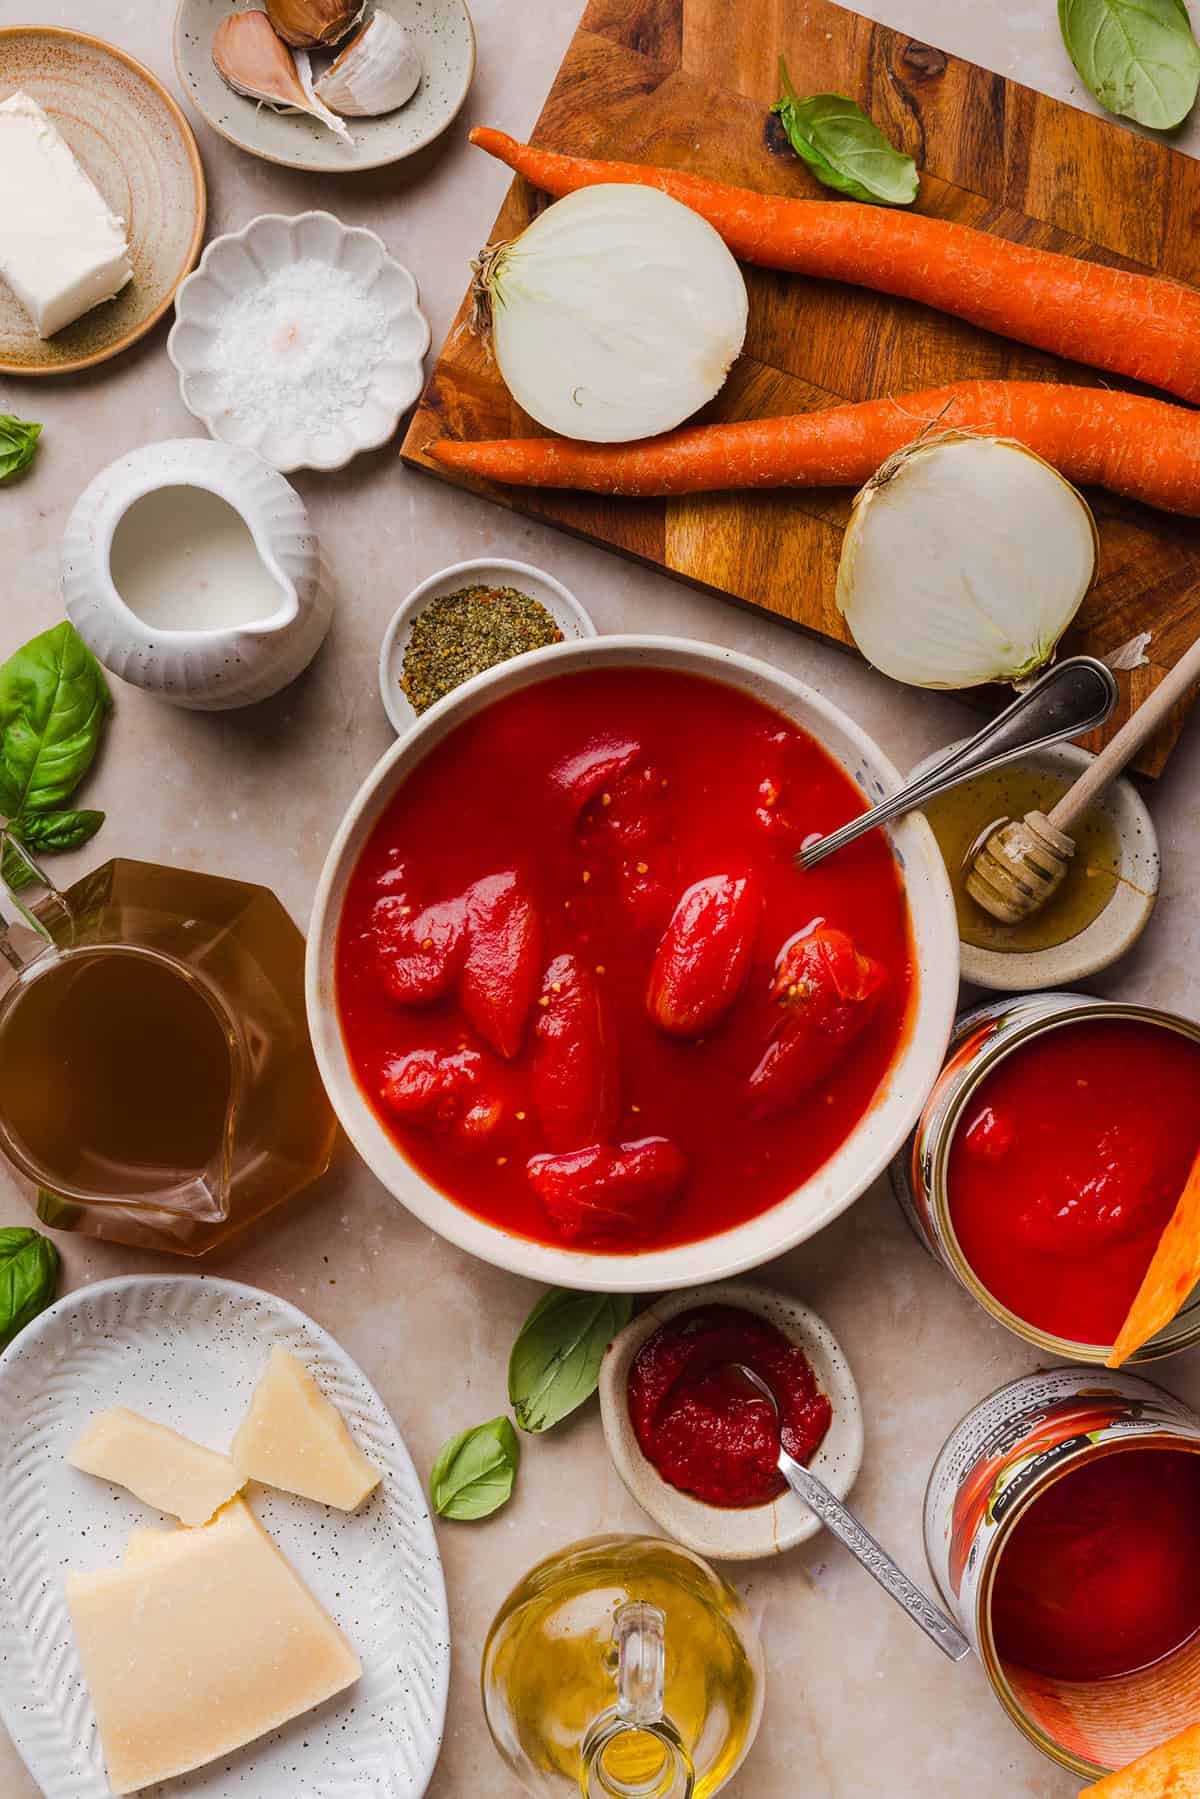
Creamy tomato basil soup ingredients

Ingredients You’ll Need

  • olive oil – used to sauté the onion and carrots and create a flavorful base for the creamy soup. You could also use butter in place of the olive oil.
  • yellow onion – adds savory flavor and a touch of natural sweetness. One medium onion should give you approximately 1½ cups once chopped.
  • carrots – help balance the acidity of the tomatoes while adding natural sweetness and extra vegetables.
  • garlic – freshly minced garlic adds so much flavor to this soup. Three cloves are perfect, but you can add another if you really love garlic.
  • tomato paste – deepens the tomato flavor and gives the soup a richer taste. Cooking the tomato paste briefly before adding the liquid helps caramelize it and remove its raw flavor.
  • San Marzano tomatoes – whole peeled San Marzano tomatoes have a naturally sweet, rich flavor and lower acidity than many other canned tomatoes. You will need two 28-ounce cans, including all the juices.
  • vegetable broth – thins the soup to the perfect consistency while adding extra flavor. I recommend using low-sodium broth so you can control the amount of salt. Chicken broth may also be used if the soup does not need to be vegetarian.
  • honey – just one teaspoon helps balance the acidity of the tomatoes without making the soup taste sweet. You could also do a pinch of sugar or maple syrup.
  • Italian seasoning – a simple blend of dried herbs complements the tomatoes and fresh basil.
  • salt and black pepper – start with the suggested amounts, then taste and adjust after blending the soup.
  • fresh basil – fresh basil gives this tomato soup its signature flavor. Be sure to pack the basil leaves lightly when measuring.
  • cream cheese – softened cream cheese makes the soup extra smooth and creamy. Cutting it into small cubes helps it blend into the soup more easily.
  • half-and-half -adds richness and creates that classic creamy tomato soup texture without using heavy cream.
  • parmesan cheese – freshly grated Parmesan melts more smoothly than pre-shredded cheese and adds a delicious savory flavor.
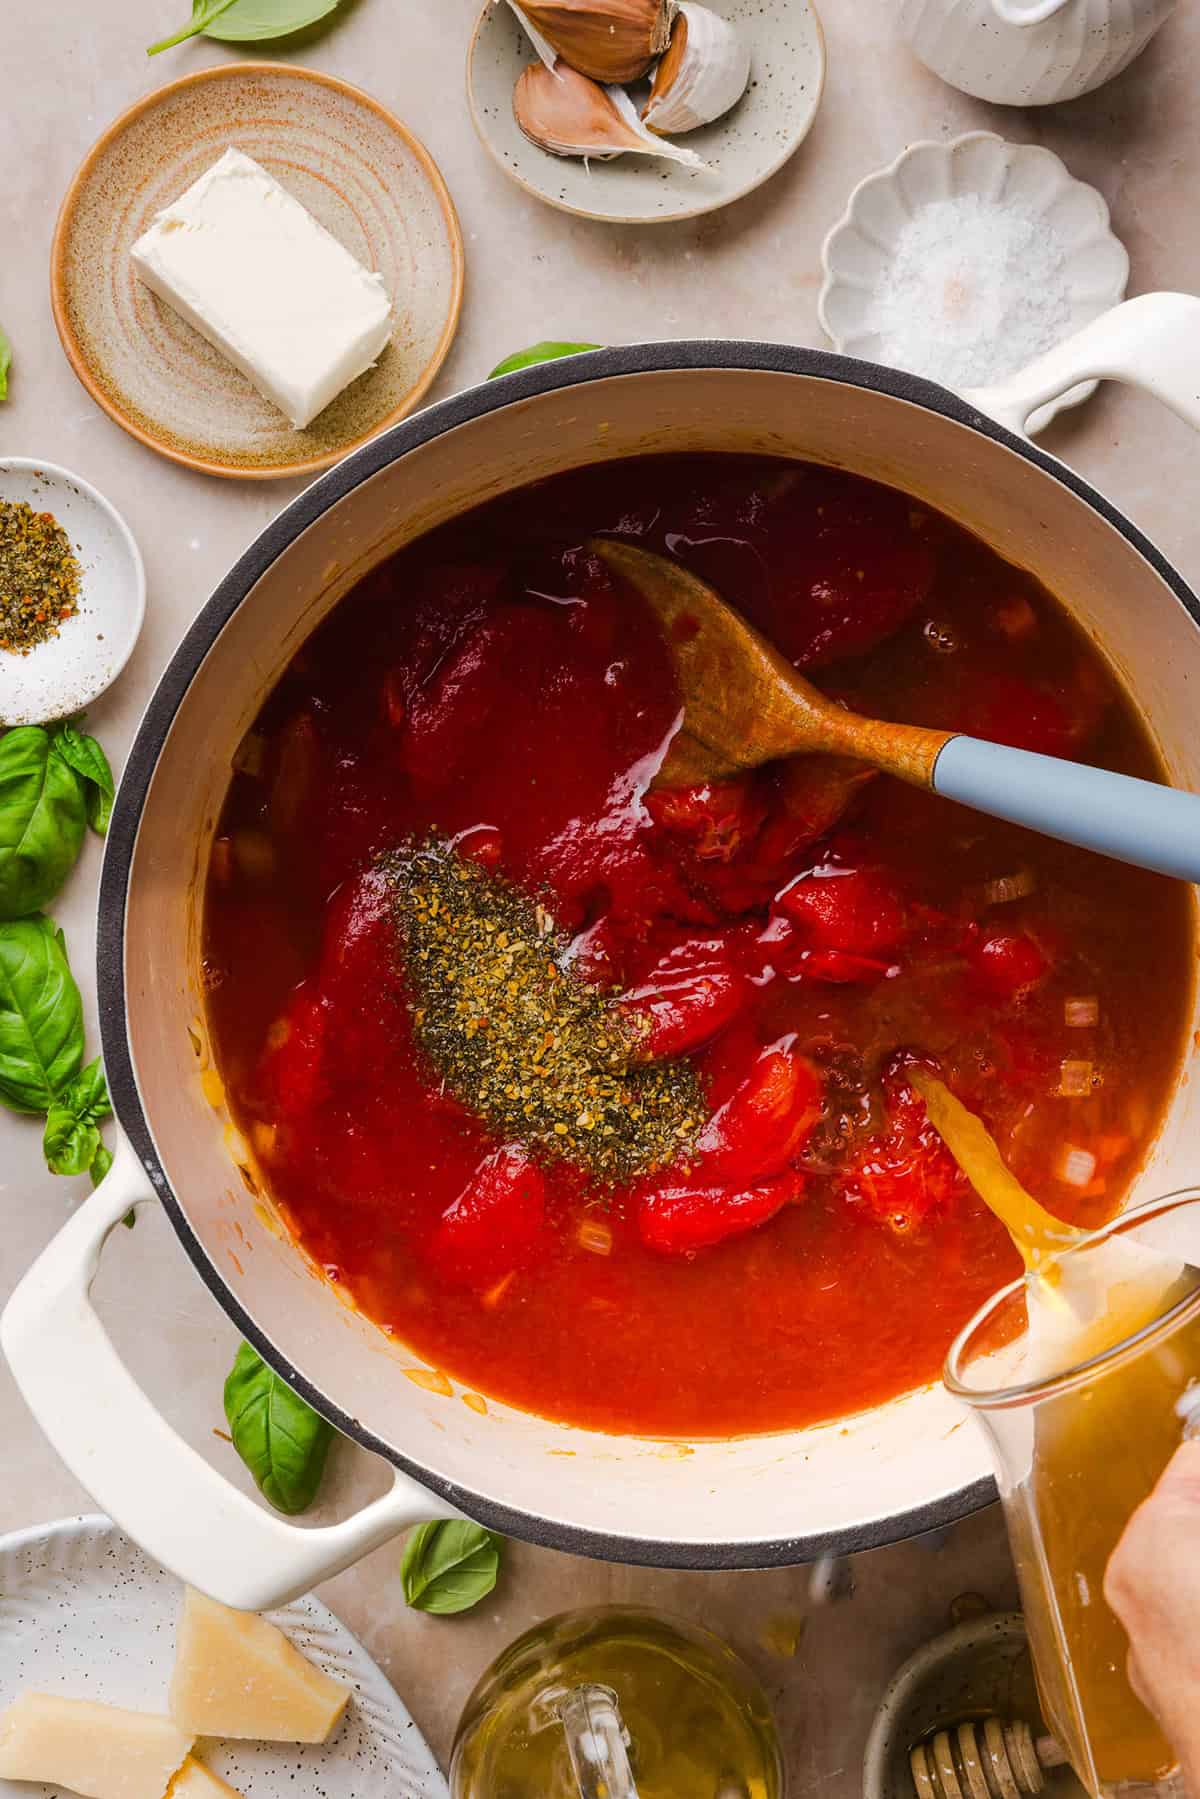
Tomato basil soup ingredients going in the pot
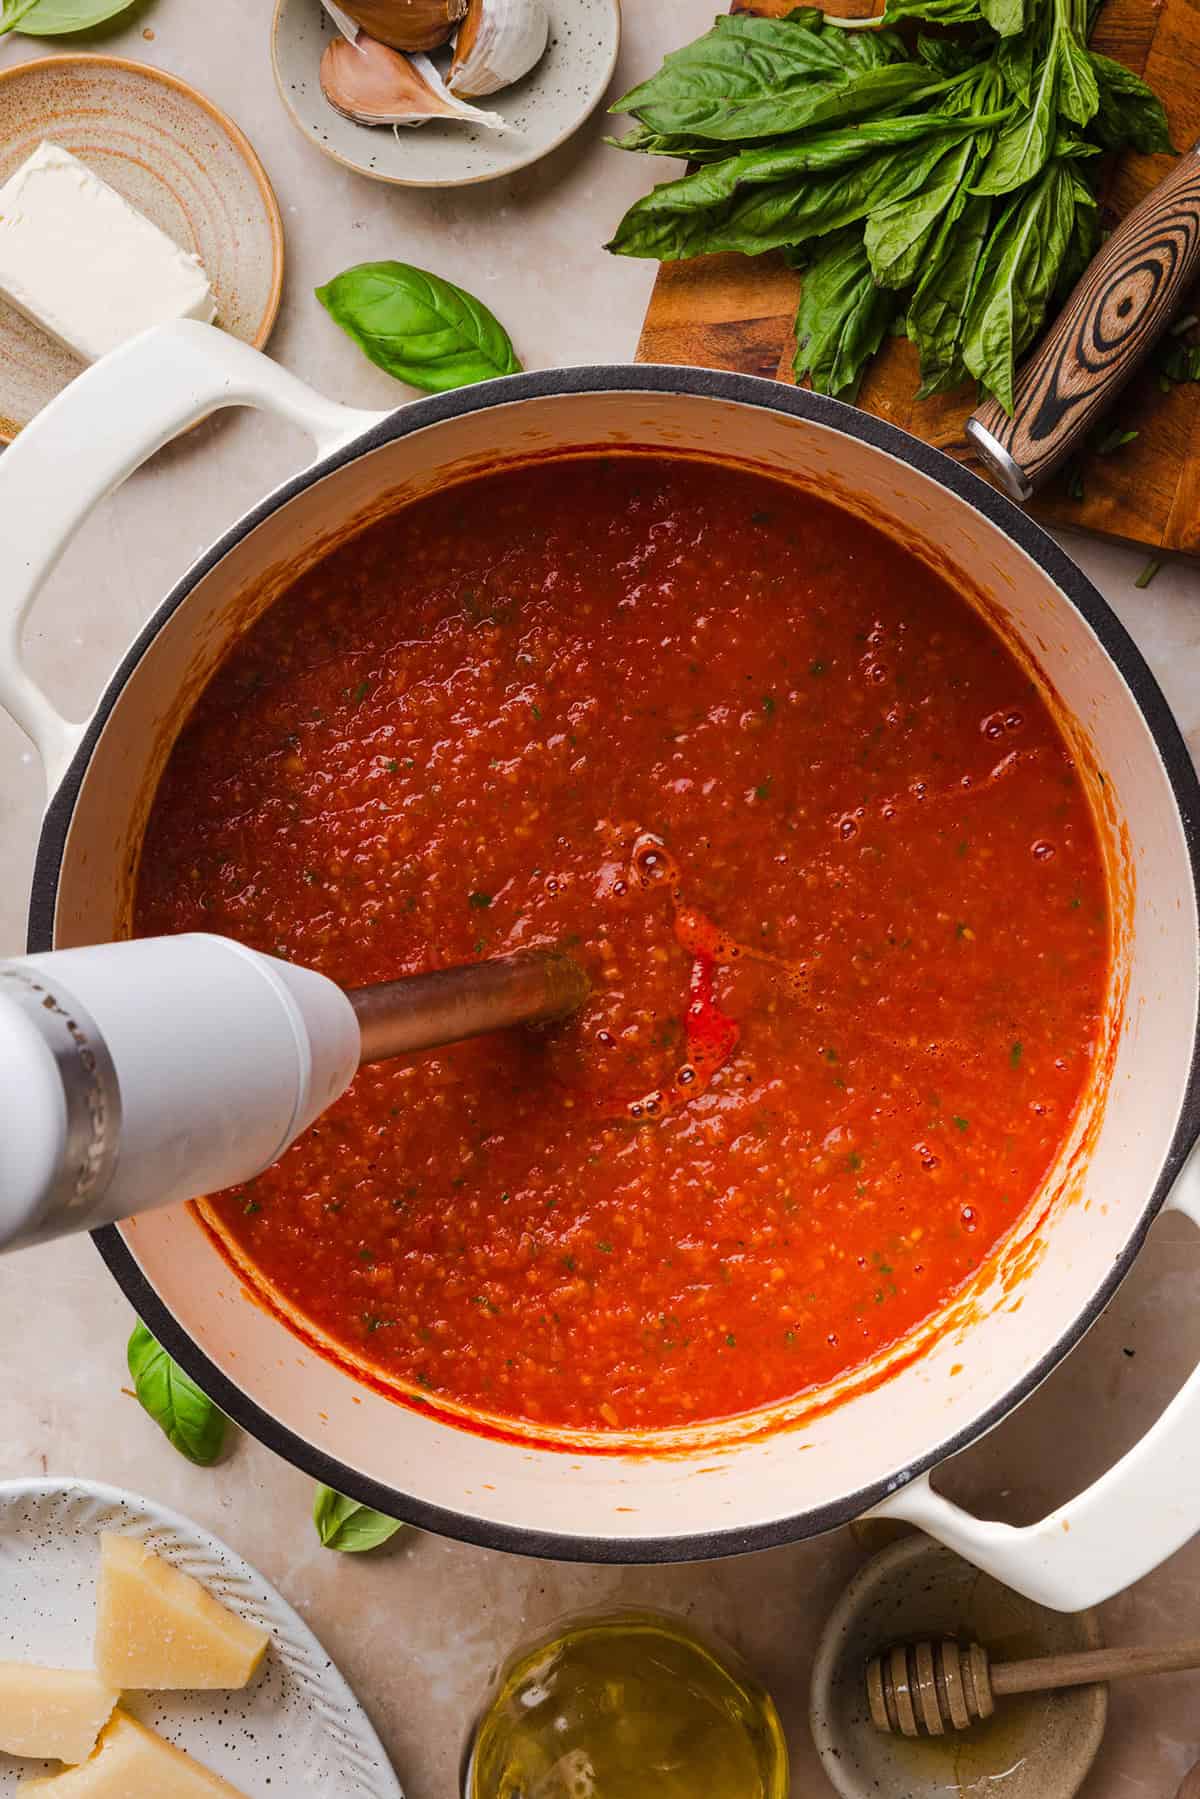
Blending the creamy tomato basil soup in the pot

How to Make Creamy Tomato Basil Soup

  1. Sauté the veggies. Heat olive oil in a large pot over medium heat on the stove. Add onion and carrots and cook for 6 to 8 minutes, until softened. Add garlic and tomato paste and cook for 1 minute, stirring frequently.
  2. Simmer the soup. Add the San Marzano tomatoes with their juices, vegetable broth, honey, Italian seasoning, salt and pepper. Break up the tomatoes with a wooden spoon, bring to a boil, then reduce heat and simmer uncovered for 20 to 25 minutes.
  3. Blend. Remove from heat, stir in the fresh basil and blend with an immersion blender until smooth and creamy.
  4. Make it creamy. Add the softened cream cheese and blend again until fully incorporated. Stir in the half-and-half and Parmesan and warm the tomato mixture over low heat for 2 to 3 minutes. Avoid boiling.
  5. Season and serve. Taste and adjust with additional salt and pepper. Serve warm with fresh basil and Parmesan.
Tomato basil soup with added cream ready to serve

Tips for the Best Tomato Basil Soup

  • Use good-quality tomatoes. Tomatoes are the star of this recipe, so using high-quality canned San Marzano tomatoes makes a noticeable difference in flavor.
  • Cook the tomato paste. Letting the tomato paste cook for about a minute helps caramelize it and intensifies the tomato flavor.
  • Soften the cream cheese. Room-temperature cream cheese blends much more easily and is less likely to leave small lumps in the soup.
  • Remove the pot from the heat before blending. This makes the soup safer to blend and prevents it from splattering.
  • Add the dairy over low heat. Once you add the cream cheese and half-and-half, avoid boiling the soup so the dairy stays smooth.
  • Adjust the consistency as needed. If the soup is thicker than you prefer, stir in a splash of additional broth. If it seems too thin, let it simmer uncovered for a few extra minutes before adding the dairy.
  • Taste before adding more honey. The carrots and San Marzano tomatoes already provide natural sweetness. The honey is only meant to soften the tomatoes’ acidity, not make the soup sweet.
Creamy tomato basil topped with added cream and black pepper in a serving bowl

Recipe Variations

  • Make it vegan – use a dairy-free cream cheese, unsweetened plant-based creamer and nutritional yeast in place of the dairy ingredients.
  • Use chicken broth – if you do not need the soup to be vegetarian, low-sodium chicken broth works well in place of vegetable broth.
  • Add more vegetables – red bell pepper, celery or roasted red peppers would all be delicious additions.
  • Make it spicy – add a pinch of crushed red pepper flakes along with the garlic and tomato paste.
  • Use heavy cream – for a richer, more traditional tomato bisque-style soup, replace the half-and-half with an equal amount of heavy cream.
  • Use dried basil – fresh basil provides the best flavor, but in a pinch, add 1 to 2 teaspoons of dried basil along with the Italian seasoning. Dried basil is more concentrated, so you will need much less.
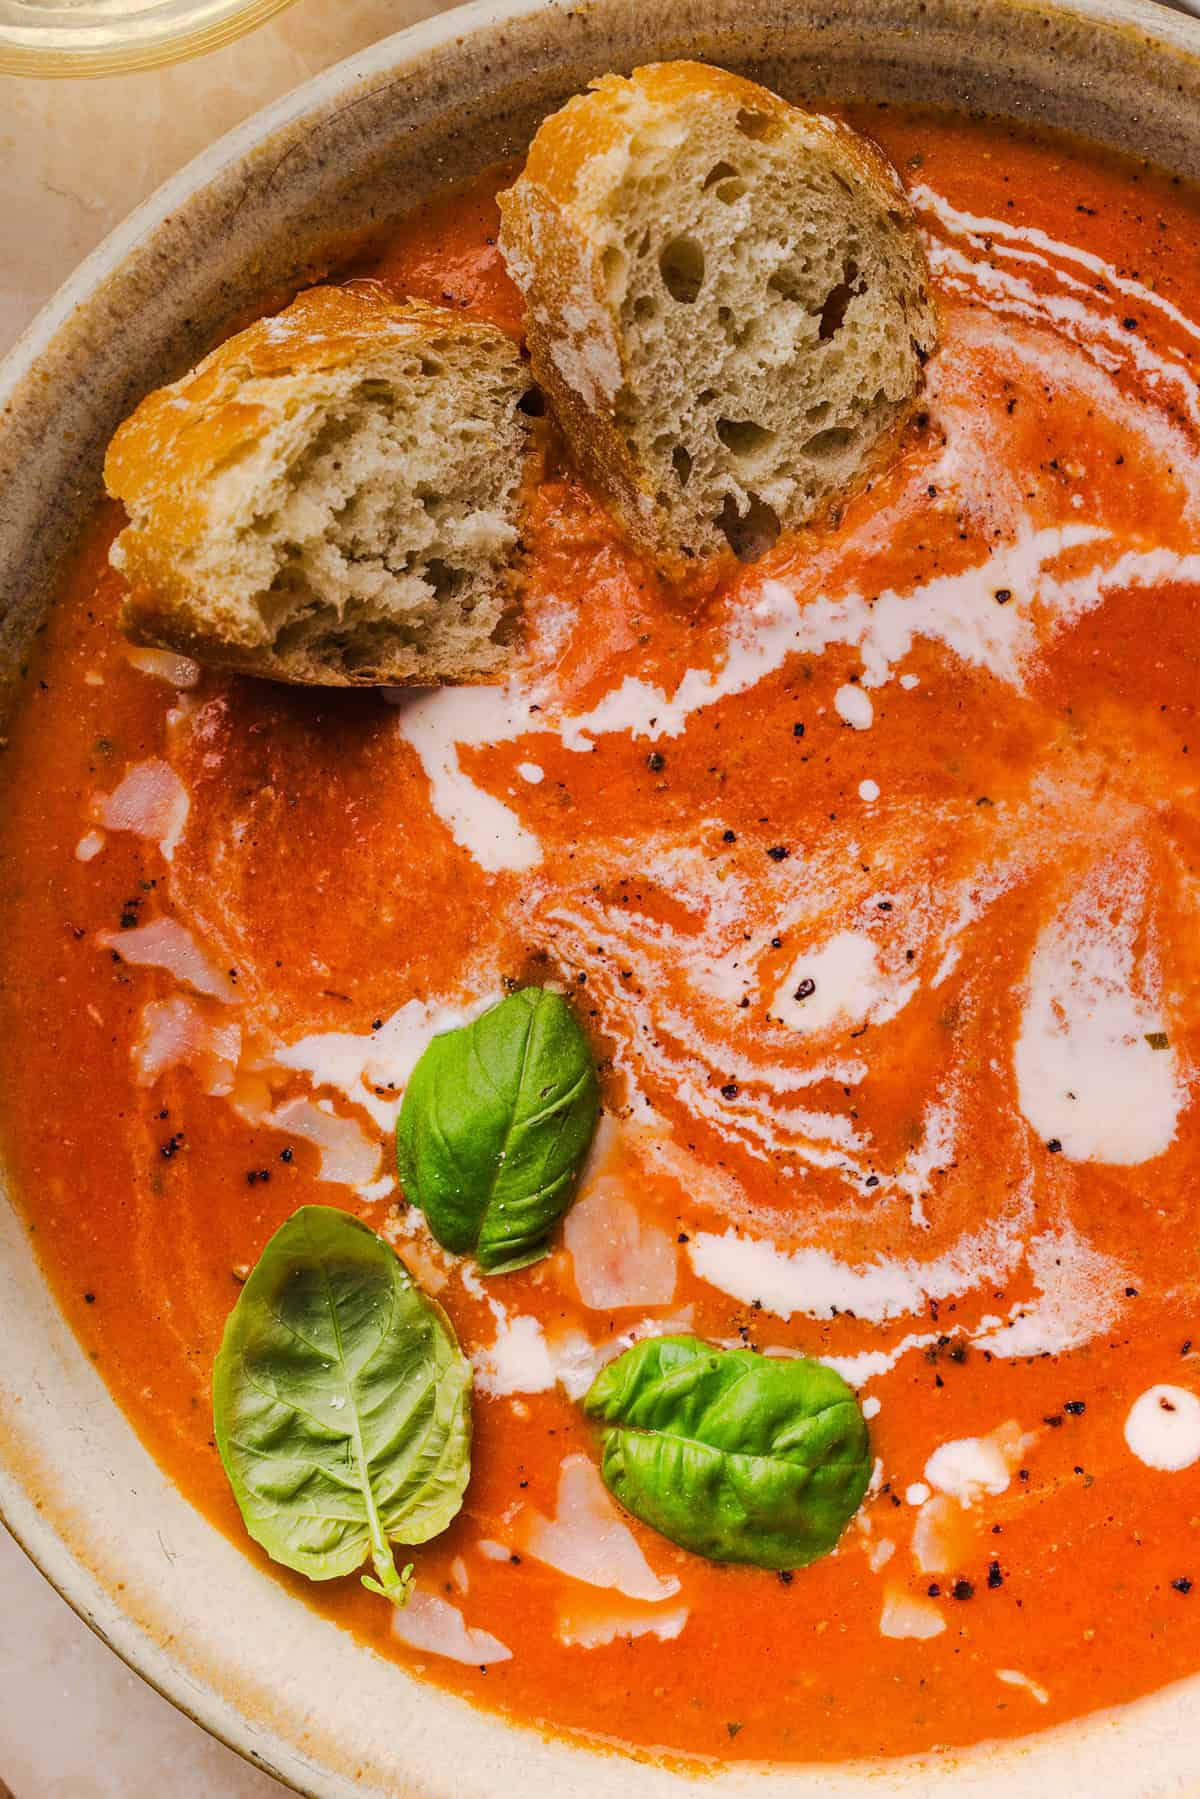
Creamy tomato soup zoomed in with crusty bread

What to Serve with Tomato Basil Soup

This creamy tomato basil soup is hearty enough for a light meal, but it is even better with something warm and crunchy for dipping. Here are a few of my favorite ways to serve it:

  • A classic grilled cheese sandwich
  • Toasted sourdough bread or a sliced baguette
  • Top with homemade croutons
  • Garlic bread or warm dinner rolls
  • A simple green salad
  • A turkey and cheese sandwich
  • A Caesar salad
  • Roasted vegetables
  • A half sandwich and soup combination for lunch

Prepping and Storage

To Prep Ahead: Chop the onion and carrots and mince the garlic up to two days in advance. Store the vegetables in separate airtight containers in the refrigerator until you are ready to make the soup.

To Store: Allow the soup to cool completely, then transfer it to an airtight container. You can store tomato basil soup in the refrigerator for 4-5 days.

To Reheat: Warm the soup in a saucepan over low to medium-low heat, stirring frequently. Avoid bringing it to a rapid boil because the dairy may separate. Individual portions may also be reheated in the microwave in 30-second intervals, stirring between each interval.

To Freeze: For the smoothest texture, freeze the soup before adding the cream cheese, half-and-half and Parmesan. Store it in a freezer-safe container for up to 3 months, leaving a little room at the top for expansion. Thaw overnight in the refrigerator, reheat gently and add the dairy ingredients just before serving.

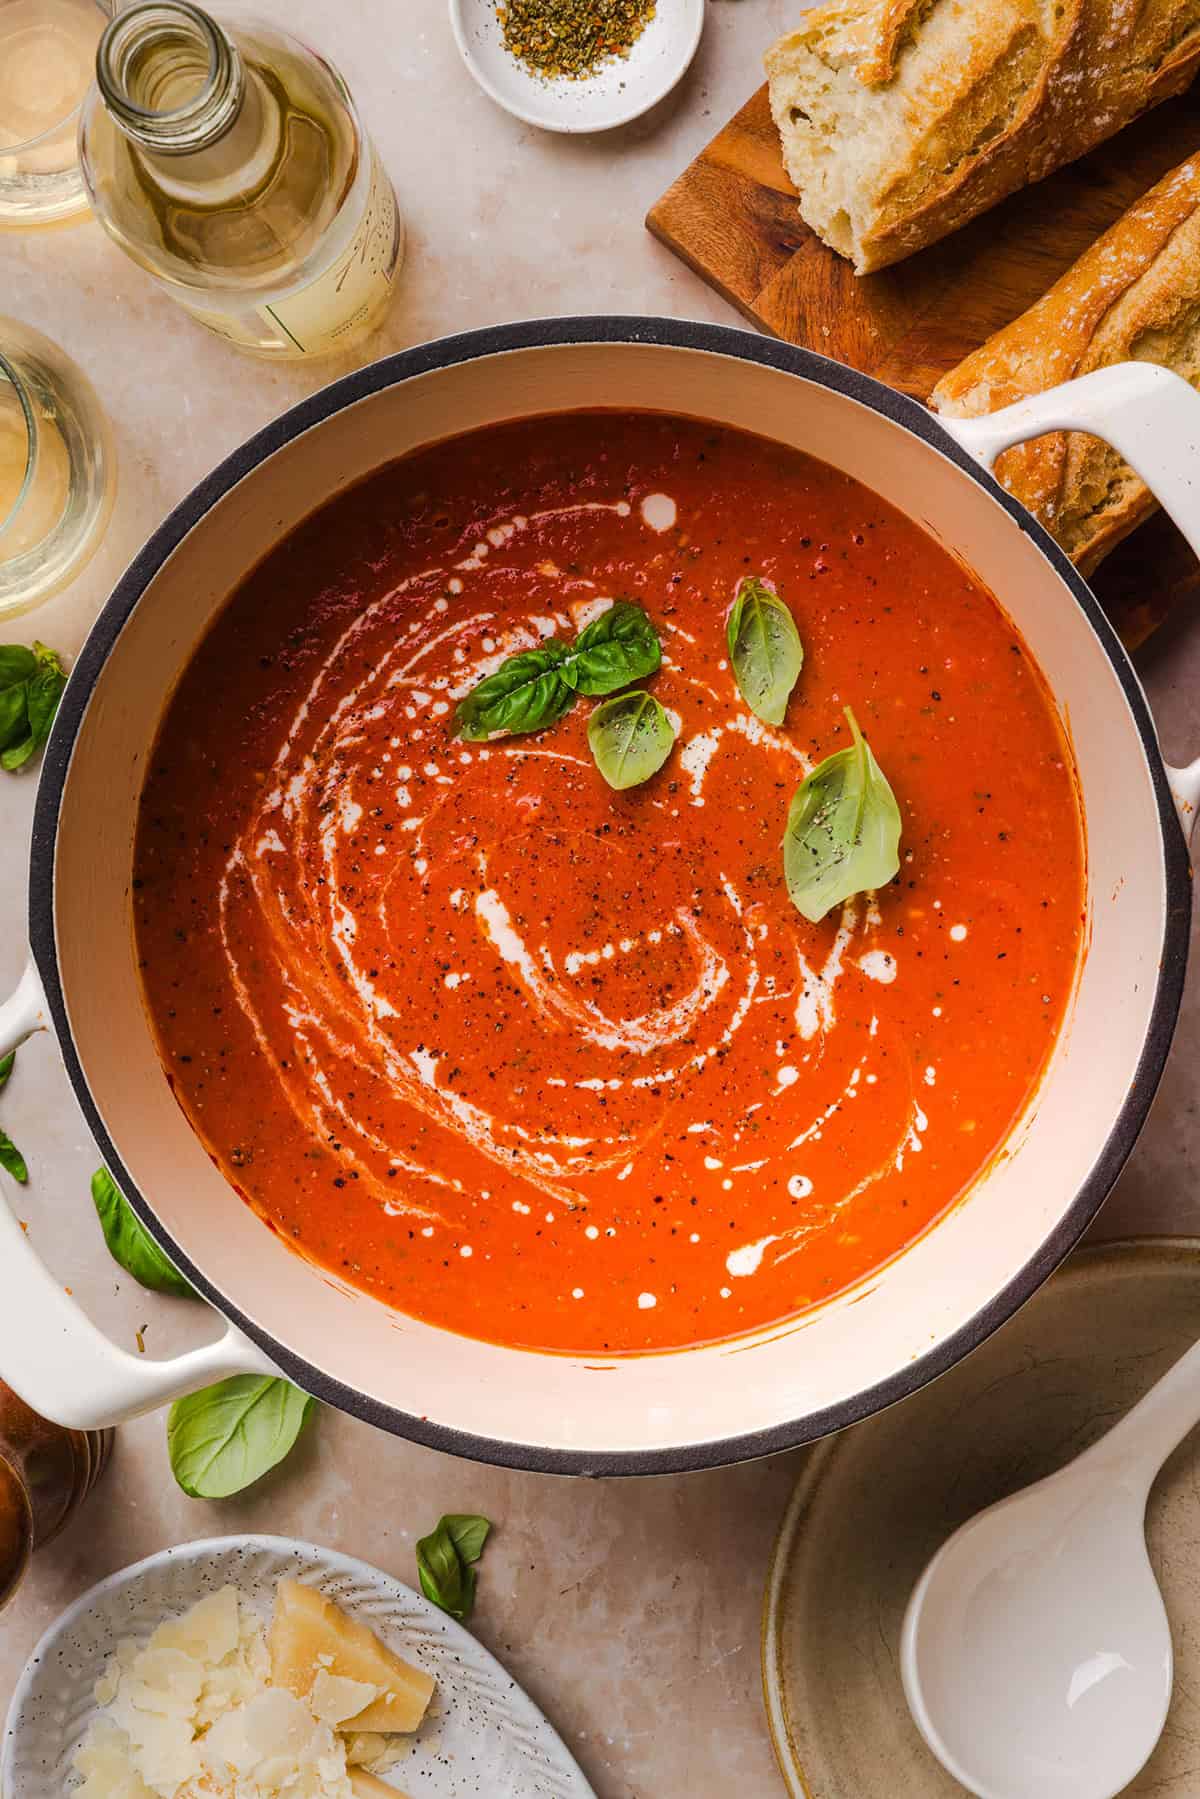
A pot of creamy tomato basil soup simmering on the stove

Frequently Asked Questions

Can I use crushed tomatoes instead of whole peeled tomatoes?

Yes! You can replace the whole peeled tomatoes with the same amount of canned crushed tomatoes. The finished soup may have a slightly different texture and flavor, but it will still be delicious. Look for high-quality crushed tomatoes without added seasonings.

Can I use fresh tomatoes instead of canned tomatoes?

Yes! You can use fresh tomatoes in this soup, but canned tomatoes will give you the richest flavor and most consistent results. If using fresh tomatoes, you’ll need about 3½ to 4 pounds of ripe Roma or plum tomatoes to replace the two 28-ounce cans. For the smoothest soup, peel the tomatoes first, then roughly chop them and add them as directed. You may also need to simmer the soup a little longer since fresh tomatoes contain more water.

Do I need an immersion blender to make tomato basil soup?

No. An immersion blender is the easiest option because you can blend the soup directly in the pot, but a regular blender will also work. Let the soup cool slightly, blend it in small batches and be careful to allow steam to escape.

How can I make tomato basil soup less acidic?

The carrots and teaspoon of honey help naturally balance the tomatoes’ acidity. Using high-quality San Marzano tomatoes also helps because they tend to taste sweeter and less acidic. If the soup still tastes sharp after blending, add a small additional drizzle of honey or a little more cream, then taste it again.

Can I make this tomato basil soup without cream?

Yes. You can leave out the cream cheese and half-and-half for a lighter, dairy-free tomato basil soup. The blended carrots and vegetables will still give it a smooth consistency. For extra creaminess without dairy, try stirring in a little unsweetened coconut milk or dairy-free creamer.

Why did my cream separate in the tomato soup?

Dairy can separate when it is added to very hot or boiling soup. Remove the soup from direct heat before blending in the cream cheese, then add the half-and-half and Parmesan over low heat. Avoid boiling the soup once the dairy has been added.

Creamy tomato soup in a bowl ready to enjoy with a spoon

Pin this now to find it later

Pin It

Follow on Instagram

Follow

More Cozy Soup Recipes

Hope you all enjoy this Creamy Tomato Basil Soup! If you love this recipe as much as we do, please leave a ⭐⭐⭐⭐⭐ star rating below and don’t forget to tag me on Instagram using the hashtag #eatyourselfskinny!

This Creamy Tomato Basil Soup is rich, cozy and full of fresh tomato flavor! Made with San Marzano tomatoes, fresh basil and a touch of creaminess, this easy one-pot soup is the ultimate comfort food. Serve it with crusty bread or a classic grilled cheese for the perfect cozy meal.

Print

Creamy Tomato Basil Soup

#wprm-recipe-user-rating-0 .wprm-rating-star.wprm-rating-star-full svg * { fill: #343434; }#wprm-recipe-user-rating-0 .wprm-rating-star.wprm-rating-star-33 svg * { fill: url(#wprm-recipe-user-rating-0-33); }#wprm-recipe-user-rating-0 .wprm-rating-star.wprm-rating-star-50 svg * { fill: url(#wprm-recipe-user-rating-0-50); }#wprm-recipe-user-rating-0 .wprm-rating-star.wprm-rating-star-66 svg * { fill: url(#wprm-recipe-user-rating-0-66); }linearGradient#wprm-recipe-user-rating-0-33 stop { stop-color: #343434; }linearGradient#wprm-recipe-user-rating-0-50 stop { stop-color: #343434; }linearGradient#wprm-recipe-user-rating-0-66 stop { stop-color: #343434; }

This Creamy Tomato Basil Soup is rich, cozy and full of fresh tomato flavor! Made with San Marzano tomatoes, fresh basil and a touch of creaminess, this easy one-pot soup is the ultimate comfort food.
Course Main Course
Cuisine American
Keyword creamy tomato basil soup, creamy tomato soup recipe, easy tomato basil soup, healthy tomato soup, homemade tomato soup, San Marzano tomato soup, tomato basil soup
Prep Time 10 minutes
Cook Time 35 minutes
Total Time 45 minutes
Servings 6
Calories 185kcal

Ingredients

  • 1 Tbsp olive oil
  • 1 medium yellow onion chopped (about 1 1/2 cups)
  • 2 medium carrots peeled and chopped
  • 3 cloves garlic minced
  • 2 Tbsp tomato paste
  • 2 (28 oz) cans whole peeled San Marzano tomatoes
  • 2 cups low-sodium vegetable broth
  • 1 tsp honey (or pinch of sugar)
  • 1 tsp Italian seasoning
  • 1/2 tsp salt plus more to taste
  • 1/4 tsp black pepper
  • 3/4 cup packed fresh basil leaves
  • 1/4 cup cream cheese softened and cubed
  • 1/3 cup half and half
  • 1/4 cup freshly grated Parmesan cheese

Instructions

  • Sauté the veggies. Heat olive oil in a large pot over medium heat on the stove. Add onion and carrots and cook for 6 to 8 minutes, until softened. Add garlic and tomato paste and cook for 1 minute, stirring frequently.
  • Simmer the soup. Add the San Marzano tomatoes with their juices, vegetable broth, honey, Italian seasoning, salt and pepper. Break up the tomatoes with a wooden spoon, bring to a boil, then reduce heat and simmer uncovered for 20 to 25 minutes.
  • Blend. Remove from heat, stir in the fresh basil and blend with an immersion blender until smooth and creamy.
  • Make it creamy. Add the softened cream cheese and blend again until fully incorporated. Stir in the half-and-half and Parmesan and warm the tomato mixture over low heat for 2 to 3 minutes. Avoid boiling.
  • Season and serve. Taste and adjust with additional salt and pepper. Serve warm with fresh basil and Parmesan.

Nutrition
Serving: 1 1/2 cups | Calories: 185kcal | Carbohydrates: 21g | Protein: 6g | Fat: 9g | Saturated Fat: 4g | Cholesterol: 18mg | Sodium: 850mg | Fiber: 4g | Sugar: 12g

zucchini-orzo-pasta-6-700x1049.jpg

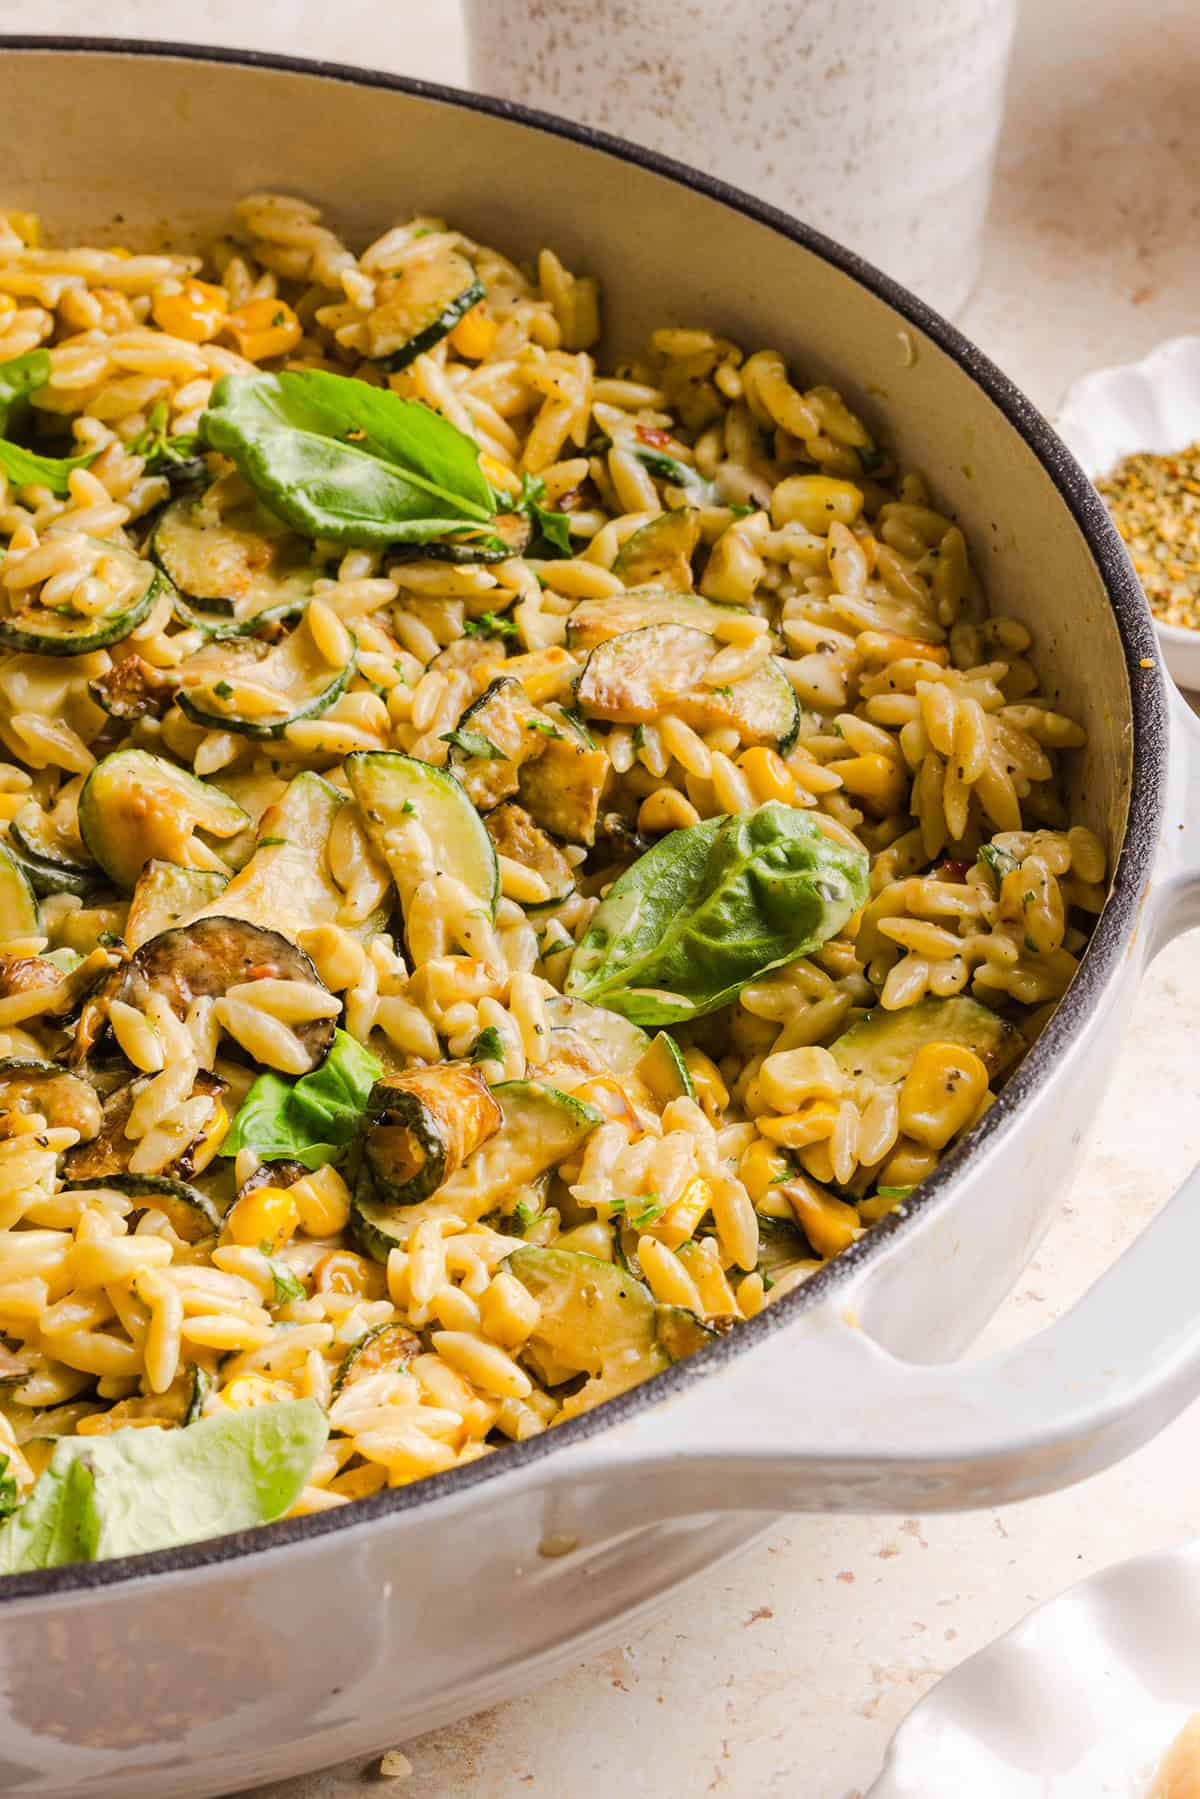
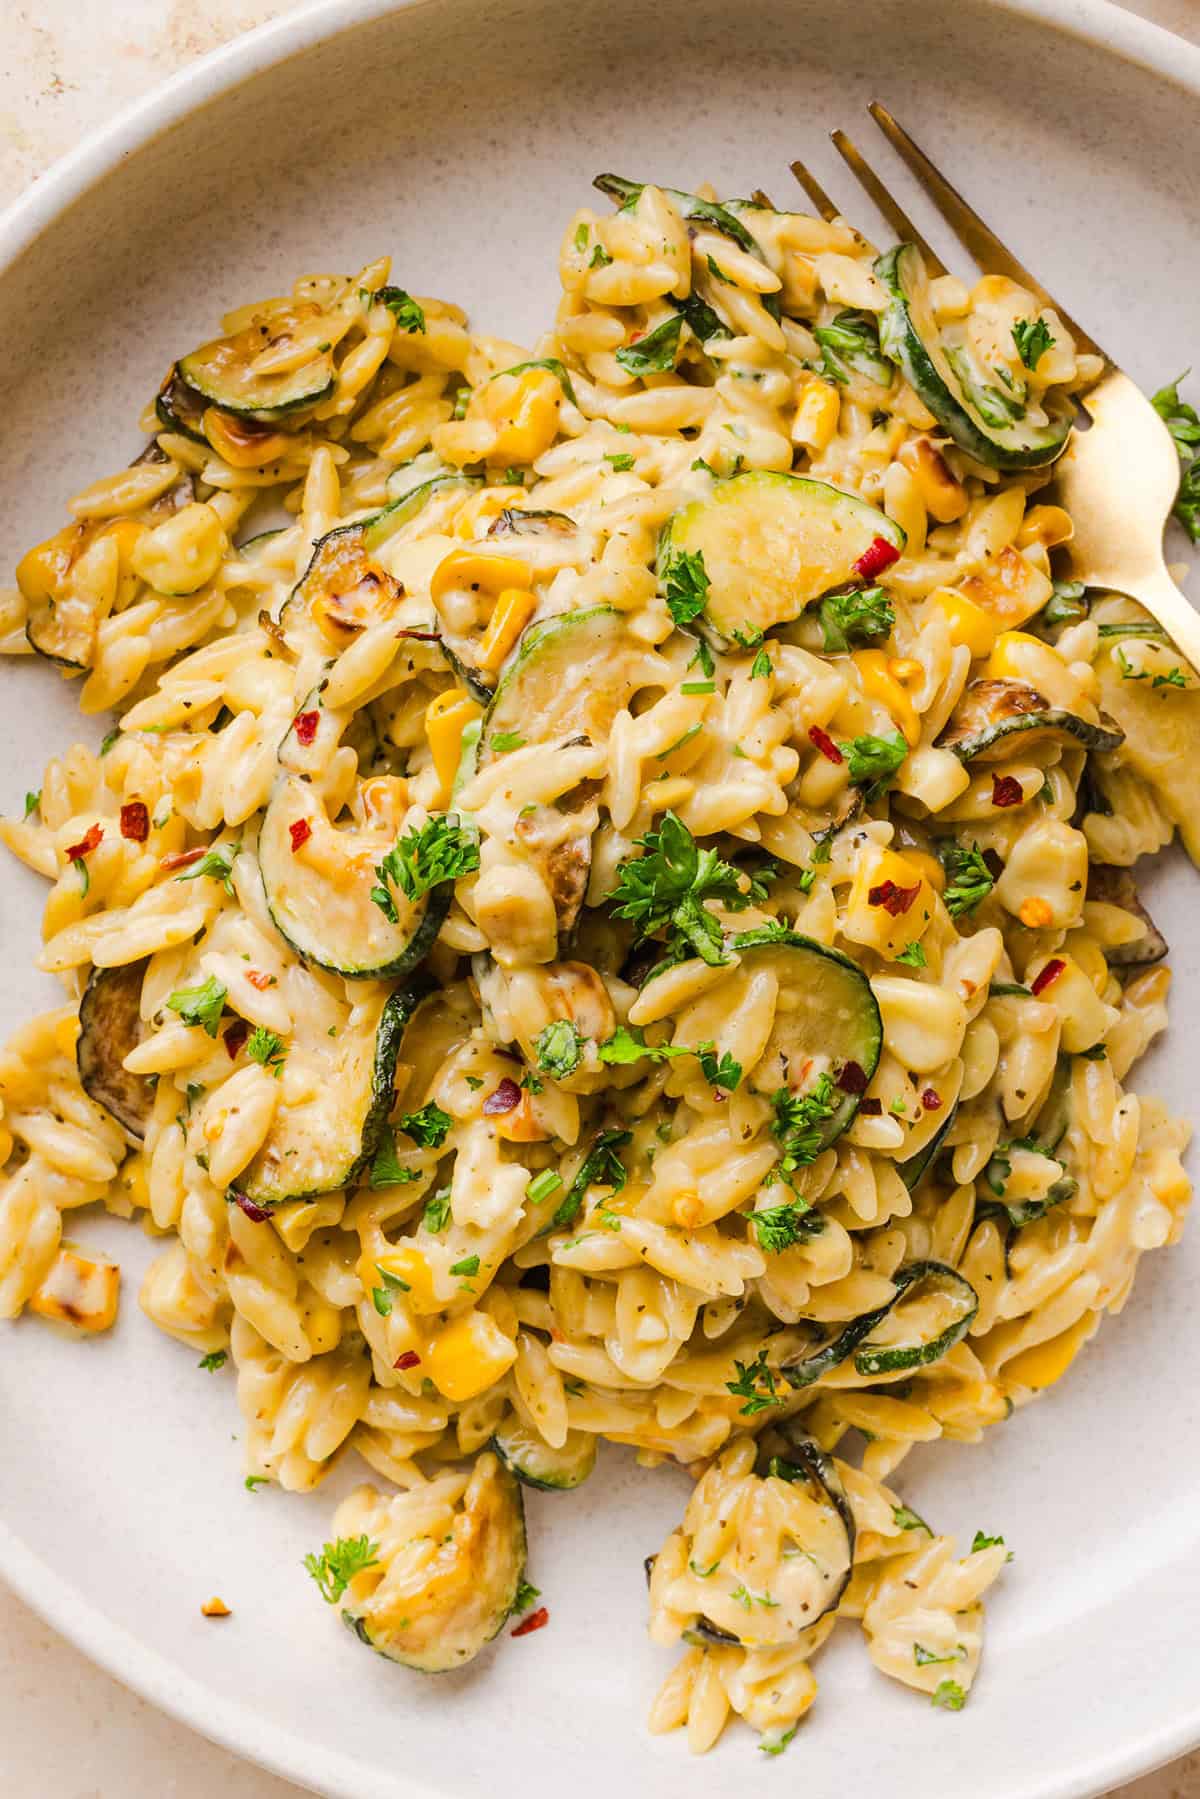
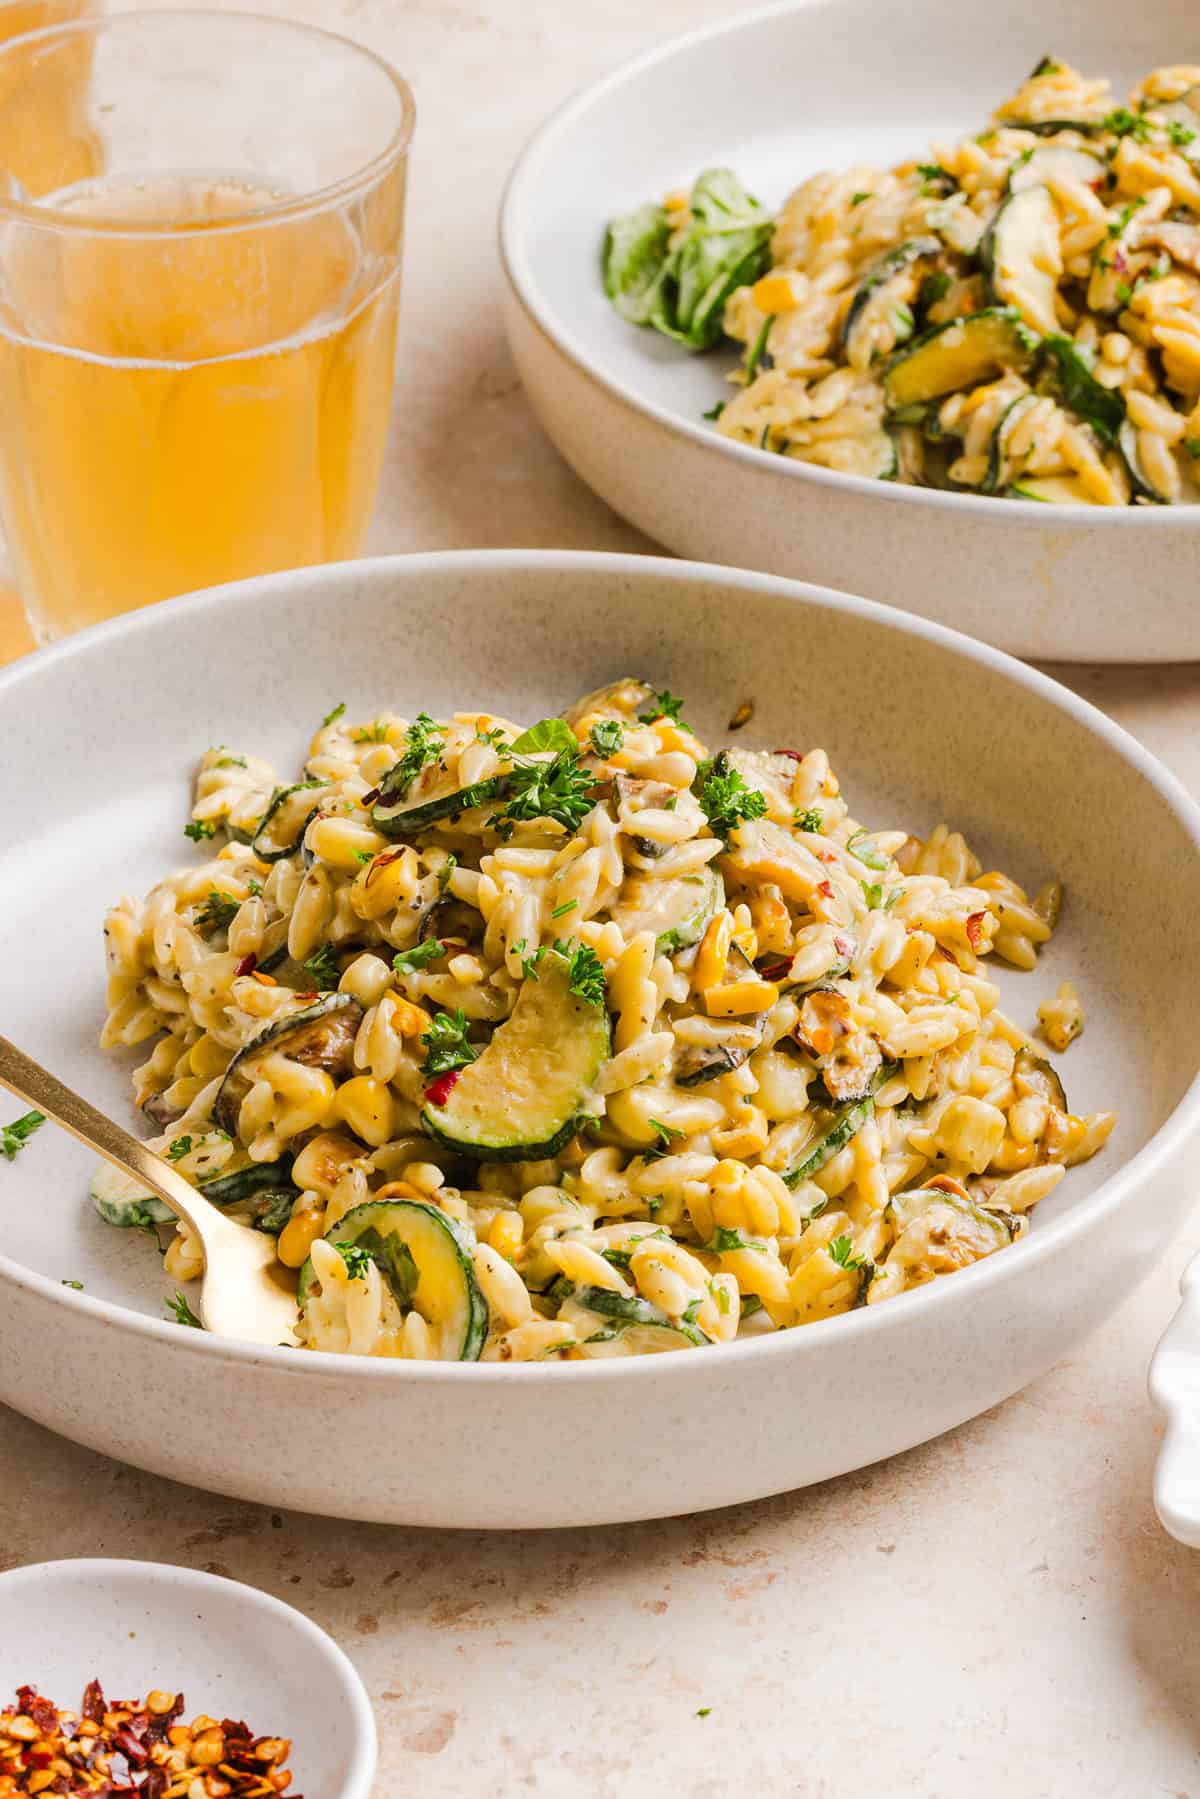
One Pan Lemon Garlic Orzo with Zucchini and Corn

This creamy One Pan Lemon Garlic Orzo with Zucchini and Corn is fresh, flavorful and made in one skillet for an easy summer side dish or weeknight meal. Packed with fresh veggies, tender orzo, Parmesan, herbs and bright lemon flavor!

This creamy One Pan Lemon Garlic Orzo with Zucchini and Corn is fresh, flavorful and made in one skillet for an easy summer side dish or weeknight meal. Packed with fresh veggies, tender orzo, Parmesan, herbs and bright lemon flavor!

This creamy One Pan Lemon Garlic Orzo with Zucchini and Corn is fresh, flavorful and made in one skillet for an easy summer side dish or weeknight meal. Packed with fresh veggies, tender orzo, Parmesan, herbs and bright lemon flavor!
Want to save this recipe?
Just enter your email and get it sent to your inbox! Plus you’ll get new recipes from us every week!

Please enable JavaScript in your browser to complete this form.

Please enable JavaScript in your browser to complete this form.

Loading

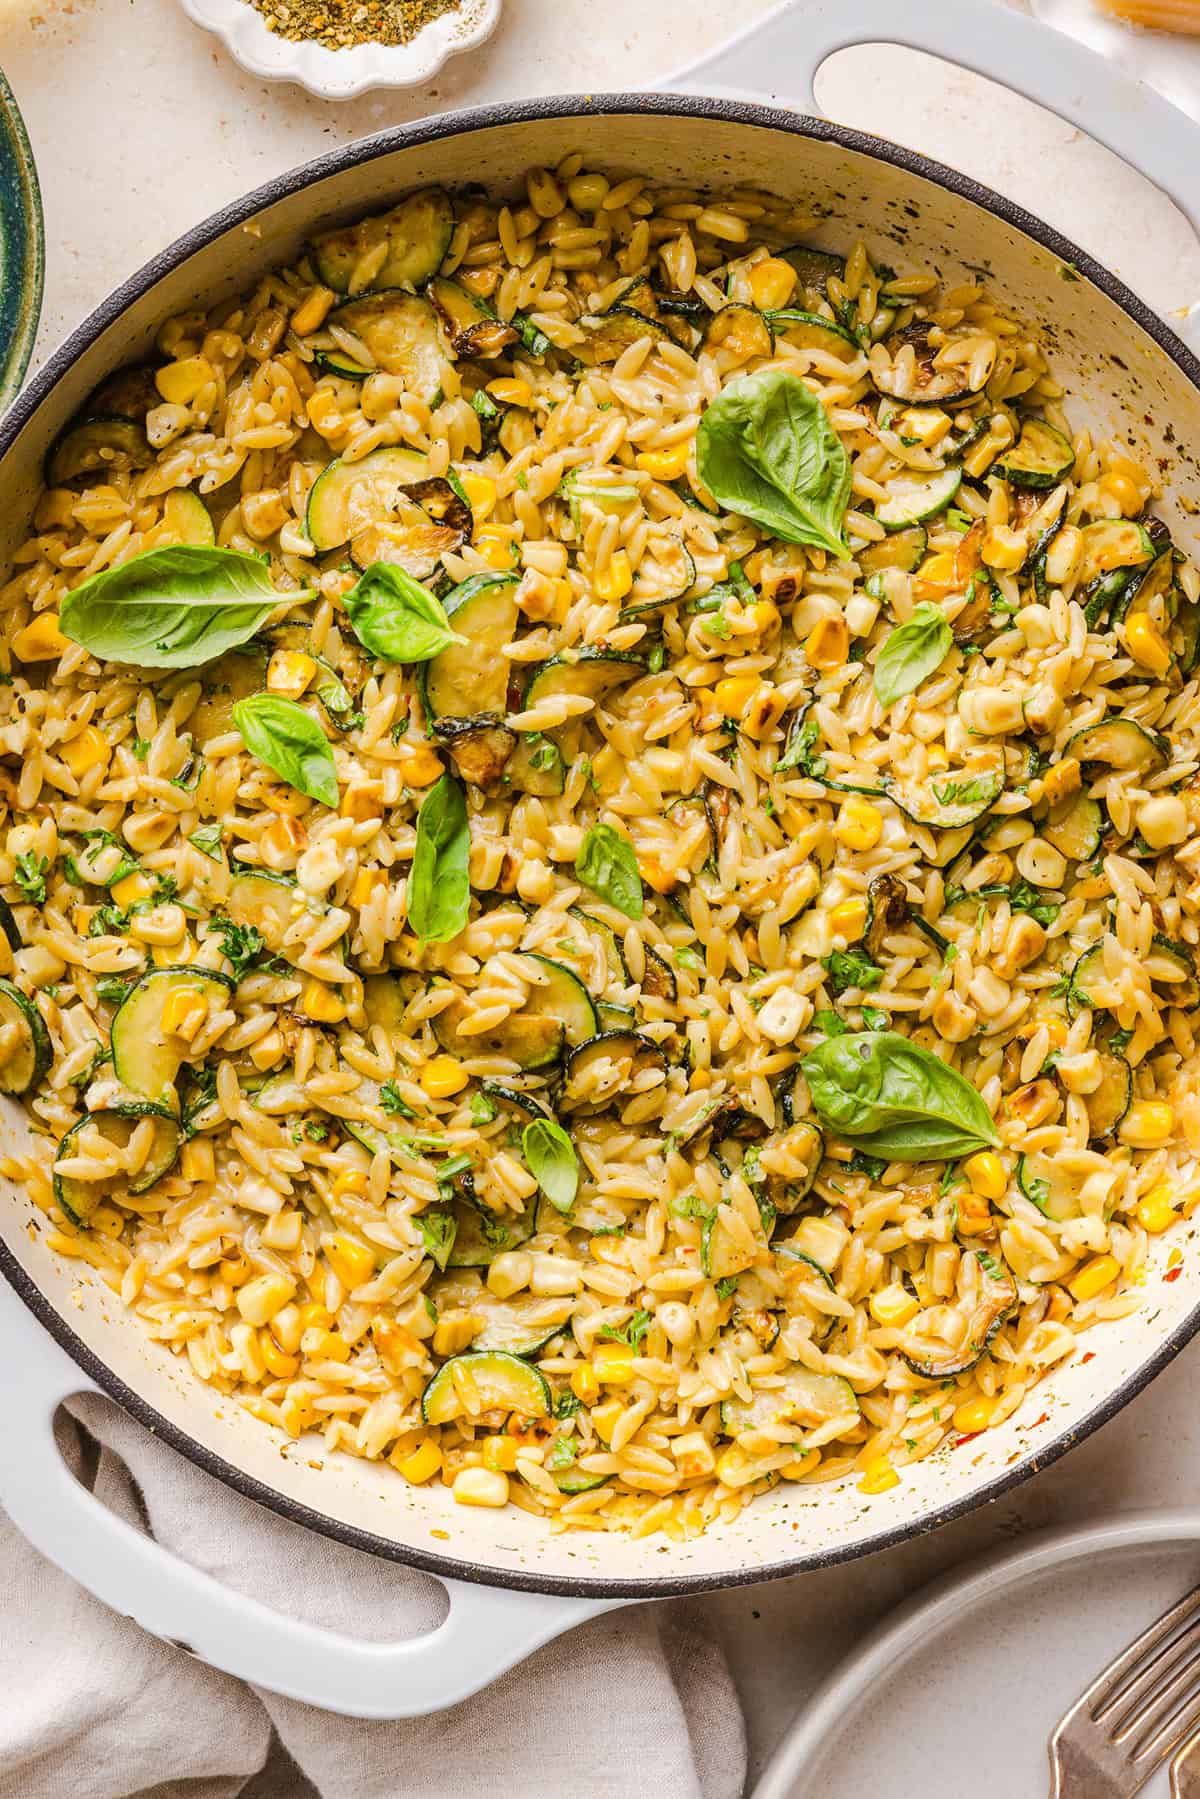
This One Pan Lemon Garlic Orzo with Zucchini and Corn recipe is creamy, bright and packed with fresh summer flavor! Tender orzo is cooked in chicken broth until perfectly creamy, then tossed with golden zucchini, sweet corn, fresh garlic, Parmesan, lemon and plenty of fresh herbs. It’s simple, comforting and the perfect side dish to use up all that seasonal zucchini and corn.

The best part about this parmesan zucchini orzo recipe is that everything comes together right in one skillet! Cooking the orzo directly in the broth gives it an extra creamy, almost risotto-like texture without all the work, while fresh lemon juice and zest keep the dish light and bright. Lightened-up comfort food where leftovers taste better the next day!

Why You’ll Love This

  • Fresh summer flavors – zucchini and sweet corn are the stars of this dish, while fresh lemon, basil and parsley add tons of bright fresh flavor.
  • Made healthier – this lighter version uses a little half-and-half combined with parmesan to give a rich, creamy texture without needing heavy cream.
  • Quick and easy – a great recipe to have on hand on busy weeknights when you want something quick and comforting without spending all night in the kitchen.
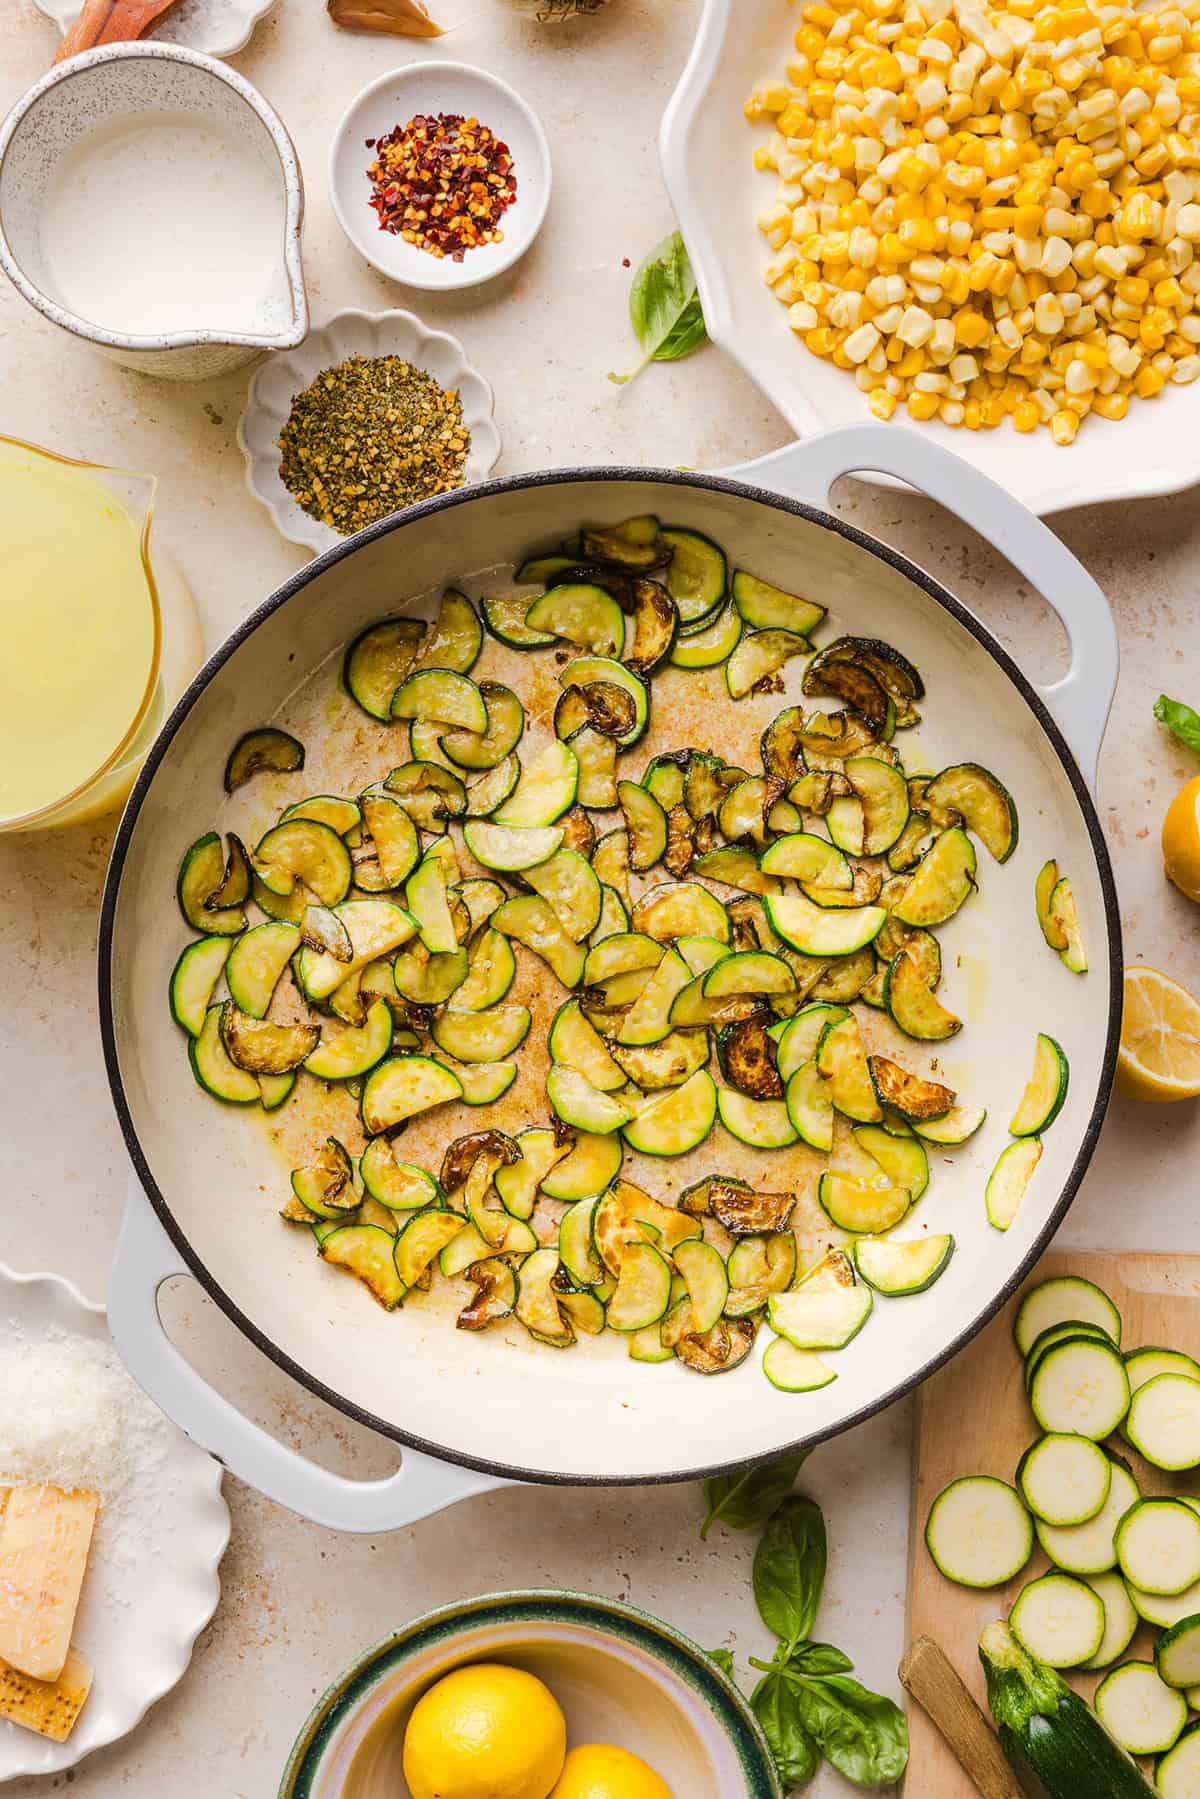
  • Made in one skillet – aside from briefly transferring the zucchini to a plate, everything cooks in the same skillet for easy prep and cleanup.
  • Customizable – add your favorite protein, swap in extra veggies or change up the herbs depending on what you have on hand.
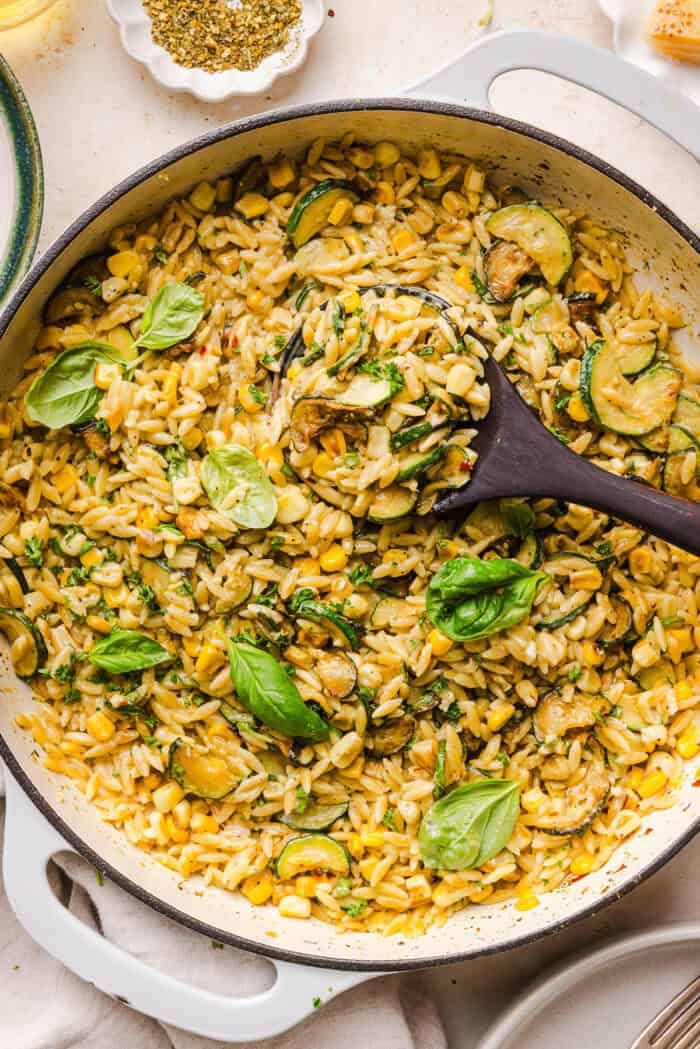
This creamy One Pan Lemon Garlic Orzo with Zucchini and Corn is fresh, flavorful and made in one skillet for an easy summer side dish or weeknight meal. Packed with fresh veggies, tender orzo, Parmesan, herbs and bright lemon flavor!

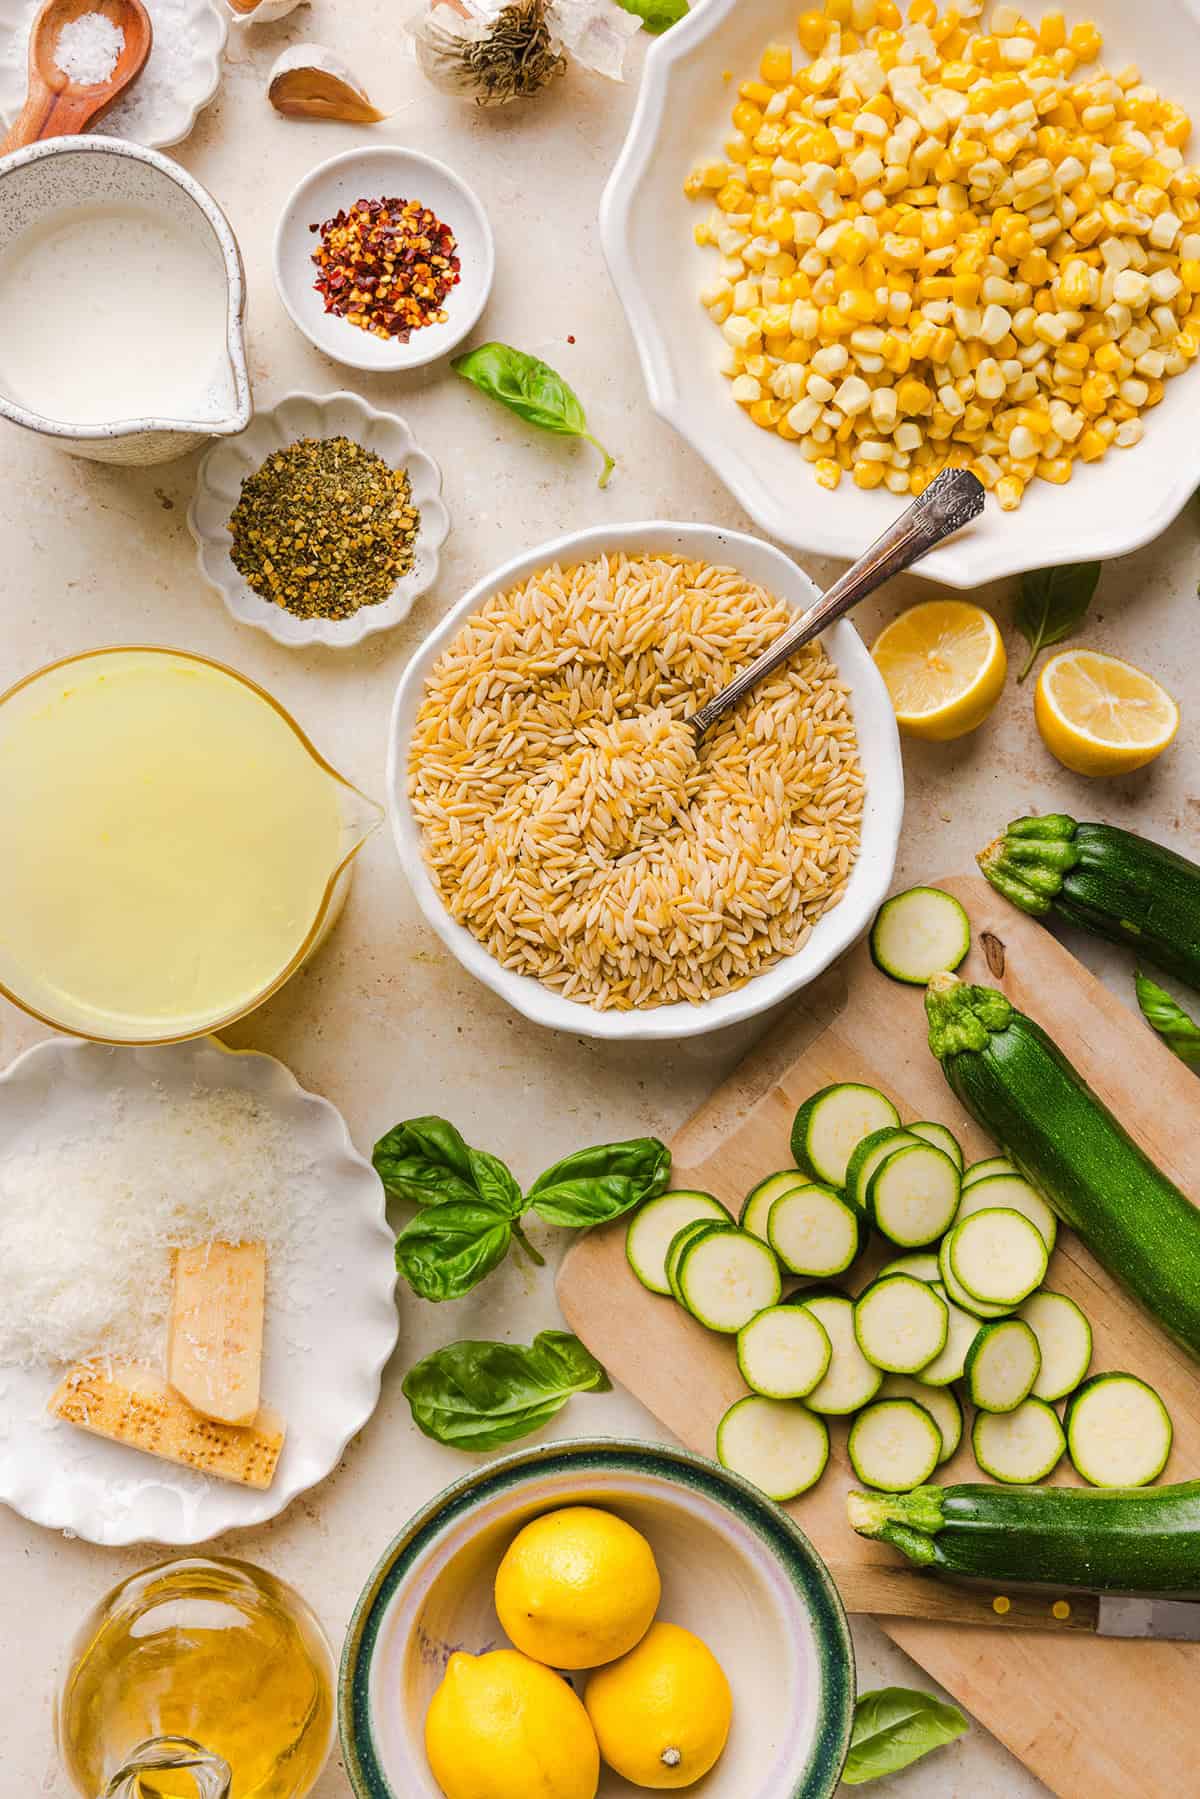
Ingredients You’ll Need

  • olive oilextra virgin olive oil is used to sauté the zucchini and corn until lightly golden and tender. Dividing the oil helps the vegetables brown rather than steam.
  • zucchini – you’ll need 2 medium zucchini, thinly sliced into half-moons. Cooking the zucchini separately keeps it tender while preventing it from becoming mushy as the orzo cooks.
  • corn – you’ll need about 2 cups of corn kernels. Fresh corn cut straight from the cob is delicious during the summer, but frozen corn works great too.
  • orzo – you’ll need 1 1/2 cups of dry orzo pasta. This small, rice-shaped pasta cooks right in the skillet and releases starch as it cooks, helping create that deliciously creamy consistency.
  • garlic – freshly minced cloves garlic add plenty of savory flavor and pair perfectly with the lemon and Parmesan.
  • chicken broth – low-sodium chicken broth or vegetable broth adds much more flavor than cooking the orzo in water and allows you to control the amount of salt in the finished dish.
  • half-and-half – just 1/3 cup makes the orzo extra creamy without making it overly rich. Heavy cream can also be used.
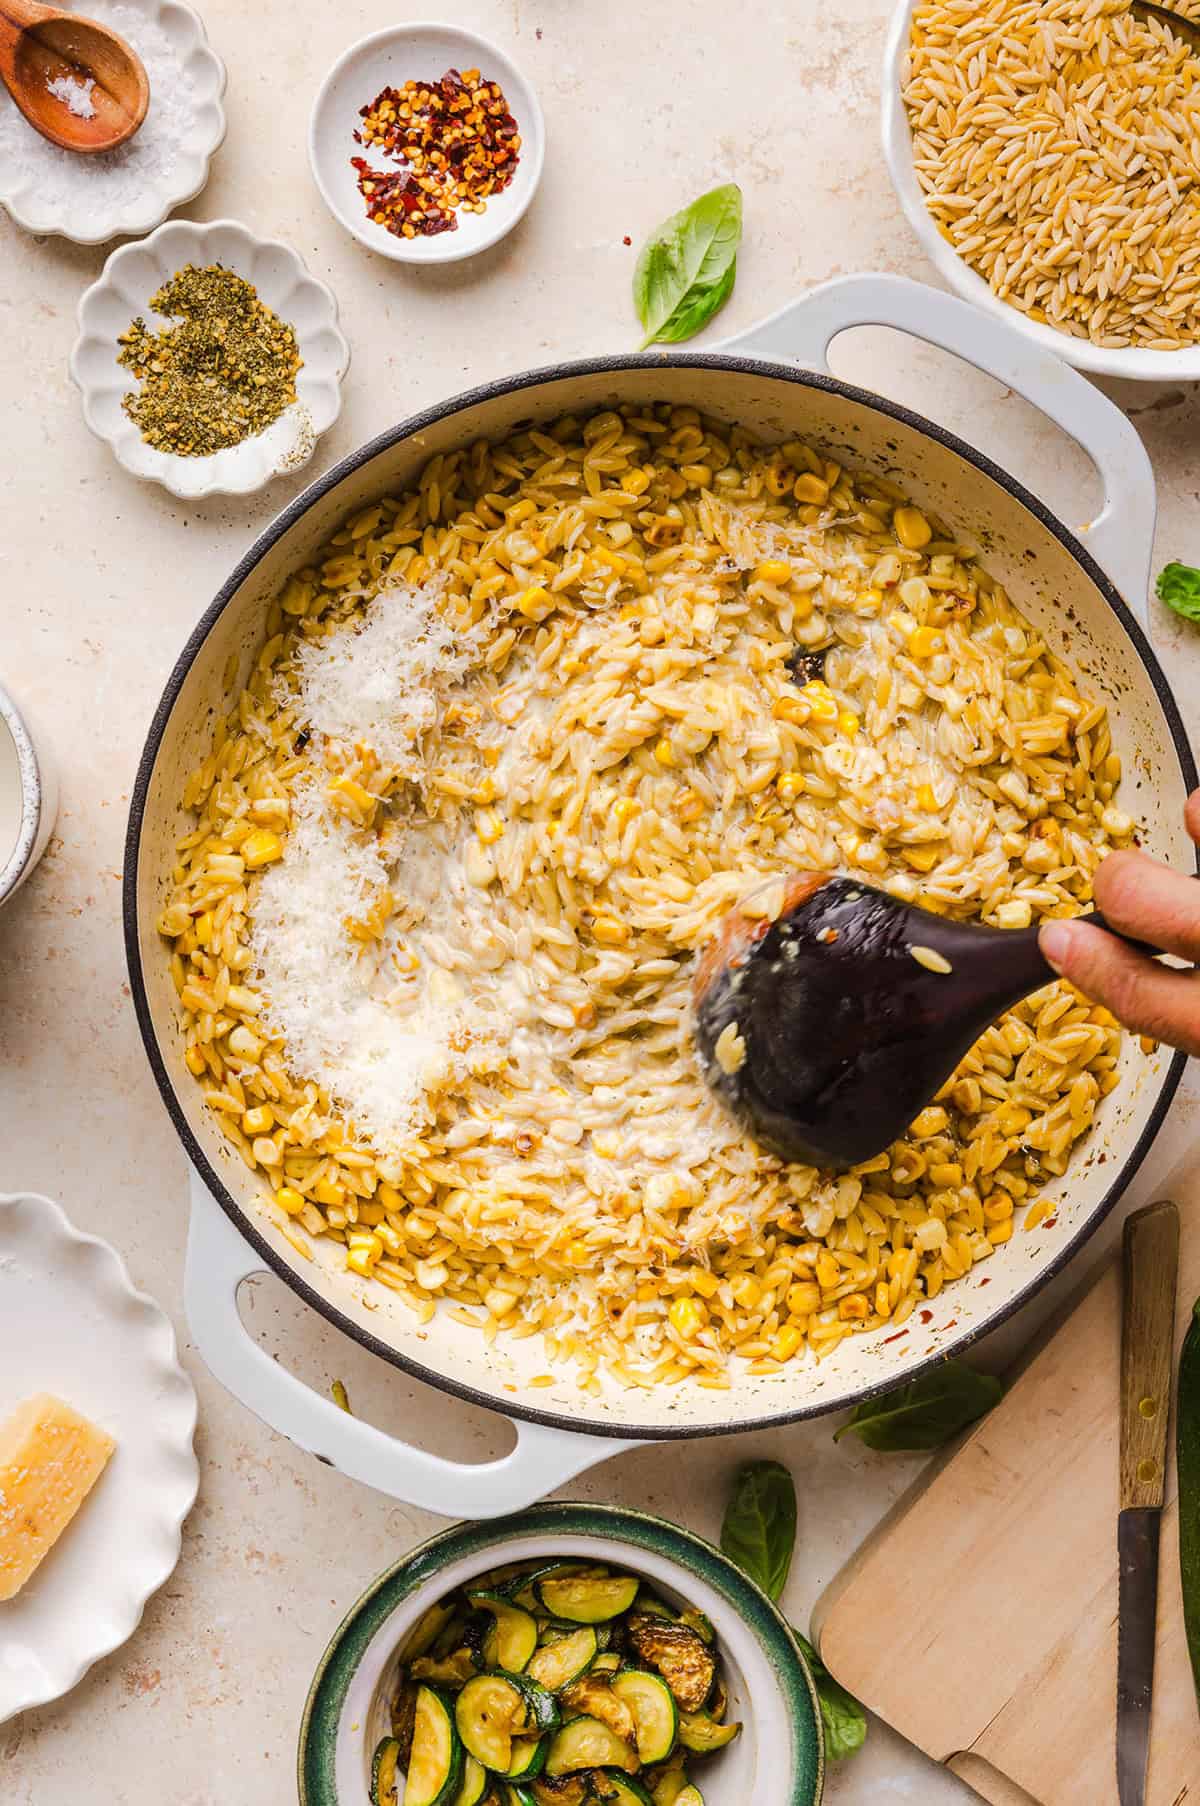
  • parmesan cheese – freshly grated Parmesan melts right into the orzo, adding salty, cheesy flavor and an even creamier consistency.
  • lemon – both fresh lemon zest and lemon juice are used to give this dish its signature bright, citrusy flavor.
  • seasonings – a combination of Italian seasoning, pinch of red pepper flakes, salt and black pepper.
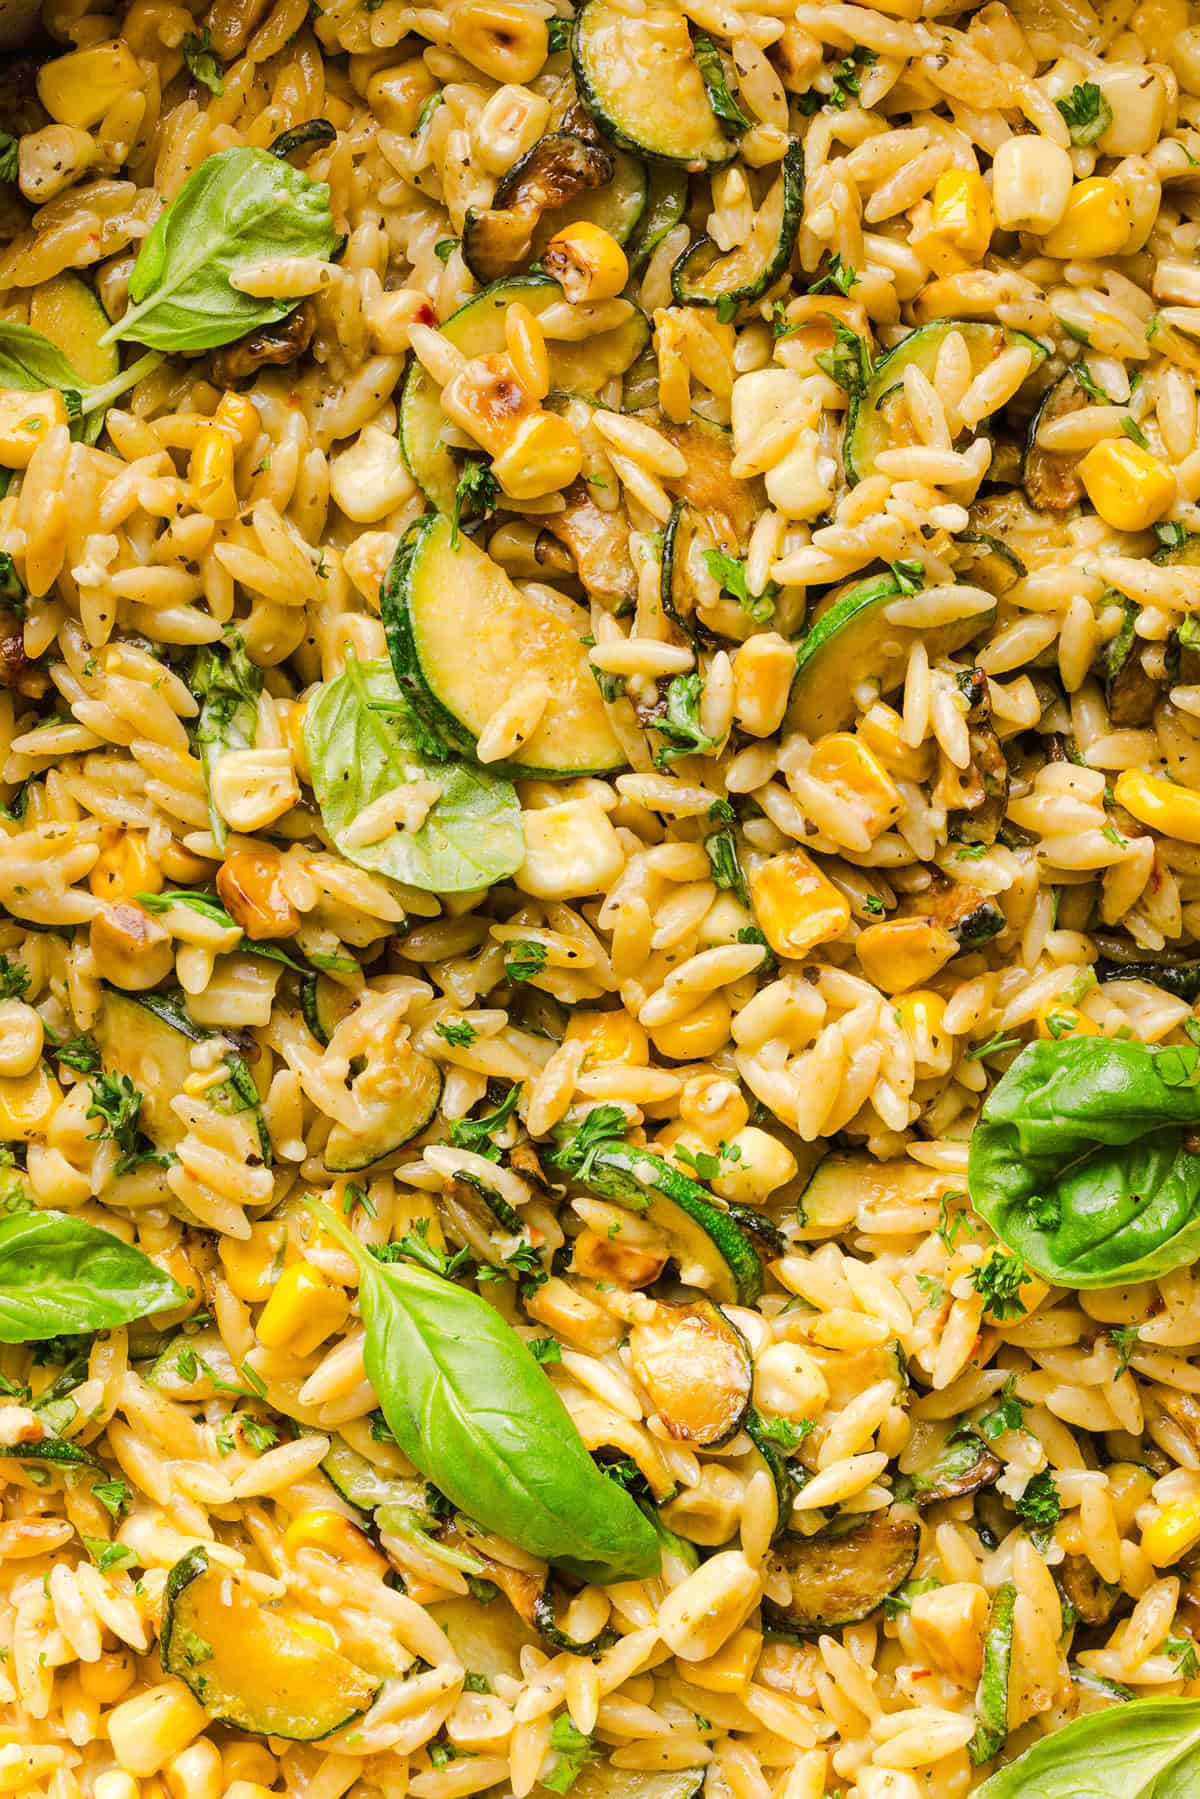
  • fresh basil and fresh parsley – fresh herbs are stirred in at the very end so they maintain their bright flavor and color. I like to garnish with additional herbs when serving too. Feel free to mix in extra greens such as baby spinach and kale for a boost of nutrition.
This creamy One Pan Lemon Garlic Orzo with Zucchini and Corn is fresh, flavorful and made in one skillet for an easy summer side dish or weeknight meal. Packed with fresh veggies, tender orzo, Parmesan, herbs and bright lemon flavor!

How to Make Lemon Garlic Orzo with Zucchini and Corn

  1. Sauté the zucchini. Heat 2 tablespoons of olive oil in a large skillet over medium-high heat. Arrange the sliced zucchini in an even layer and season lightly with salt and pepper. Cook for 3 to 4 minutes, stirring occasionally, until just tender and lightly golden. Transfer the zucchini to a plate and set aside.
  2. Cook the corn and garlic. Reduce to medium heat and add the remaining tablespoon of olive oil. Add the corn and cook for 2 to 3 minutes until lightly golden and tender. Stir in the garlic and cook for about 30 seconds, just until fragrant.
  3. Toast the orzo. Add the dry orzo directly to the skillet and cook for about 2 minutes, stirring frequently. Toasting the pasta gives it a slightly nutty flavor and adds another layer of flavor to the finished dish.
  4. Cook the orzo. Pour in the chicken broth and season with Italian seasoning, salt, black pepper and crushed red pepper flakes, if using. Bring everything to a gentle boil, then reduce the heat to medium-low. Simmer uncovered for 10 to 12 minutes, stirring frequently, until the orzo is al dente and most of the liquid has been absorbed.
  5. Make it creamy. Reduce the heat to low and stir in the half-and-half and freshly grated Parmesan. Cook for another 1 to 2 minutes, stirring gently, until the Parmesan has melted and the orzo is nice and creamy. If the mixture becomes too thick, simply add a splash of chicken broth to loosen it up.
  6. Add the zucchini back in. Gently fold the sautéed zucchini into the creamy orzo and cook for about a minute, just until warmed through. Be careful not to stir too aggressively so the zucchini slices stay intact.
  7. Finish with lemon and herbs. Remove the skillet from the heat and stir in the lemon zest, fresh lemon juice, basil and parsley. Serve with extra parmesan, some cracked black pepper, extra lemon zest and a little drizzle of olive oil, if desired.
This creamy One Pan Lemon Garlic Orzo with Zucchini and Corn is fresh, flavorful and made in one skillet for an easy summer side dish or weeknight meal. Packed with fresh veggies, tender orzo, Parmesan, herbs and bright lemon flavor!

Variations and Substitutions

  • Add protein – turn this into a complete meal by adding grilled or shredded chicken, sautéed shrimp, salmon or Italian chicken sausage.
  • Add more veggies – fresh spinach, kale, asparagus, yellow squash, onion, fresh or frozen peas, cherry tomatoes, green beans or bell peppers would all be delicious additions.
  • Make it extra creamy – swap the half-and-half for heavy cream for an even richer consistency. You could also swap the parmesan cheese with crumbled feta cheese for even more depth of flavor.
  • Add more heat – increase the crushed red pepper chili flakes for a little extra kick or add your favorite hot sauce.
  • Make it dairy-free – simply replace the half-and-half with an unsweetened dairy-free milk such as oat milk or a dairy-free cooking cream. Swap the Parmesan for dairy-free Parmesan or nutritional yeast.
  • Change up the herbs – fresh dill, fresh mint, chives or fresh thyme would all pair nicely with the lemon and vegetables.
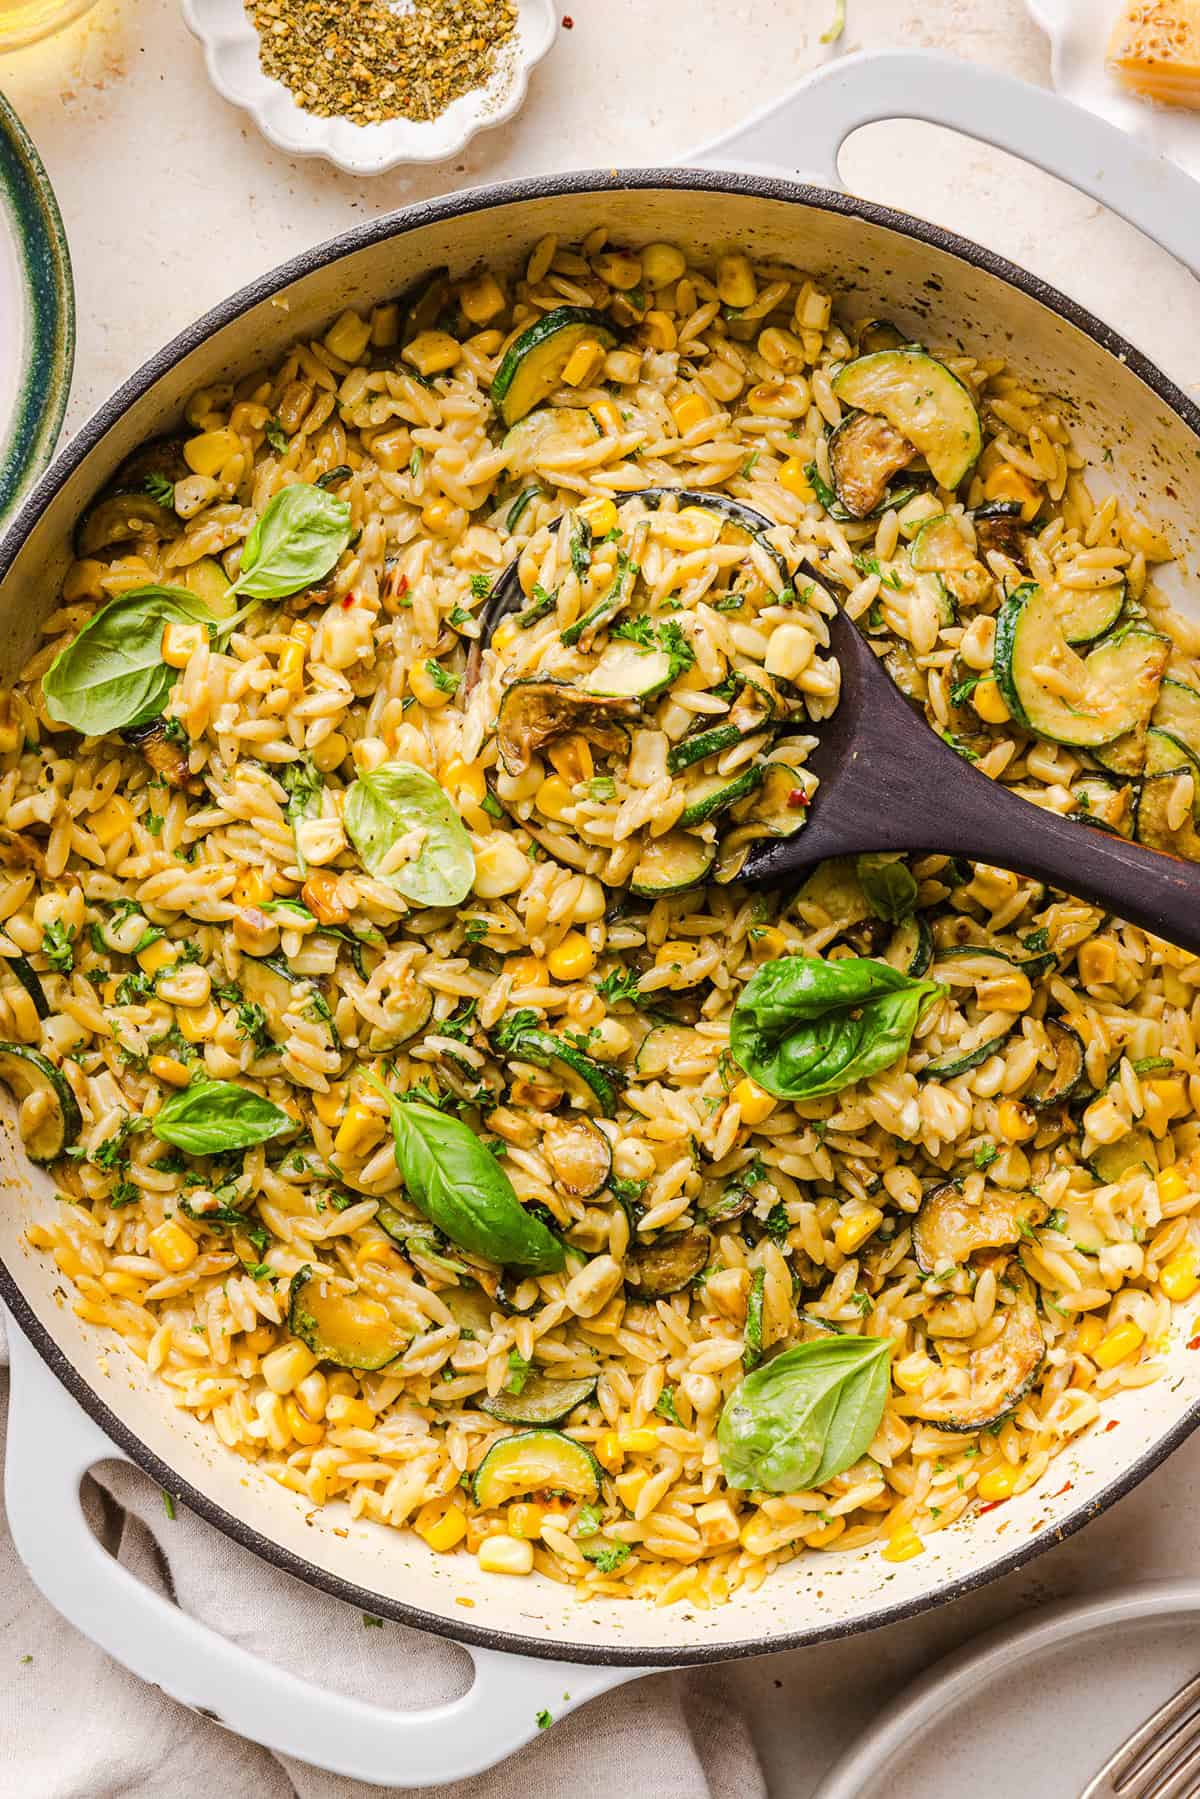
This creamy One Pan Lemon Garlic Orzo with Zucchini and Corn is fresh, flavorful and made in one skillet for an easy summer side dish or weeknight meal. Packed with fresh veggies, tender orzo, Parmesan, herbs and bright lemon flavor!

How to Serve

This creamy One Pan Lemon Garlic Orzo with Zucchini and Corn is fresh, flavorful and made in one skillet for an easy summer side dish or weeknight meal. Packed with fresh veggies, tender orzo, Parmesan, herbs and bright lemon flavor!

Prepping and Storage

  • To Store: Let the orzo cool completely, then transfer leftovers to an airtight container and refrigerate for up to 3 to 4 days.
  • To Reheat: Warm the orzo gently in a skillet over medium-low heat or microwave it in short intervals. Add a splash of chicken broth, milk or half-and-half while reheating to loosen the sauce and bring back its creamy consistency.
  • To Meal Prep: Portion the orzo into individual airtight containers along with your favorite protein for easy lunches throughout the week. Keep in mind that the zucchini will soften slightly as it sits.
  • To Freeze: I don’t recommend freezing this recipe. Both the creamy sauce and zucchini can change texture once frozen and thawed, so this dish is best enjoyed fresh or refrigerated.
This creamy One Pan Lemon Garlic Orzo with Zucchini and Corn is fresh, flavorful and made in one skillet for an easy summer side dish or weeknight meal. Packed with fresh veggies, tender orzo, Parmesan, herbs and bright lemon flavor!

Frequently Asked Questions

Is orzo rice or pasta?

Despite looking a lot like rice, orzo is actually a type of pasta! Its small shape makes it perfect for soups, pasta salads and creamy skillet recipes like this one.

Do I need to cook the orzo separately?

No! That’s one of the best parts about this recipe. The dry orzo cooks directly in the skillet with the chicken broth, which means fewer dishes and even more flavor. The starch released from the pasta also helps create the creamy consistency.

Can I use frozen corn?

Absolutely. Fresh corn is especially delicious during the summer, but frozen corn makes this recipe easy to enjoy all year long. You can add the frozen kernels directly to the skillet without thawing first.

Why do you cook the zucchini separately?

Cooking the zucchini first and removing it from the skillet prevents it from overcooking while the orzo simmers. Adding it back at the end keeps the zucchini tender and helps the slices hold their shape instead of becoming mushy.

Why is my orzo too thick?

Orzo continues absorbing liquid even after it has finished cooking. If your orzo becomes thicker than you’d like, stir in a splash of warm chicken broth, vegetable stock, milk or half-and-half until you reach your desired consistency of the velvety lemon sauce.

Can I use shredded zucchini?

Yes! You can substitute shredded zucchini for the sliced zucchini. Use about 3 to 4 cups of shredded zucchini, lightly squeezing out the excess moisture first. Sauté it in the olive oil for 3 to 4 minutes, then transfer it to a plate and stir it back into the orzo near the end as directed. This will give the dish a softer, more blended texture.

Can I add chicken or shrimp?

Definitely. Grilled chicken, shredded chicken or sautéed shrimp are all delicious additions and turn this creamy orzo into an easy complete meal.

Is this recipe gluten-free?

No, traditional orzo is made from wheat and therefore contains gluten. You could try substituting a gluten-free orzo, but cooking times and the amount of broth needed may vary depending on the brand.

This creamy One Pan Lemon Garlic Orzo with Zucchini and Corn is fresh, flavorful and made in one skillet for an easy summer side dish or weeknight meal. Packed with fresh veggies, tender orzo, Parmesan, herbs and bright lemon flavor!

Pin this now to find it later

Pin It

Follow on Instagram

Follow

More Easy Orzo Recipes

More One Pan Recipes

Hope you all enjoy this Lemon Garlic Orzo with Zucchini and Corn! If you love this recipe as much as we do, please leave a ⭐⭐⭐⭐⭐ star rating below and don’t forget to tag me on Instagram using the hashtag #eatyourselfskinny!

This creamy One Pan Lemon Garlic Orzo with Zucchini and Corn is fresh, flavorful and made in one skillet for an easy summer side dish or weeknight meal. Packed with fresh veggies, tender orzo, Parmesan, herbs and bright lemon flavor!

Print

One Pan Lemon Garlic Orzo with Zucchini and Corn

#wprm-recipe-user-rating-0 .wprm-rating-star.wprm-rating-star-full svg * { fill: #343434; }#wprm-recipe-user-rating-0 .wprm-rating-star.wprm-rating-star-33 svg * { fill: url(#wprm-recipe-user-rating-0-33); }#wprm-recipe-user-rating-0 .wprm-rating-star.wprm-rating-star-50 svg * { fill: url(#wprm-recipe-user-rating-0-50); }#wprm-recipe-user-rating-0 .wprm-rating-star.wprm-rating-star-66 svg * { fill: url(#wprm-recipe-user-rating-0-66); }linearGradient#wprm-recipe-user-rating-0-33 stop { stop-color: #343434; }linearGradient#wprm-recipe-user-rating-0-50 stop { stop-color: #343434; }linearGradient#wprm-recipe-user-rating-0-66 stop { stop-color: #343434; }

This creamy One Pan Lemon Garlic Orzo with Zucchini and Corn is fresh, flavorful and made in one skillet for an easy summer side dish or weeknight meal. Packed with fresh veggies, tender orzo, Parmesan, herbs and bright lemon flavor!
Course Side Dish
Cuisine American
Keyword Lemon Garlic Orzo with Zucchini and Corn
Prep Time 15 minutes
Cook Time 25 minutes
Total Time 40 minutes
Servings 8
Calories 290kcal

Ingredients

  • 3 Tbsp olive oil divided
  • 2 medium zucchini thinly sliced into half-moons
  • 2 cups corn fresh or frozen
  • 3 cloves garlic minced
  • 1 1/2 cups dry orzo
  • 2 1/2 cups low-sodium chicken broth
  • 1/2 tsp Italian seasoning
  • 1/2 tsp salt plus more to taste
  • 1/4 tsp black pepper
  • 1/4 tsp crushed red pepper flakes optional
  • 1/3 cup half and half (or heavy cream)
  • 1/2 cup freshly grated Parmesan cheese
  • Zest of 1 lemon
  • 2 Tbsp fresh lemon juice, or more to taste
  • 2 Tbsp chopped fresh basil
  • 2 Tbsp chopped fresh parsley

Instructions

  • Sauté the zucchini. Heat 2 tablespoons of olive oil in a large skillet over medium-high heat. Arrange the sliced zucchini in an even layer and season lightly with salt and pepper. Cook for 3 to 4 minutes, stirring occasionally, until just tender and lightly golden. Transfer the zucchini to a plate and set aside.
  • Cook the corn and garlic. Reduce to medium heat and add the remaining tablespoon of olive oil. Add the corn and cook for 2 to 3 minutes until lightly golden and tender. Stir in the garlic and cook for about 30 seconds, just until fragrant.
  • Toast the orzo. Add the dry orzo directly to the skillet and cook for about 2 minutes, stirring frequently. Toasting the pasta gives it a slightly nutty flavor and adds another layer of flavor to the finished dish.
  • Cook the orzo. Pour in the chicken broth and season with Italian seasoning, salt, black pepper and crushed red pepper flakes, if using. Bring everything to a gentle boil, then reduce the heat to medium-low. Simmer uncovered for 10 to 12 minutes, stirring frequently, until the orzo is al dente and most of the liquid has been absorbed.
  • Make it creamy. Reduce the heat to low and stir in the half-and-half and freshly grated Parmesan. Cook for another 1 to 2 minutes, stirring gently, until the Parmesan has melted and the orzo is nice and creamy. If the mixture becomes too thick, simply add a splash of chicken broth to loosen it up.
  • Add the zucchini back in. Gently fold the sautéed zucchini into the creamy orzo and cook for about a minute, just until warmed through. Be careful not to stir too aggressively so the zucchini slices stay intact.
  • Finish with lemon and herbs. Remove the skillet from the heat and stir in the lemon zest, fresh lemon juice, basil and parsley. Serve with extra parmesan, some cracked black pepper, and extra lemon zest, if desired.

Nutrition
Serving: 1/8th of recipe | Calories: 290kcal | Carbohydrates: 41g | Protein: 11g | Fat: 10g | Saturated Fat: 3g | Cholesterol: 11mg | Sodium: 415mg | Fiber: 3g | Sugar: 5g

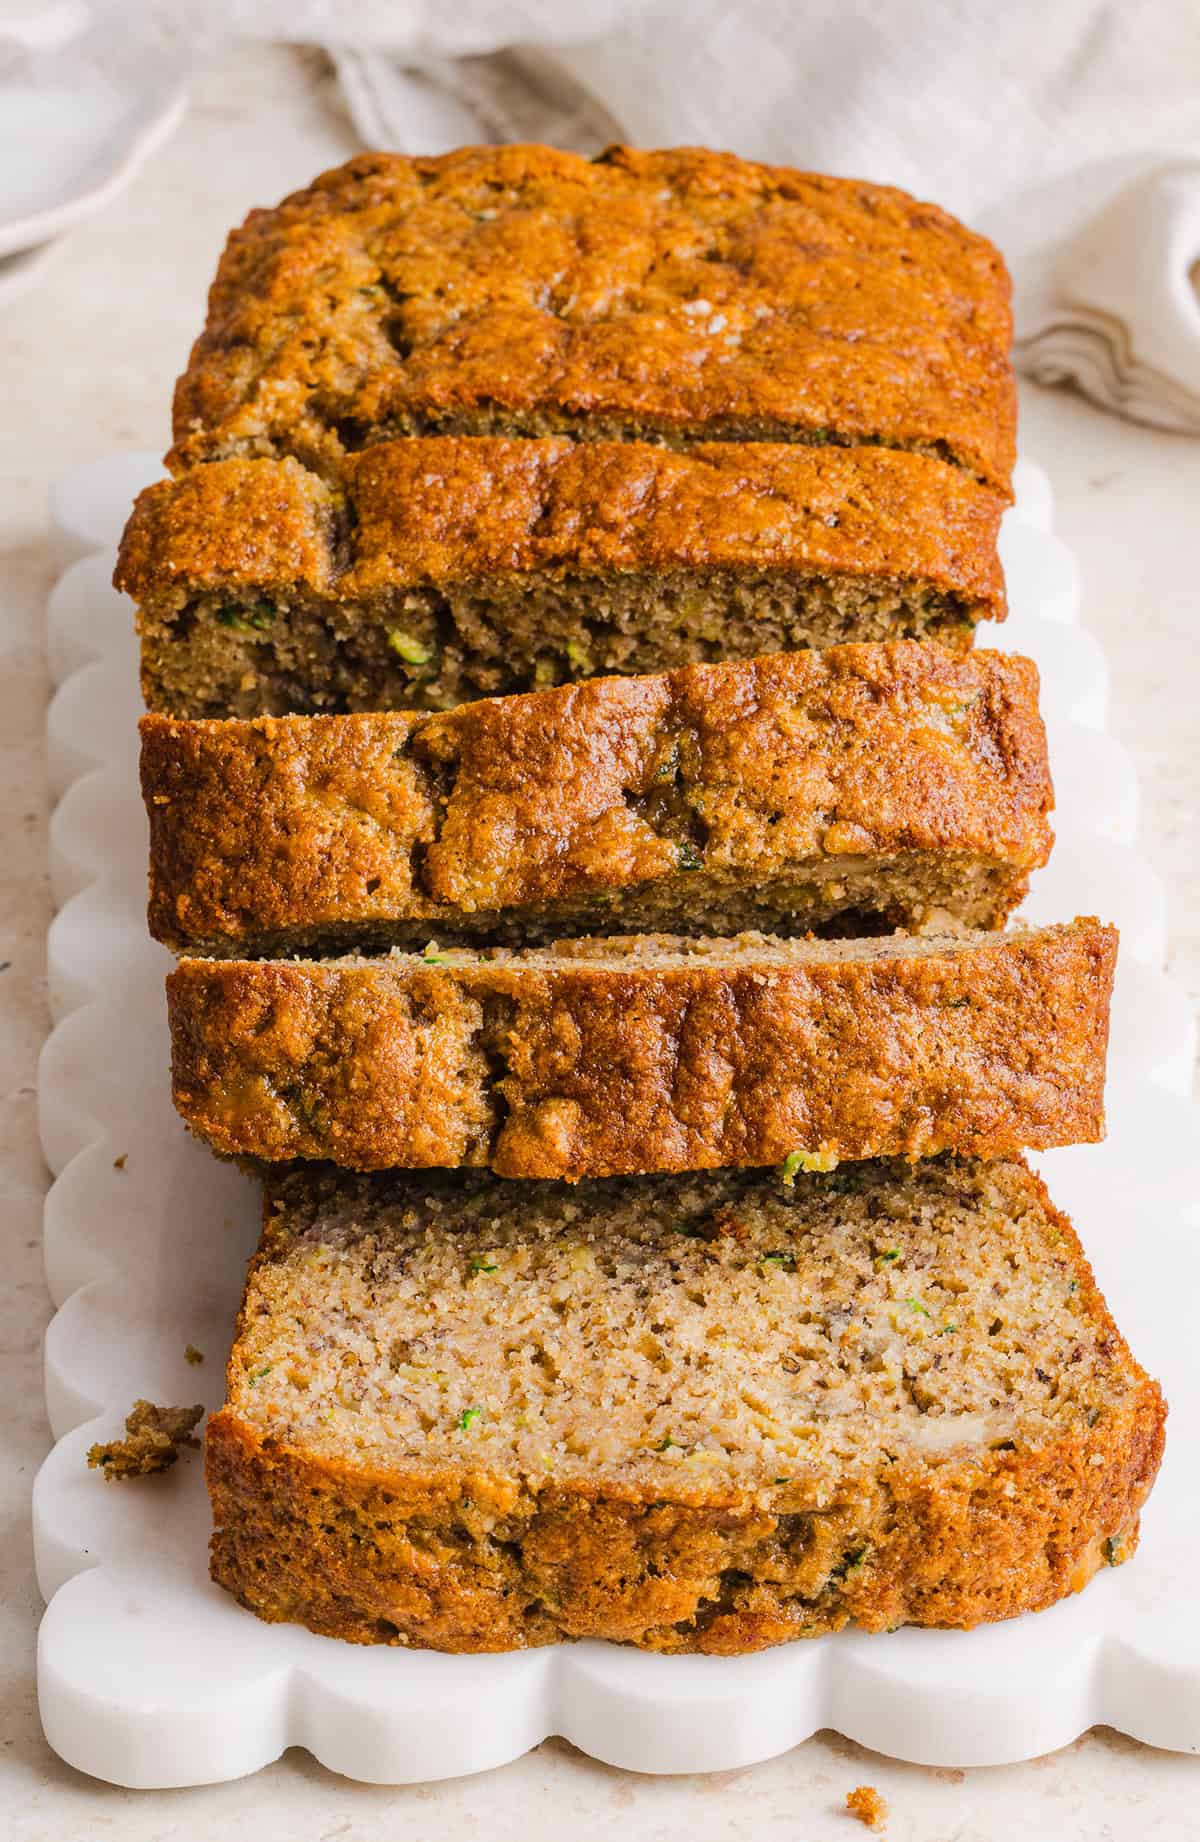
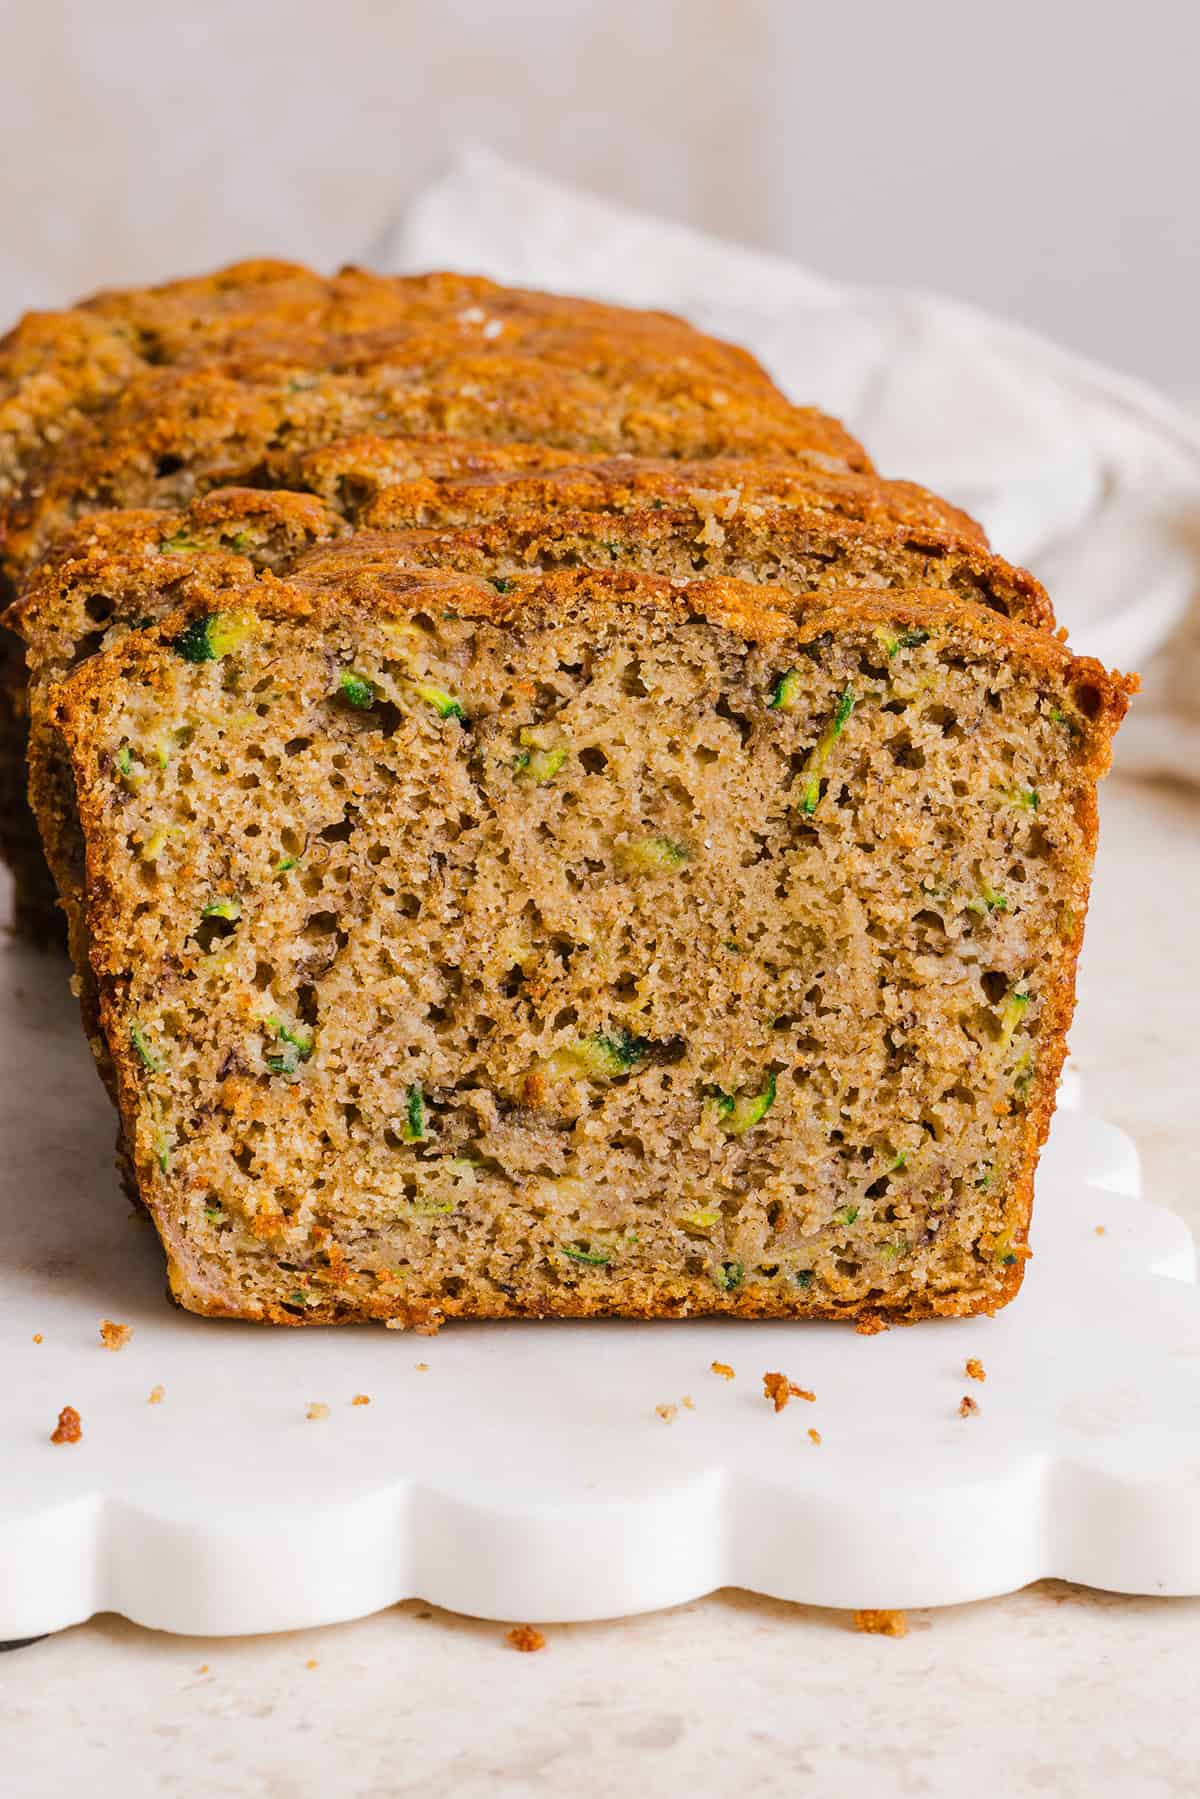
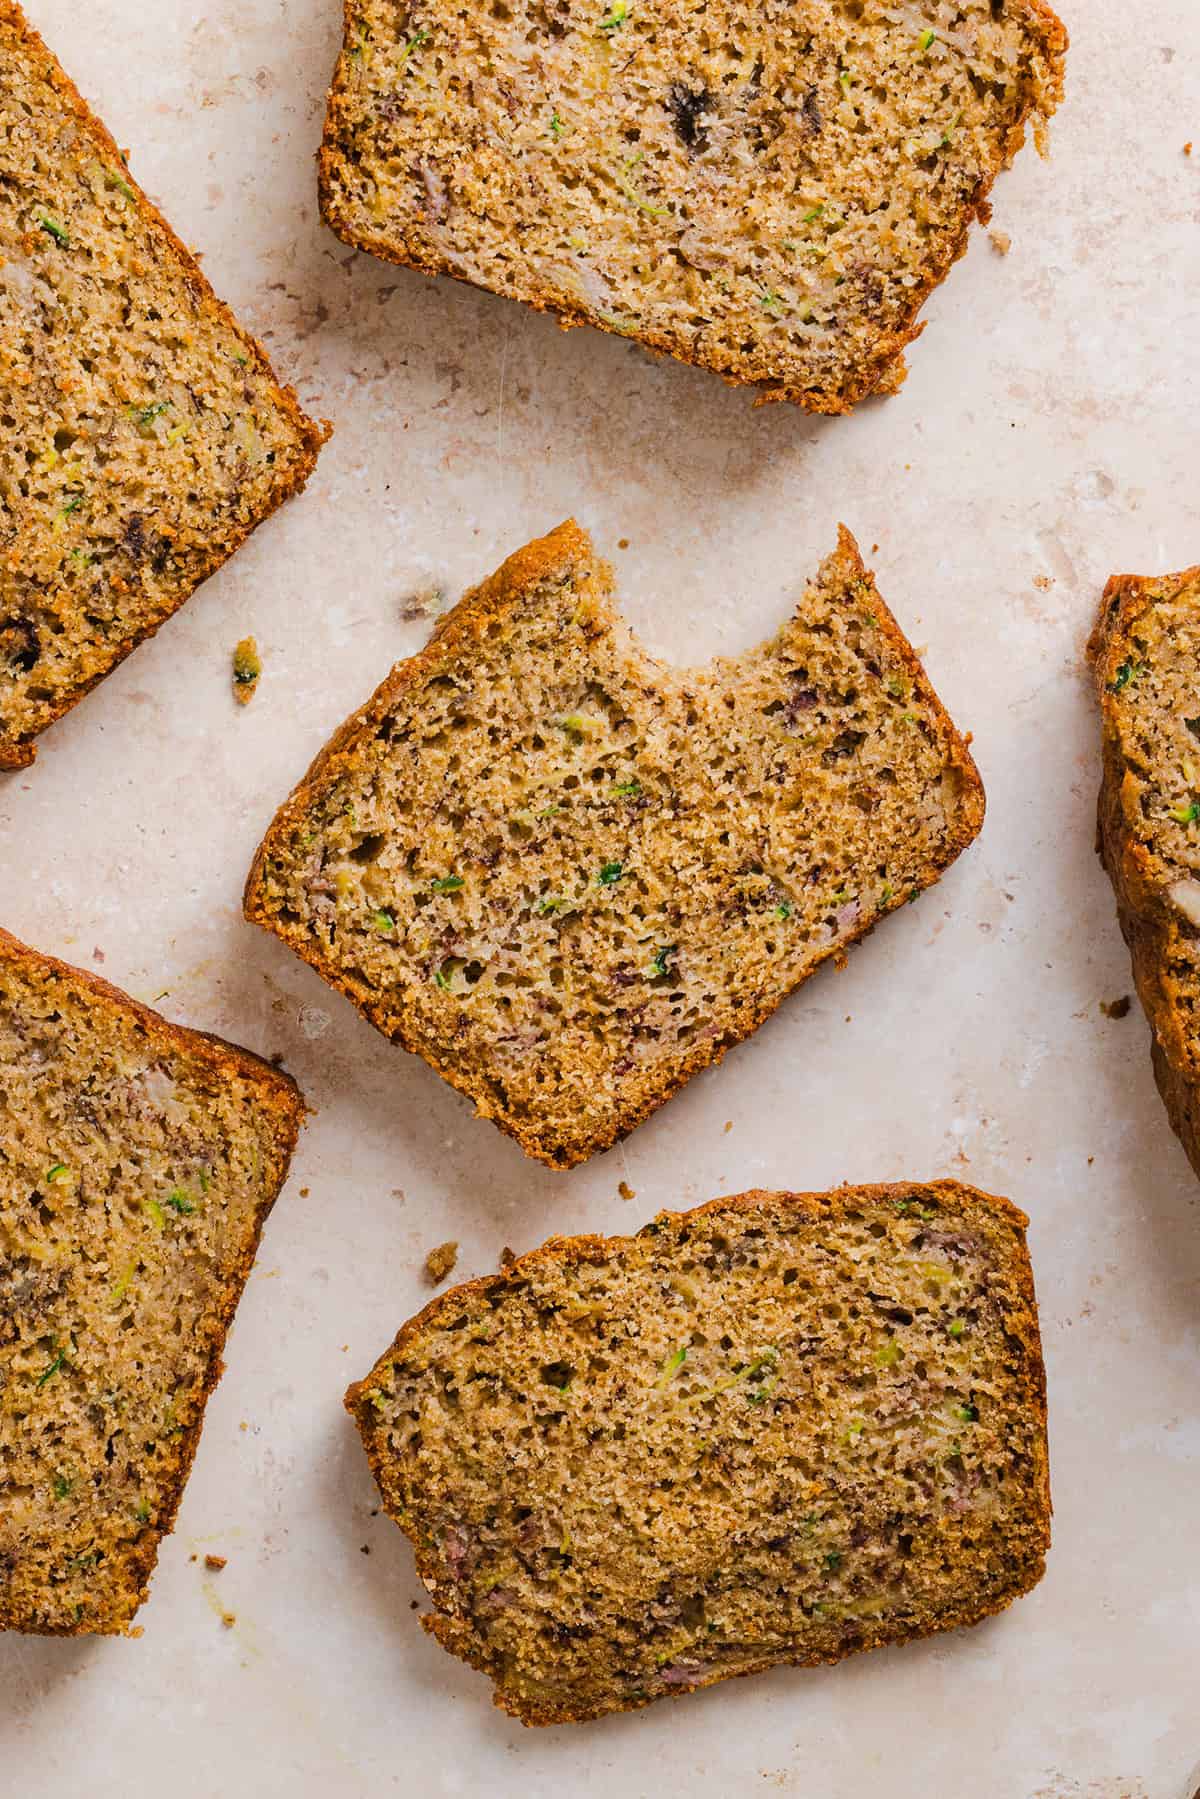
zucchini-banana-bread-66-700x1051.jpg

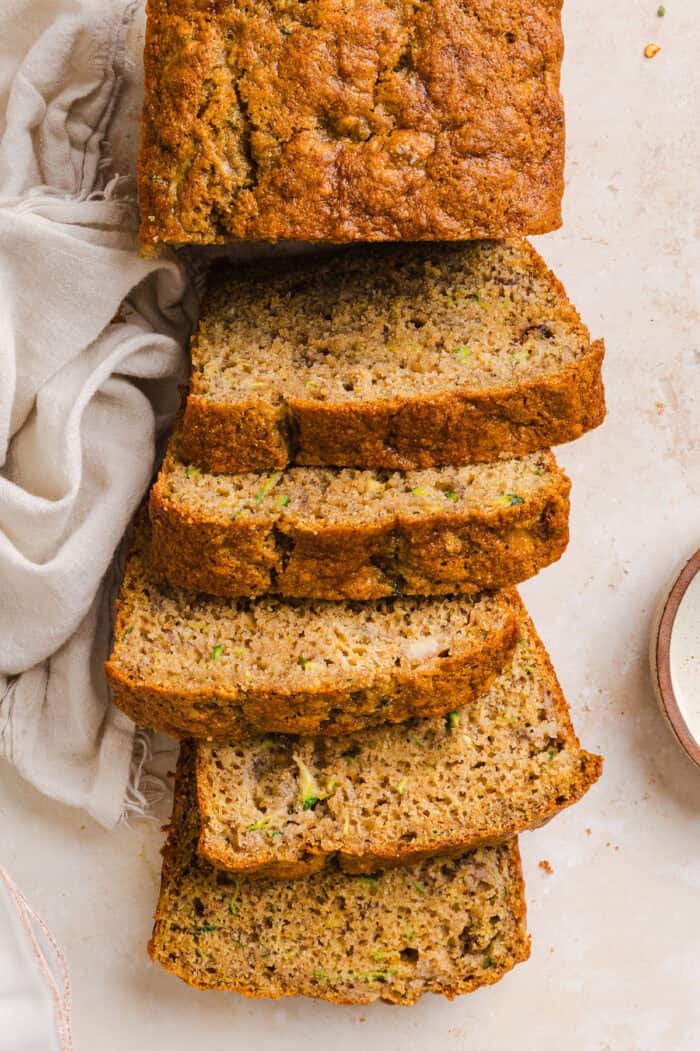
Healthy Zucchini Banana Bread

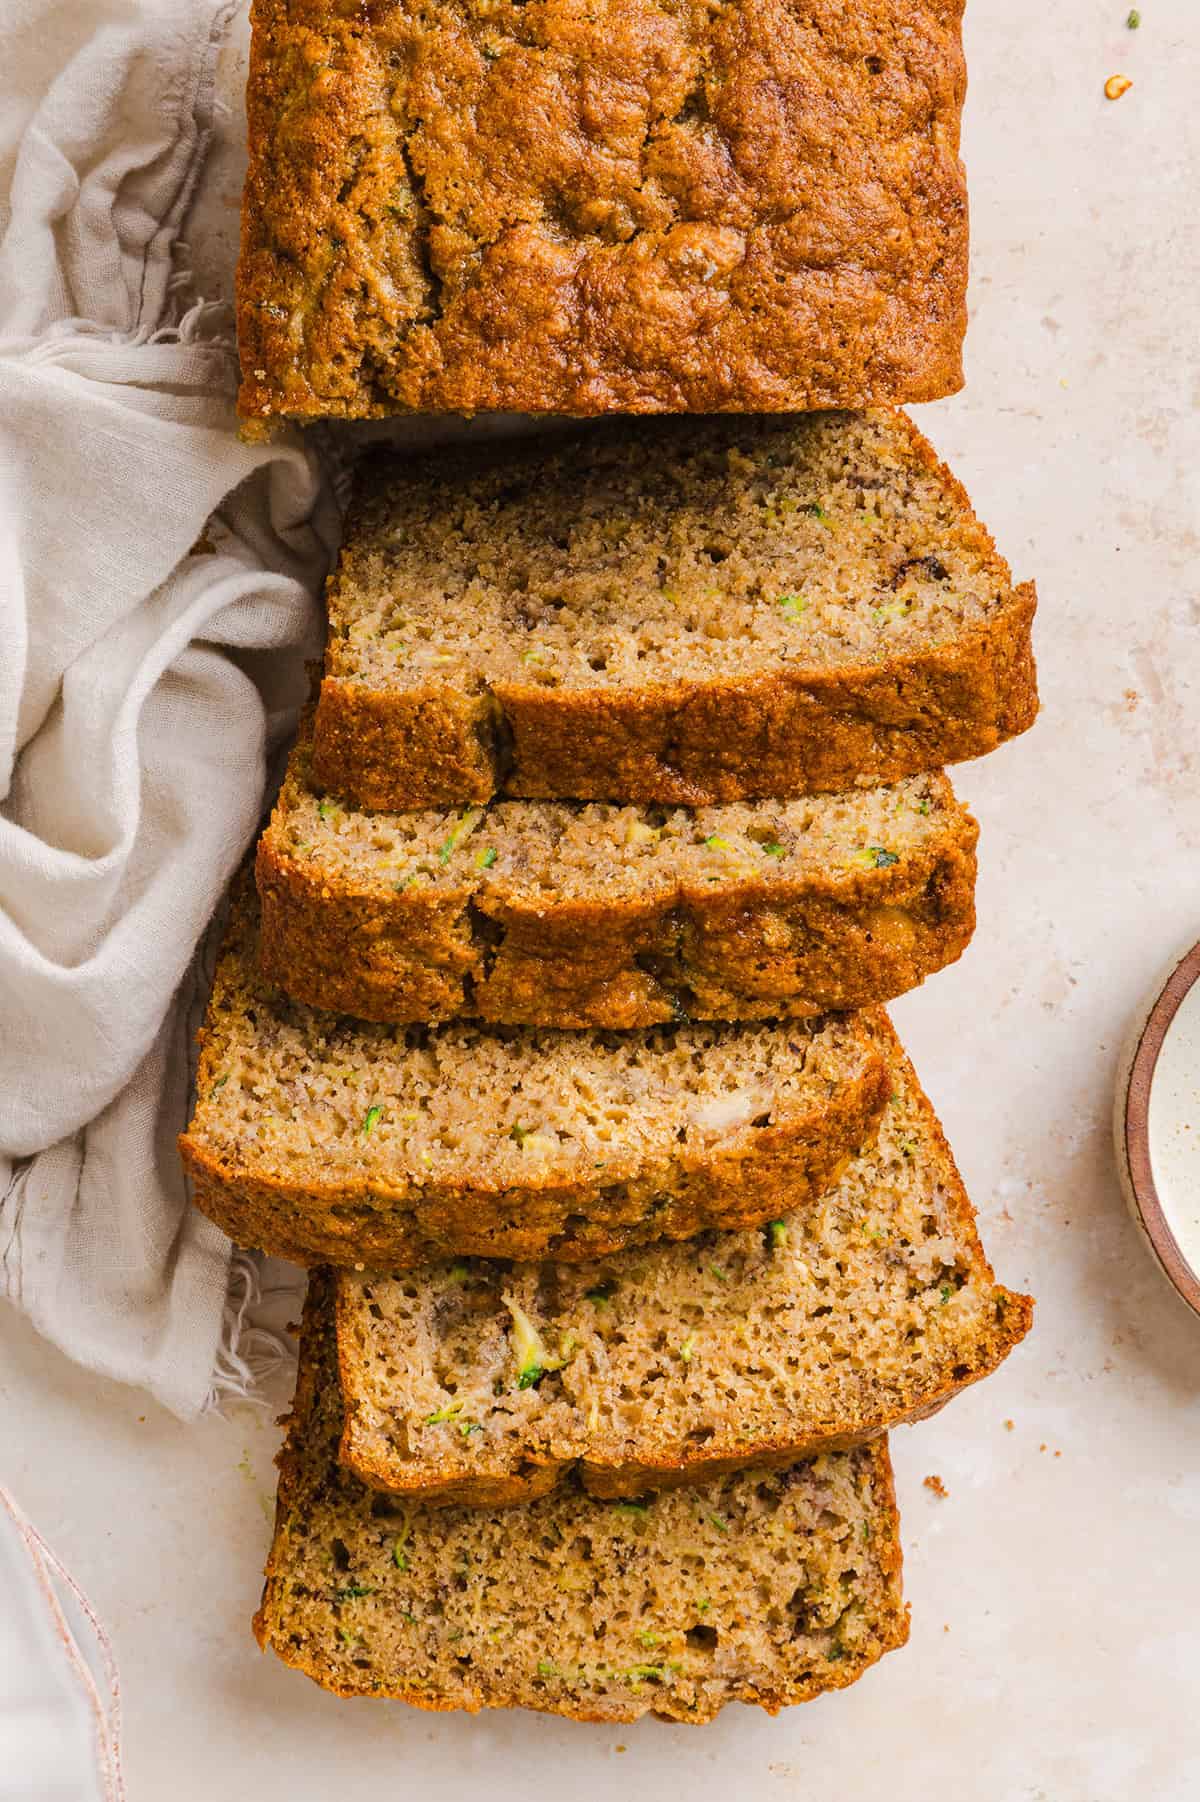
This Healthy Zucchini Banana Bread is soft, moist and perfectly sweet, made with ripe bananas, fresh zucchini and wholesome ingredients. Enjoy as an easy breakfast or nutritious snack!

This Healthy Zucchini Banana Bread is soft, moist and perfectly sweet, made with ripe bananas, fresh zucchini and wholesome ingredients. Enjoy as an easy breakfast or nutritious snack!

This Healthy Zucchini Banana Bread is soft, moist and perfectly sweet, made with ripe bananas, fresh zucchini and wholesome ingredients. Enjoy as an easy breakfast or nutritious snack!
Want to save this recipe?
Just enter your email and get it sent to your inbox! Plus you’ll get new recipes from us every week!

Please enable JavaScript in your browser to complete this form.

Please enable JavaScript in your browser to complete this form.

Loading

If you have ripe bananas sitting on the counter and an abundance of fresh zucchini, this Healthy Zucchini Banana Bread recipe is the perfect way to put both to good use! It’s soft, moist and perfectly sweet with warm hints of cinnamon and nutmeg in every bite. It makes the BEST easy breakfast, afternoon snack or healthier treat the whole family will love.

I love combining banana and zucchini in quick breads because they both add so much natural moisture. The ripe banana also adds sweetness and flavor, which means we can use less added sugar while still ending up with a delicious loaf that actually tastes like a treat. Your kids will love this!

Why You’ll Love This

  • Soft and moist – between the mashed banana, freshly grated zucchini and avocado oil, this bread stays incredibly tender without needing a ton of oil or butter.
  • Made healthier – whole wheat pastry flour adds whole grains and fiber, while ripe banana provides natural sweetness so we don’t need as much added sugar.
  • Great way to use zucchini – if your garden is overflowing with zucchini (or you grabbed a few too many at the farmers market!), this is an easy and delicious way to use it.
  • Perfect for meal prep – make a loaf over the weekend and enjoy slices for breakfast or snacks throughout the week. This bread is freezer-friendly too!
This Healthy Zucchini Banana Bread is soft, moist and perfectly sweet, made with ripe bananas, fresh zucchini and wholesome ingredients. Enjoy as an easy breakfast or nutritious snack!

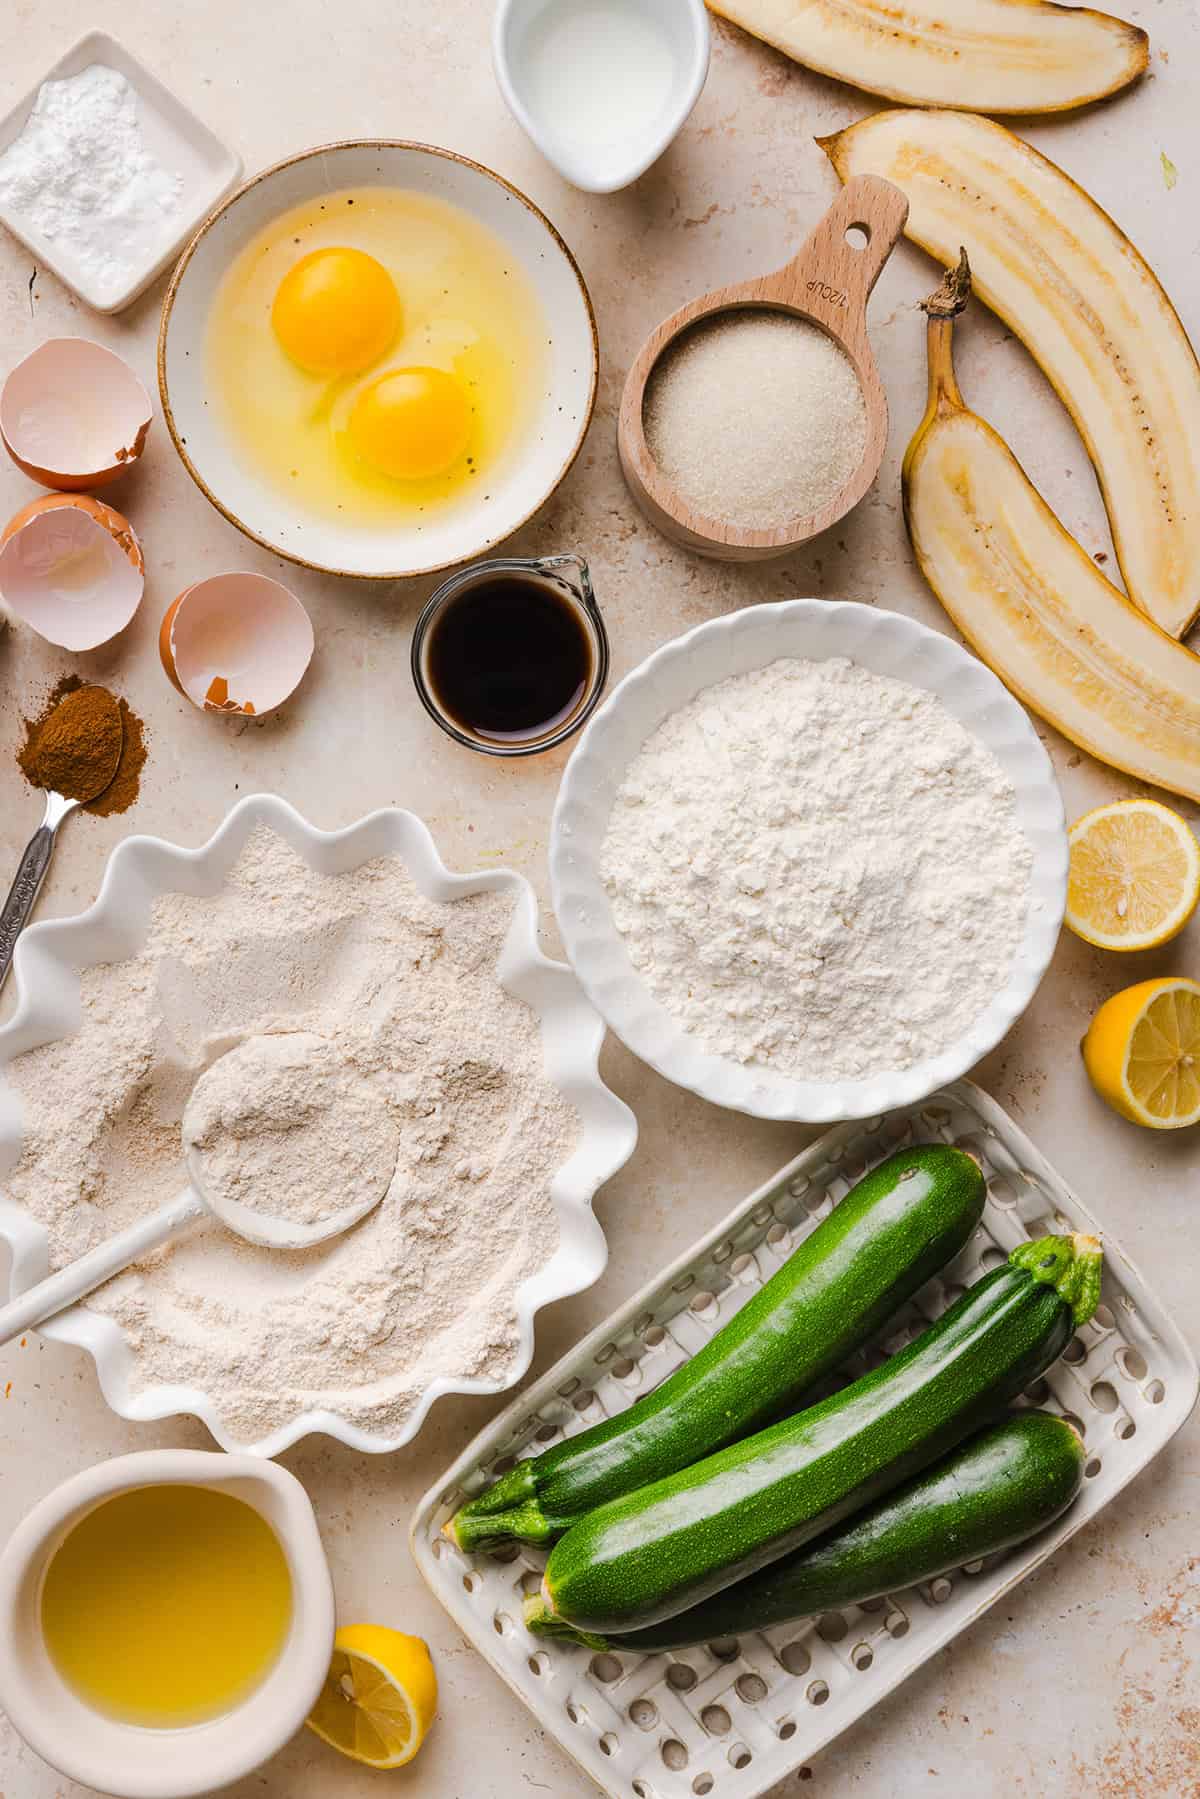
Ingredients You’ll Need

  • flours – combining all-purpose flour with whole wheat pastry flour gives you the perfect balance between wholesome and fluffy.
  • baking powder + baking soda – these act as leavening agents to help the bread rise and keep it soft and fluffy.
  • ripe banana – the riper and more spotted your bananas are, the sweeter and more flavorful your bread will be.
  • zucchini – lightly squeeze out the excess water, but don’t completely wring the zucchini dry, you want to retain some of that moisture for a soft, tender loaf.
  • large eggs – these provide structure and help create a tender crumb.
  • cane sugar – I like using cane sugar in this bread because it gives a lighter texture than relying solely on a liquid sweetener such as maple syrup or honey.
  • avocado oil – keeps the bread moist and tender without using butter. Avocado oil has a neutral flavor, which makes it great for baking. You could also use olive oil or melted coconut oil.
  • milk – two tablespoons add just enough additional moisture to the batter. I typically use almond milk, but any milk will work.
  • vanilla extract – adds delicious warmth and brings out the natural sweetness of the banana.
  • cinnamon + nutmeg – warm spices pair perfectly with the banana and zucchini. The cinnamon is more prominent while just a touch of nutmeg adds extra warmth.
  • fresh lemon juice – just a tablespoon brightens the flavors and provides acidity that works with the baking soda to help the loaf rise.
  • salt – an important ingredient in baking that balances the sweetness and enhances all the other flavors.
This Healthy Zucchini Banana Bread is soft, moist and perfectly sweet, made with ripe bananas, fresh zucchini and wholesome ingredients. Enjoy as an easy breakfast or nutritious snack!

How to Make Healthy Zucchini Banana Bread

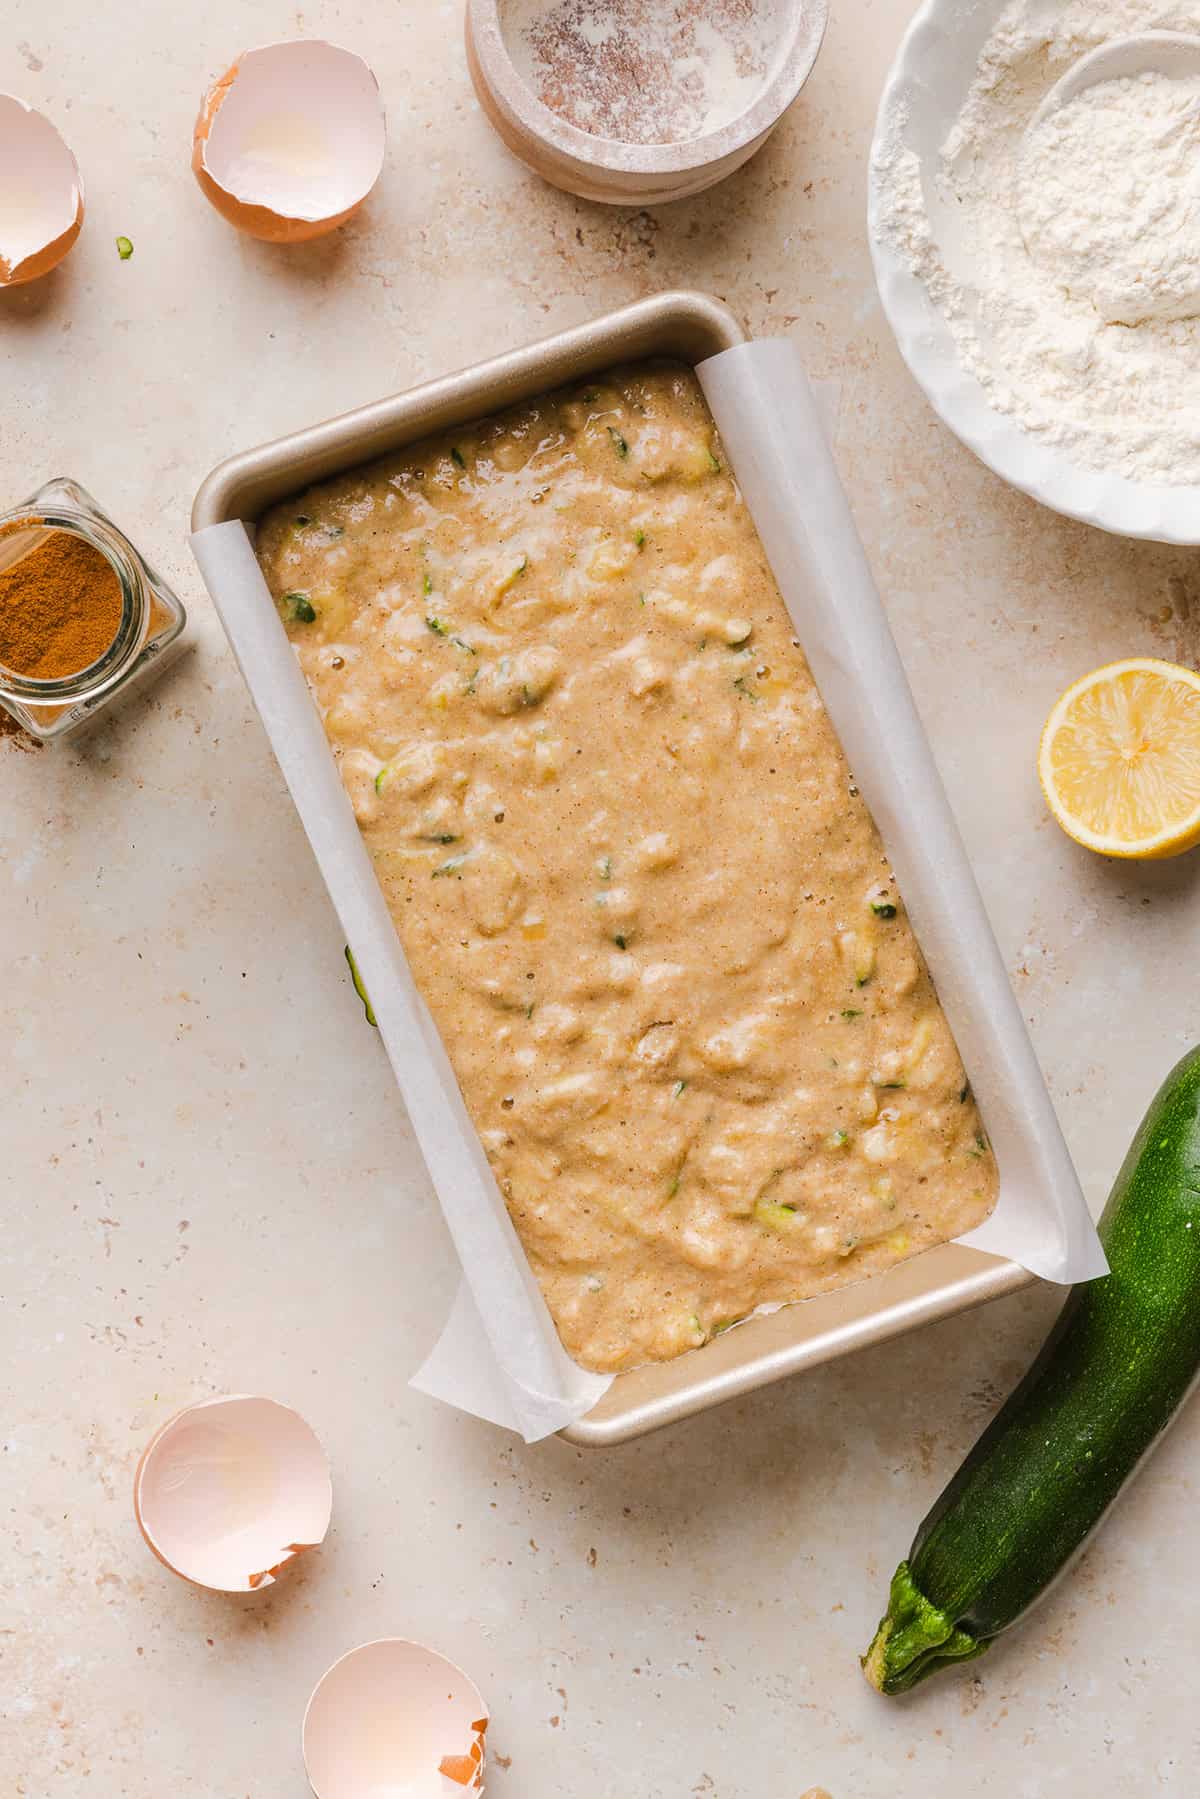
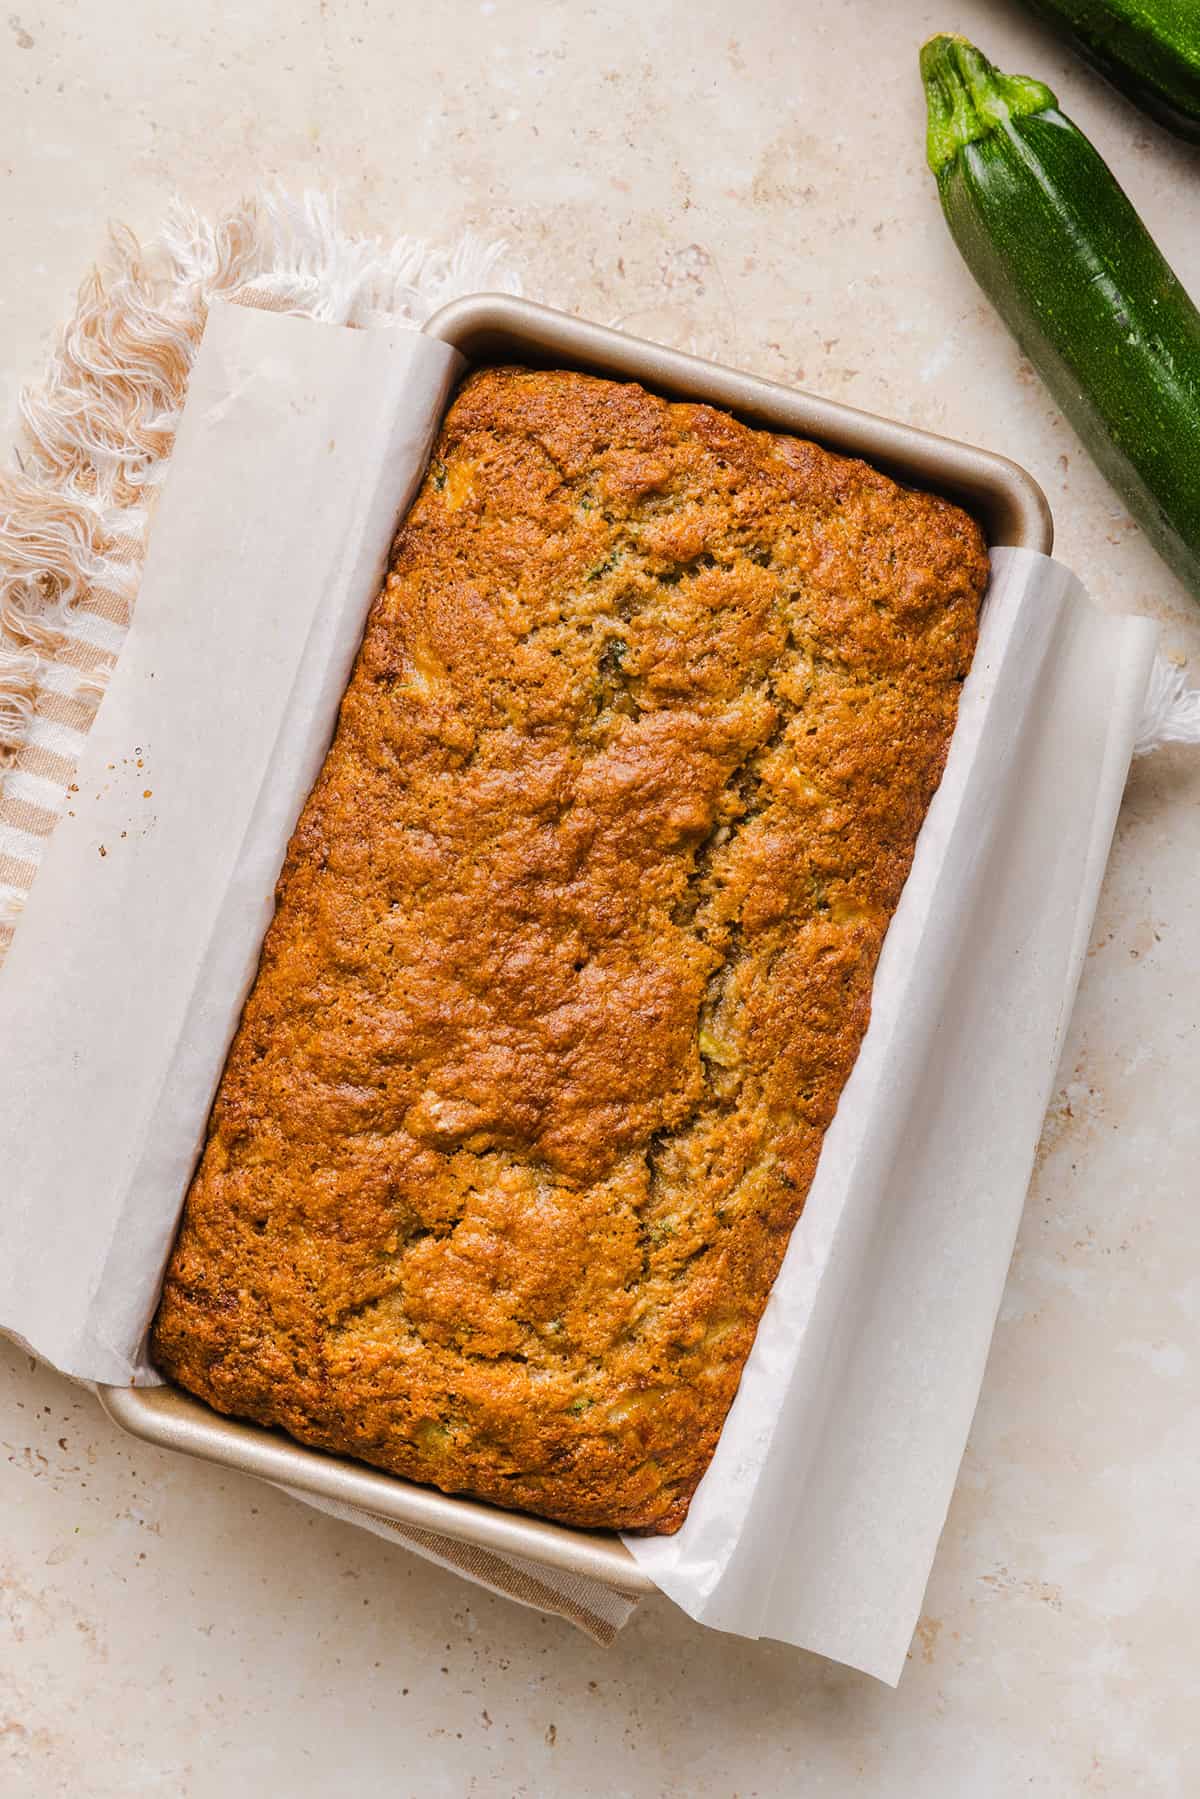
  1. Prepare your oven and pan. Preheat oven to 350°F. Lightly grease a 9×5-inch loaf pan and line it with parchment paper, leaving a little overhang along the sides so the bread is easy to lift out after baking.
  2. Mix the dry ingredients. In a medium bowl, whisk together the whole wheat pastry flour, all-purpose flour, baking soda, baking powder, cinnamon, nutmeg and salt. Set aside.
  3. Combine the wet ingredients. In a large bowl, whisk the eggs and cane sugar together for about 30 to 60 seconds, until well combined and slightly lighter in color. Add the mashed banana, avocado oil, milk, vanilla extract and lemon juice, whisking until smooth.
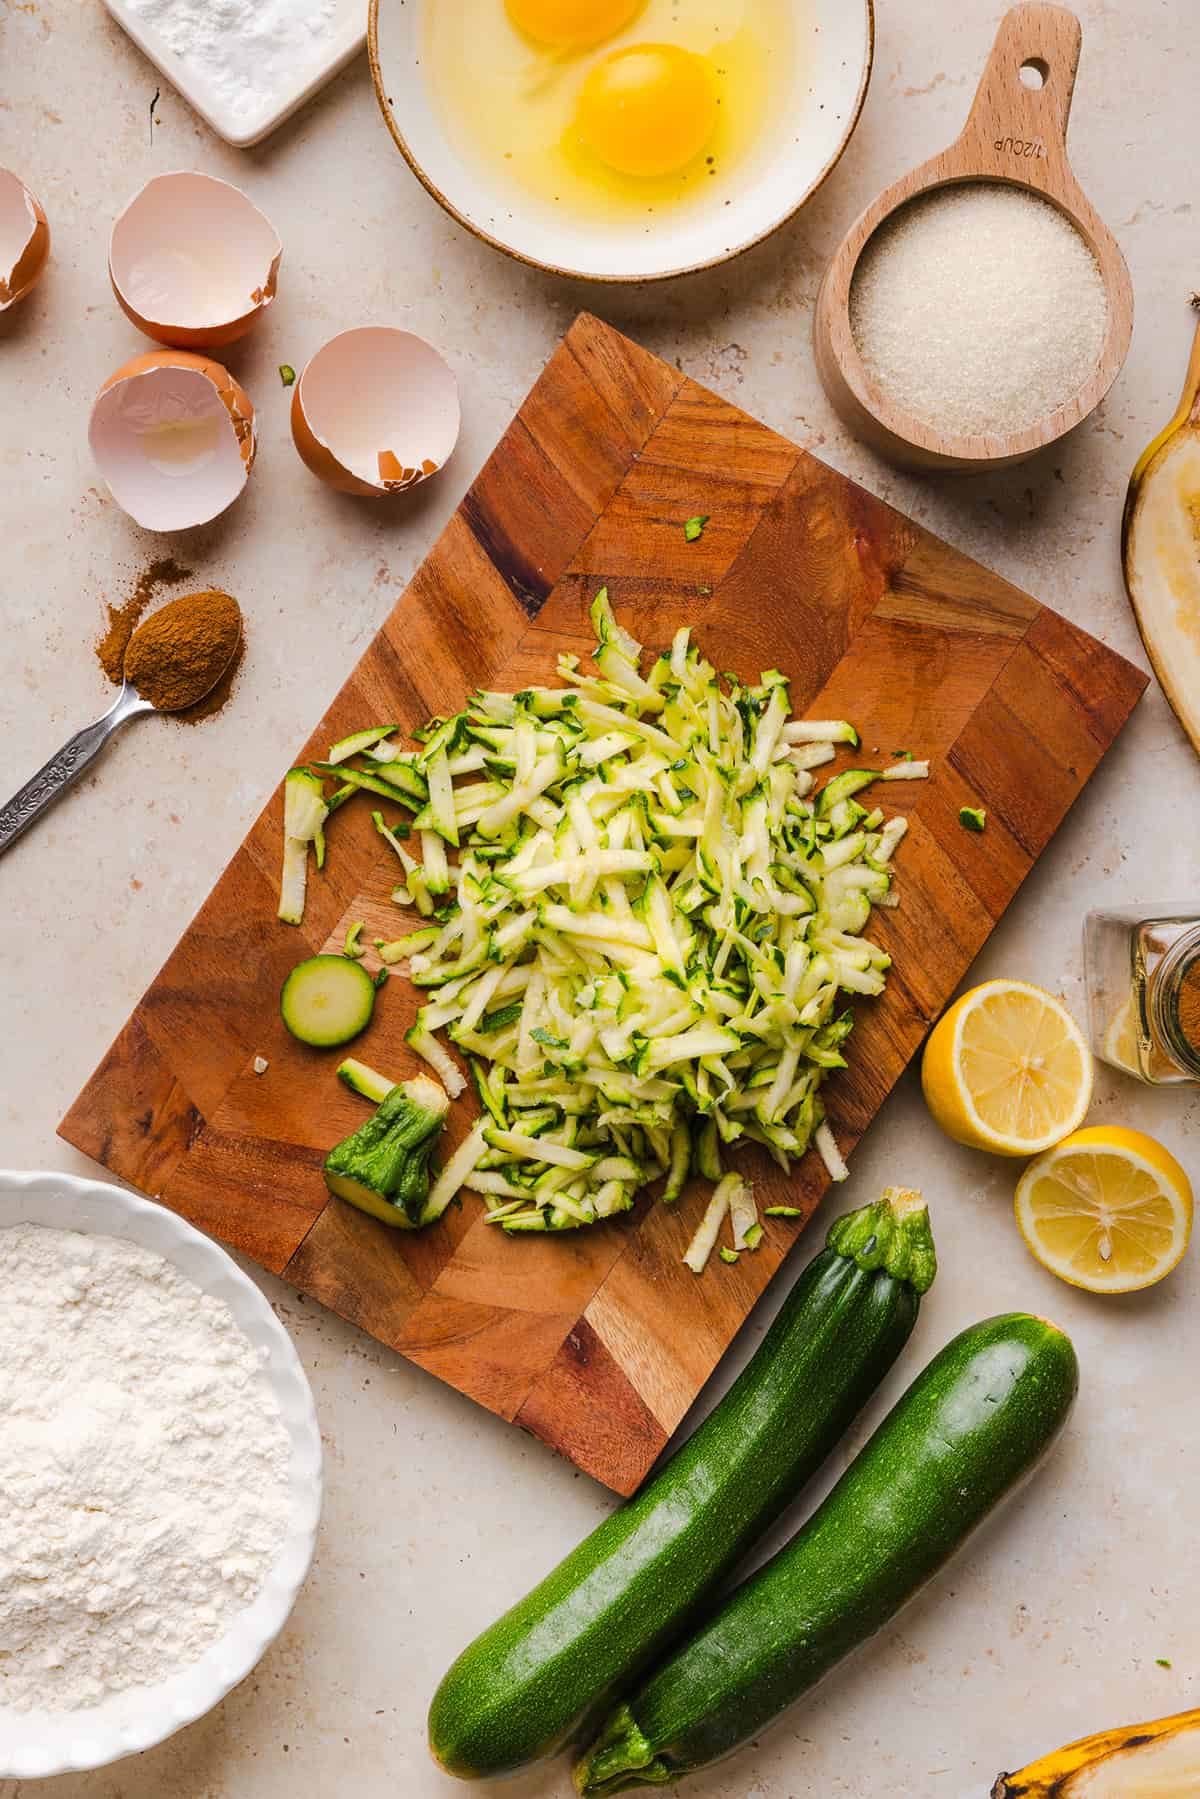
  4. Add the zucchini. Gently fold the grated zucchini into the wet ingredients. The zucchini should be lightly squeezed to remove excess liquid, but don’t wring it completely dry.
  5. Combine wet and dry ingredients. Add the flour mixture to the wet ingredients and gently fold everything together with a spatula. Mix only until you no longer see streaks of flour. A few small lumps are perfectly fine!
  6. Transfer to the loaf pan. Pour batter into your prepared pan and use a spatula to spread it evenly and smooth the top.
  7. Bake. Bake for 50 to 60 minutes, or until the top is golden brown and a toothpick inserted into the center comes out clean. Start checking around the 50-minute mark. If the top begins browning before the center is finished, loosely cover the loaf with aluminum foil.
  8. Cool before slicing. Let the bread cool in the pan for about 10 to 15 minutes before lifting it out using the parchment paper. Transfer to a wire rack and let cool for at least 30 minutes before slicing.
This Healthy Zucchini Banana Bread is soft, moist and perfectly sweet, made with ripe bananas, fresh zucchini and wholesome ingredients. Enjoy as an easy breakfast or nutritious snack!

Tips for the Best Healthy Zucchini Banana Bread

  • Use very overripe bananas – those spotty brown bananas you might otherwise throw away are perfect! As bananas ripen, they become sweeter and softer, giving the bread better flavor and extra moisture.
  • Measure the mashed banana – banana sizes vary quite a bit, so measuring out the full ¾ cup is more reliable than simply calling for a certain number of bananas.
  • Don’t peel the zucchini – there’s no need! The skin is tender and softens right into the bread while baking. It also adds those pretty little green flecks throughout the loaf.
  • Lightly squeeze the zucchini – this is important. Zucchini contains a lot of water, but squeezing out too much can leave your bread dry. Grate the zucchini using a box grater and gently squeeze with a clean towel or paper towels to remove the excess moisture without completely drying it out.
  • Don’t overmix the batter – once the flour goes in, gently fold everything together just until combined. Overmixing develops more gluten and can make quick breads dense.
  • Don’t overbake – start checking the loaf around 50 minutes. A toothpick should come out clean or with a few moist crumbs, not wet batter.
  • Let it cool before cutting – I know it’s tempting to cut right into warm banana bread, but giving it at least 30 minutes to cool allows the crumb to finish setting and makes for much cleaner slices.
This Healthy Zucchini Banana Bread is soft, moist and perfectly sweet, made with ripe bananas, fresh zucchini and wholesome ingredients. Enjoy as an easy breakfast or nutritious snack!

Frequently Asked Questions

What makes this banana zucchini bread healthier?

Traditional zucchini and banana bread recipes can contain quite a bit of refined flour, sugar and oil or butter. This recipe lightens things up without sacrificing that moist, tender texture we all want in a good quick bread.

We’re using whole wheat pastry flour for extra whole grains and fiber, naturally sweet banana so less added sugar is needed, fresh zucchini for extra nutrients and moisture, and just ¼ cup avocado oil for the entire loaf. It’s still sweet and satisfying, but made with simple, wholesome ingredients you can feel good about serving your family.

Can I use frozen zucchini?

Yes! Frozen shredded zucchini can work, but thaw it completely first and drain off the excess liquid. Since frozen zucchini tends to release more water than fresh zucchini, gently squeeze it before measuring and adding it to the batter.

Can I use frozen bananas?

Absolutely. Let frozen bananas thaw completely and drain off any large amount of excess liquid before mashing and measuring them. You’ll need ¾ cup mashed banana.

Can I make this zucchini banana bread gluten-free?

I haven’t tested this exact recipe with gluten-free flour, but a quality 1-to-1 gluten-free baking flour can replace the flours. I wouldn’t recommend substituting almond or coconut flour one-for-one because they behave very differently in baking.

Do I need to peel the zucchini?

No. Leave the skin right on! It’s soft enough that it practically disappears into the bread while baking.

Why is my zucchini banana bread soggy in the middle?

This can happen if your zucchini released too much water, you used more banana than called for, the loaf was underbaked or the bread was sliced while still very hot. Make sure to measure the banana and zucchini carefully, gently remove excess water from the zucchini and bake until the center is completely set.

Why did my zucchini banana bread turn out dense?

The most common culprit is overmixing. Once you add the flour, gently fold the batter only until the ingredients are combined. Using too much flour or completely squeezing the zucchini dry can also affect the texture.

Can I add chocolate chips or nuts?

Definitely! Fold ½ to ¾ cup chocolate chips or about ½ cup chopped walnuts or pecans into the batter right before transferring it to the loaf pan.

This Healthy Zucchini Banana Bread is soft, moist and perfectly sweet, made with ripe bananas, fresh zucchini and wholesome ingredients. Enjoy as an easy breakfast or nutritious snack!

Prepping and Storage

  • To Make Ahead: Zucchini banana bread is a great recipe to make a day in advance because the loaf stays wonderfully moist. Let it cool completely before wrapping or storing.
  • To Store: Keep the bread in an airtight container at room temperature for about 2-3 days. For longer storage, store in the refrigerator for up to 5 to 7 days. You can store the loaf whole or pre-slice it for easy grab-and-go breakfasts.
  • To Freeze: Allow the loaf to cool completely, then wrap the loaf or individual slices tightly with plastic wrap and place in a freezer-safe bag or container. Freeze for up to 3 months. Freezing individual slices makes it much easier to pull out exactly what you need.
  • To Thaw: Let a slice thaw overnight in the refrigerator or for an hour or so at room temperature. You can also gently warm individual slices in the microwave or toaster oven.
This Healthy Zucchini Banana Bread is soft, moist and perfectly sweet, made with ripe bananas, fresh zucchini and wholesome ingredients. Enjoy as an easy breakfast or nutritious snack!

Pin this now to find it later

Pin It

Follow on Instagram

Follow

More Ways to Use Fresh Zucchini

More Easy Bread Recipes

Hope you all enjoy this Healthy Zucchini Banana Bread! If you love this recipe as much as we do, please leave a ⭐⭐⭐⭐⭐ star rating below and don’t forget to tag me on Instagram using the hashtag #eatyourselfskinny!

This Healthy Zucchini Banana Bread is soft, moist and perfectly sweet, made with ripe bananas, fresh zucchini and wholesome ingredients. Enjoy as an easy breakfast or nutritious snack!

Print

Healthy Zucchini Banana Bread

#wprm-recipe-user-rating-0 .wprm-rating-star.wprm-rating-star-full svg * { fill: #343434; }#wprm-recipe-user-rating-0 .wprm-rating-star.wprm-rating-star-33 svg * { fill: url(#wprm-recipe-user-rating-0-33); }#wprm-recipe-user-rating-0 .wprm-rating-star.wprm-rating-star-50 svg * { fill: url(#wprm-recipe-user-rating-0-50); }#wprm-recipe-user-rating-0 .wprm-rating-star.wprm-rating-star-66 svg * { fill: url(#wprm-recipe-user-rating-0-66); }linearGradient#wprm-recipe-user-rating-0-33 stop { stop-color: #343434; }linearGradient#wprm-recipe-user-rating-0-50 stop { stop-color: #343434; }linearGradient#wprm-recipe-user-rating-0-66 stop { stop-color: #343434; }

This Healthy Zucchini Banana Bread is soft, moist and perfectly sweet, made with ripe bananas, fresh zucchini and wholesome ingredients. Enjoy as an easy breakfast or nutritious snack!
Course Breakfast, Dessert
Cuisine American
Keyword Healthy Zucchini Banana Bread
Prep Time 10 minutes
Cook Time 50 minutes
Total Time 1 hour
Servings 12
Calories 165kcal

Ingredients

  • 1 cup whole wheat pastry flour
  • 3/4 cup all-purpose flour
  • 1 tsp baking soda
  • 1/2 tsp baking powder
  • 1 tsp cinnamon
  • 1/4 tsp nutmeg
  • 1/2 tsp salt
  • 2 large eggs room temperature
  • 3/4 cup mashed ripe banana
  • 1/2 cup cane sugar
  • 1/4 cup avocado oil
  • 2 Tbsp milk
  • 2 tsp vanilla extract
  • 1 Tbsp fresh lemon juice
  • 1 1/4 cups grated zucchini water squeezed out

Instructions

  • Prepare your oven and pan. Preheat oven to 350°F. Lightly grease a 9×5-inch loaf pan and line it with parchment paper, leaving a little overhang along the sides so the bread is easy to lift out after baking.
  • Mix the dry ingredients. In a medium bowl, whisk together the whole wheat pastry flour, all-purpose flour, baking soda, baking powder, cinnamon, nutmeg and salt. Set aside.
  • Combine the wet ingredients. In a large bowl, whisk the eggs and cane sugar together for about 30 to 60 seconds, until well combined and slightly lighter in color. Add the mashed banana, avocado oil, milk, vanilla extract and lemon juice, whisking until smooth.
  • Add the zucchini. Gently fold the grated zucchini into the wet ingredients. The zucchini should be lightly squeezed to remove excess liquid, but don't wring it completely dry.
  • Combine wet and dry ingredients. Add the flour mixture to the wet ingredients and gently fold everything together with a spatula. Mix only until you no longer see streaks of flour. A few small lumps are perfectly fine!
  • Transfer to the loaf pan. Pour batter into your prepared pan and use a spatula to spread it evenly and smooth the top.
  • Bake. Bake for 50 to 60 minutes, or until the top is golden brown and a toothpick inserted into the center comes out clean. Start checking around the 50-minute mark. If the top begins browning before the center is finished, loosely cover the loaf with aluminum foil.
  • Cool before slicing. Let the bread cool in the pan for about 10 to 15 minutes before lifting it out using the parchment paper. Transfer to a wire rack and let cool for at least 30 minutes before slicing.

Nutrition
Serving: 1 slice | Calories: 165kcal | Carbohydrates: 25g | Protein: 4g | Fat: 6g | Saturated Fat: 1g | Cholesterol: 31mg | Sodium: 220mg | Fiber: 2g | Sugar: 11g

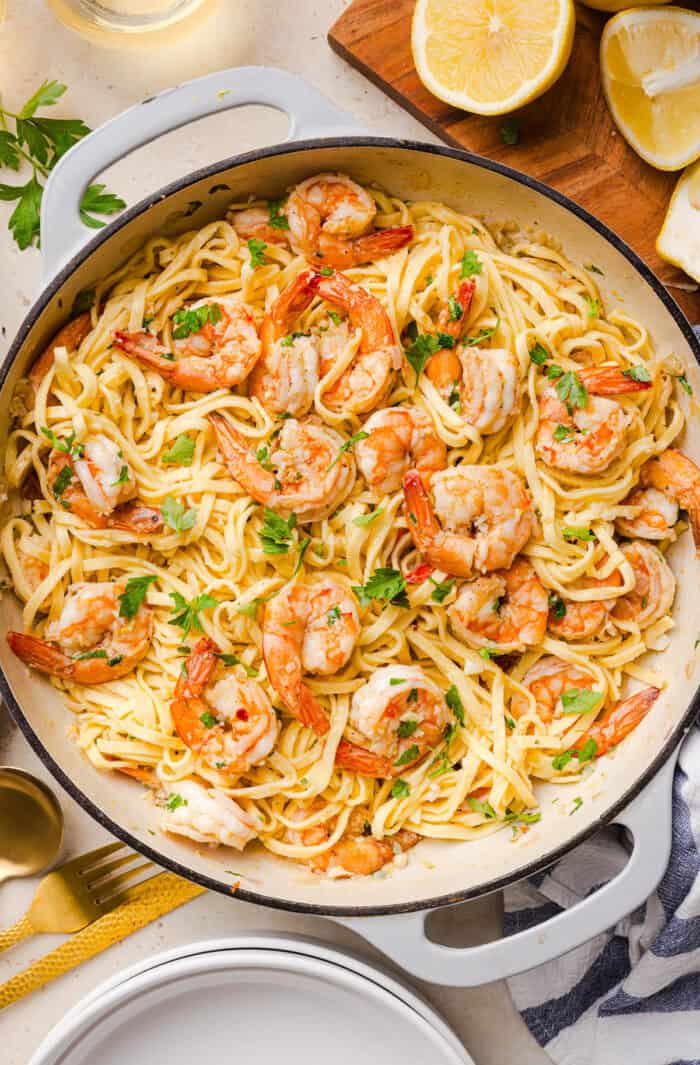
healthy-shrimp-scampi-55-700x1065.jpg

Healthy Shrimp Scampi Recipe

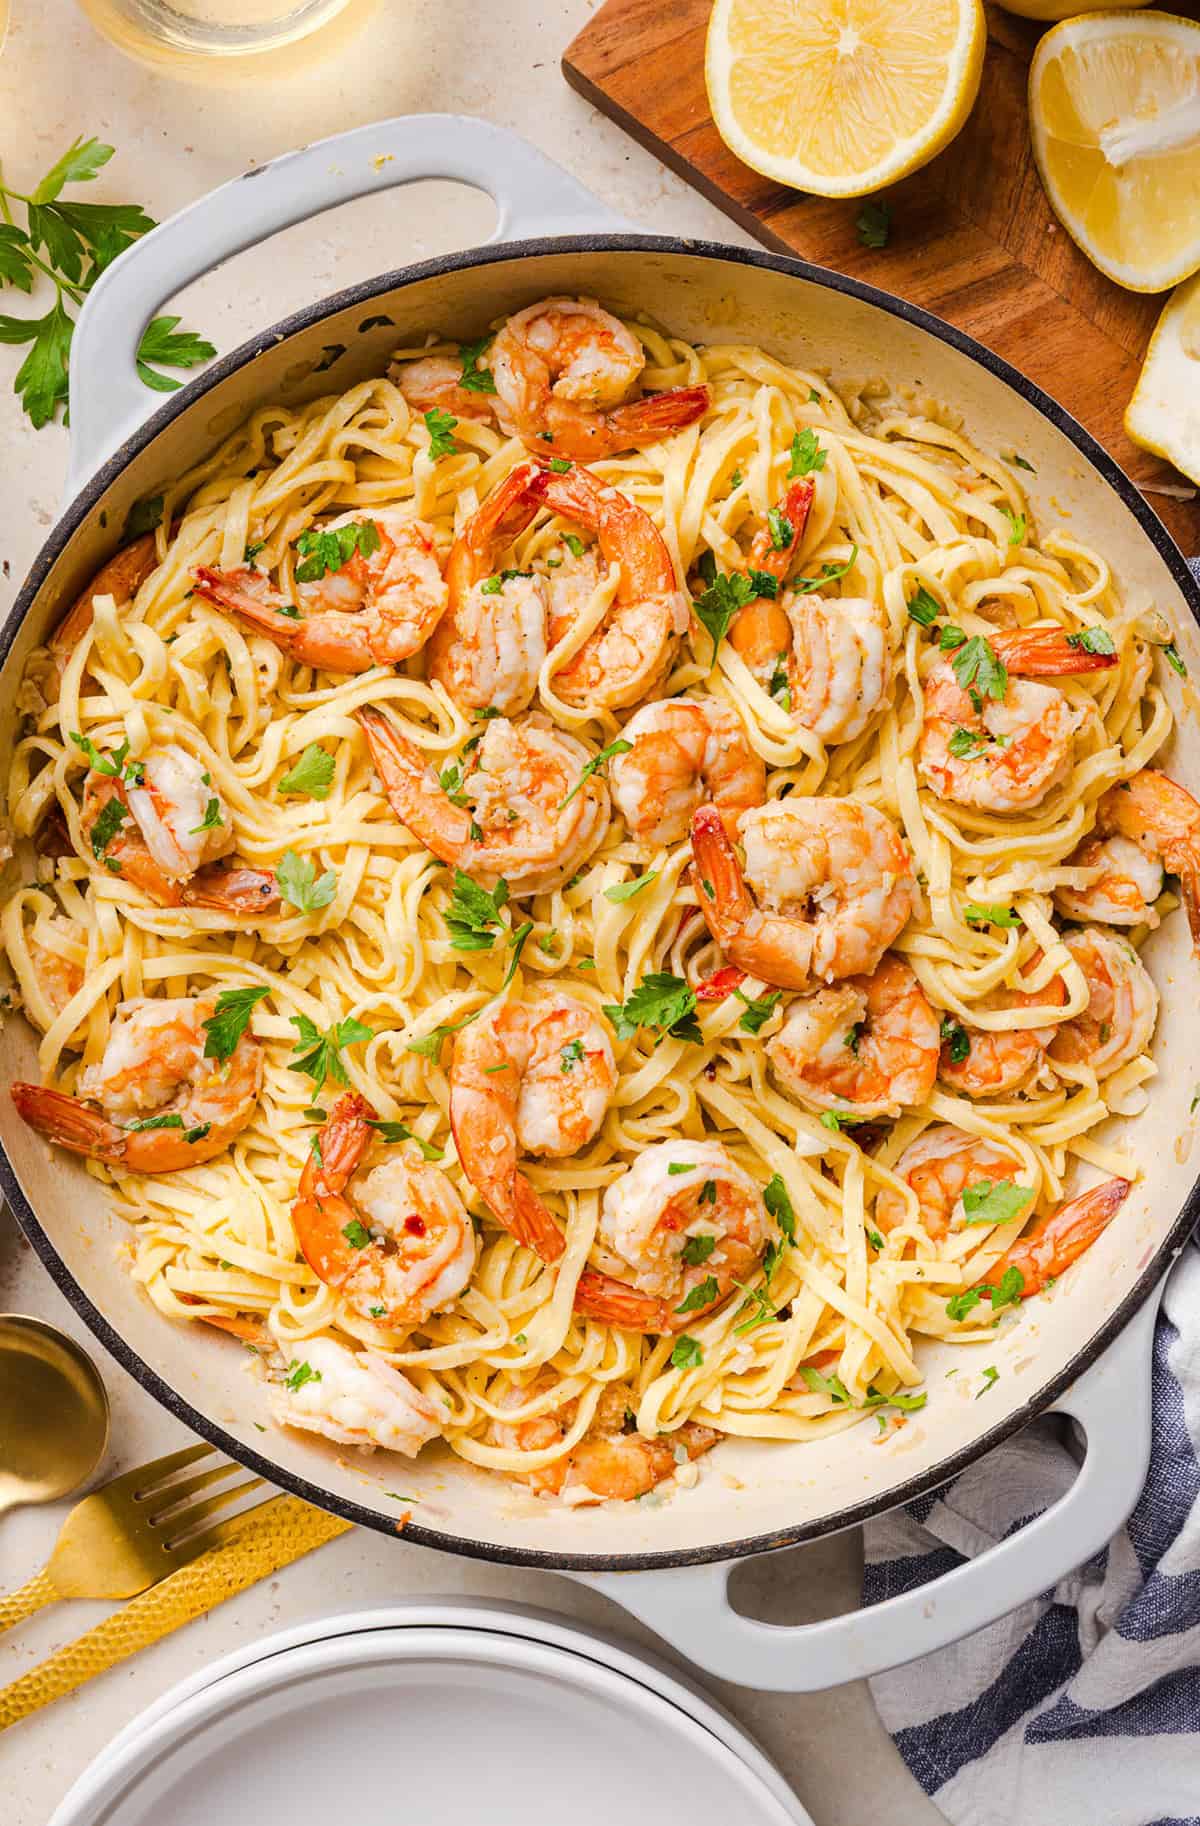
The BEST Healthy Shrimp Scampi recipe lightened up without sacrificing flavor! Juicy shrimp, garlic, lemon, white wine, and Parmesan are tossed with tender linguine in a silky, buttery sauce that’s ready in just 30 minutes.

The BEST Healthy Shrimp Scampi recipe lightened up without sacrificing flavor! Juicy shrimp, garlic, lemon, white wine, and Parmesan are tossed with tender linguine in a silky, buttery sauce that’s ready in under 30 minutes.

The BEST Healthy Shrimp Scampi recipe lightened up without sacrificing flavor! Juicy shrimp, garlic, lemon, white wine, and Parmesan are tossed with tender linguine in a silky, buttery sauce that’s ready in just 30 minutes.
Want to save this recipe?
Just enter your email and get it sent to your inbox! Plus you’ll get new recipes from us every week!

Please enable JavaScript in your browser to complete this form.

Please enable JavaScript in your browser to complete this form.

Loading

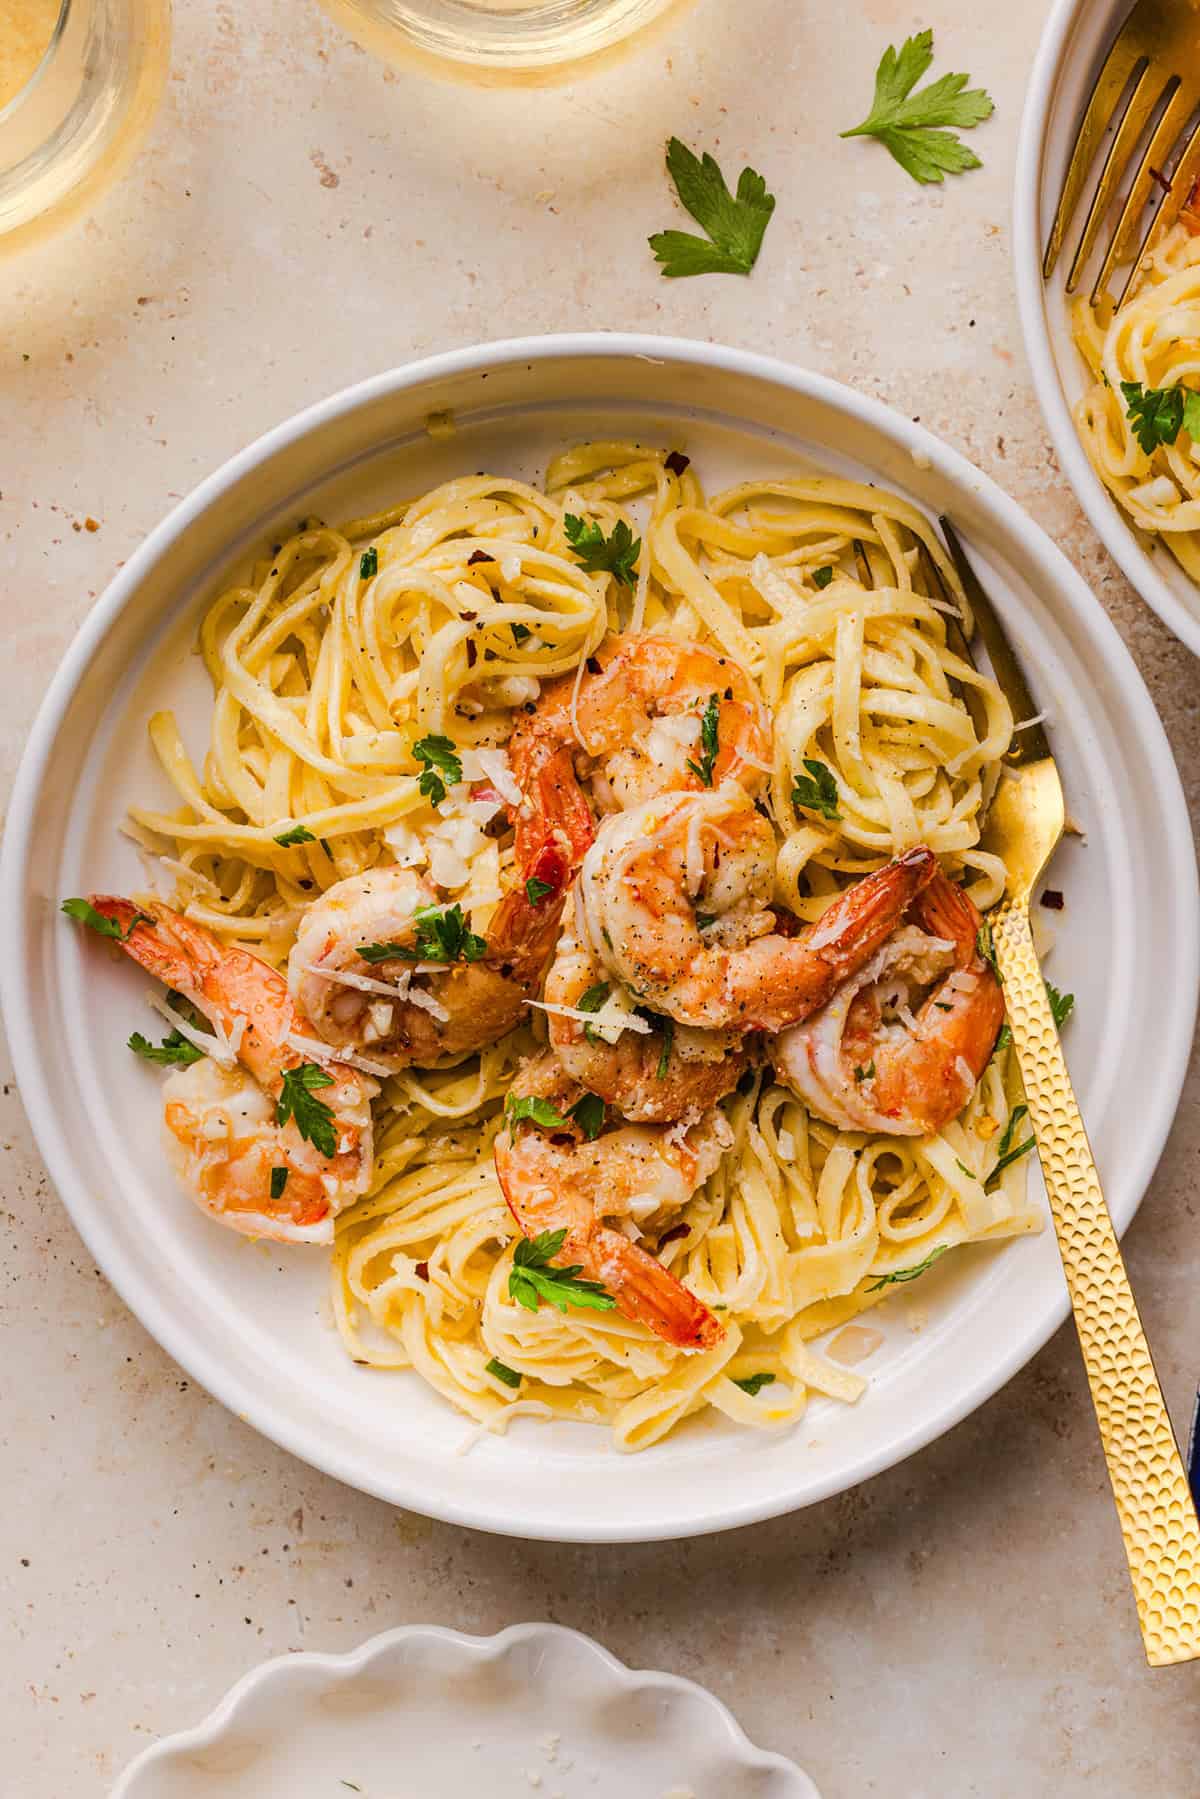
If you’re looking for a restaurant-quality dinner that’s surprisingly easy to make at home, this Healthy Shrimp Scampi is about to become a new favorite. Tender, juicy shrimp are sautéed with lots of garlic, shallots, fresh lemon, herbs, and just enough butter to create a rich, silky sauce without feeling heavy. Toss everything together with perfectly cooked linguine, a sprinkle of Parmesan, and fresh parsley for an elegant meal that’s ready in about 30 minutes.

Traditional shrimp scampi is often loaded with lots of butter, but this healthier version keeps all of the classic flavors you love while using a lighter combination of olive oil, less butter, and fresh ingredients that let the shrimp truly shine. Shrimp are also naturally low in calories and high in protein so they really make this a balanced dinner the whole family will love.

Why You’ll Love This

  • Quick and easy – this whole entire meal easily comes together in just 30 minutes making it fancy enough for entertaining, but convenient for those busy weeknights.
  • Healthier – packed with lean protein from the shrimp, fiber-rich whole wheat linguine, less butter, and fresh ingredients for a lighter take on the classic dish.
  • Packed with flavor – garlic, shallots, fresh lemon juice, lemon zest, parsley, Parmesan, and white wine create layers of bright, fresh flavor in every bite.
  • Customizable – add fresh vegetables, swap the pasta, adjust the spice level, or make it gluten-free with just a few simple changes.
  • Great for entertaining –  this skinny shrimp scampi recipe is elegant enough for guests yet simple enough that you won’t be stuck in the kitchen all evening.
The BEST Healthy Shrimp Scampi recipe lightened up without sacrificing flavor! Juicy shrimp, garlic, lemon, white wine, and Parmesan are tossed with tender linguine in a silky, buttery sauce that’s ready in just 30 minutes.

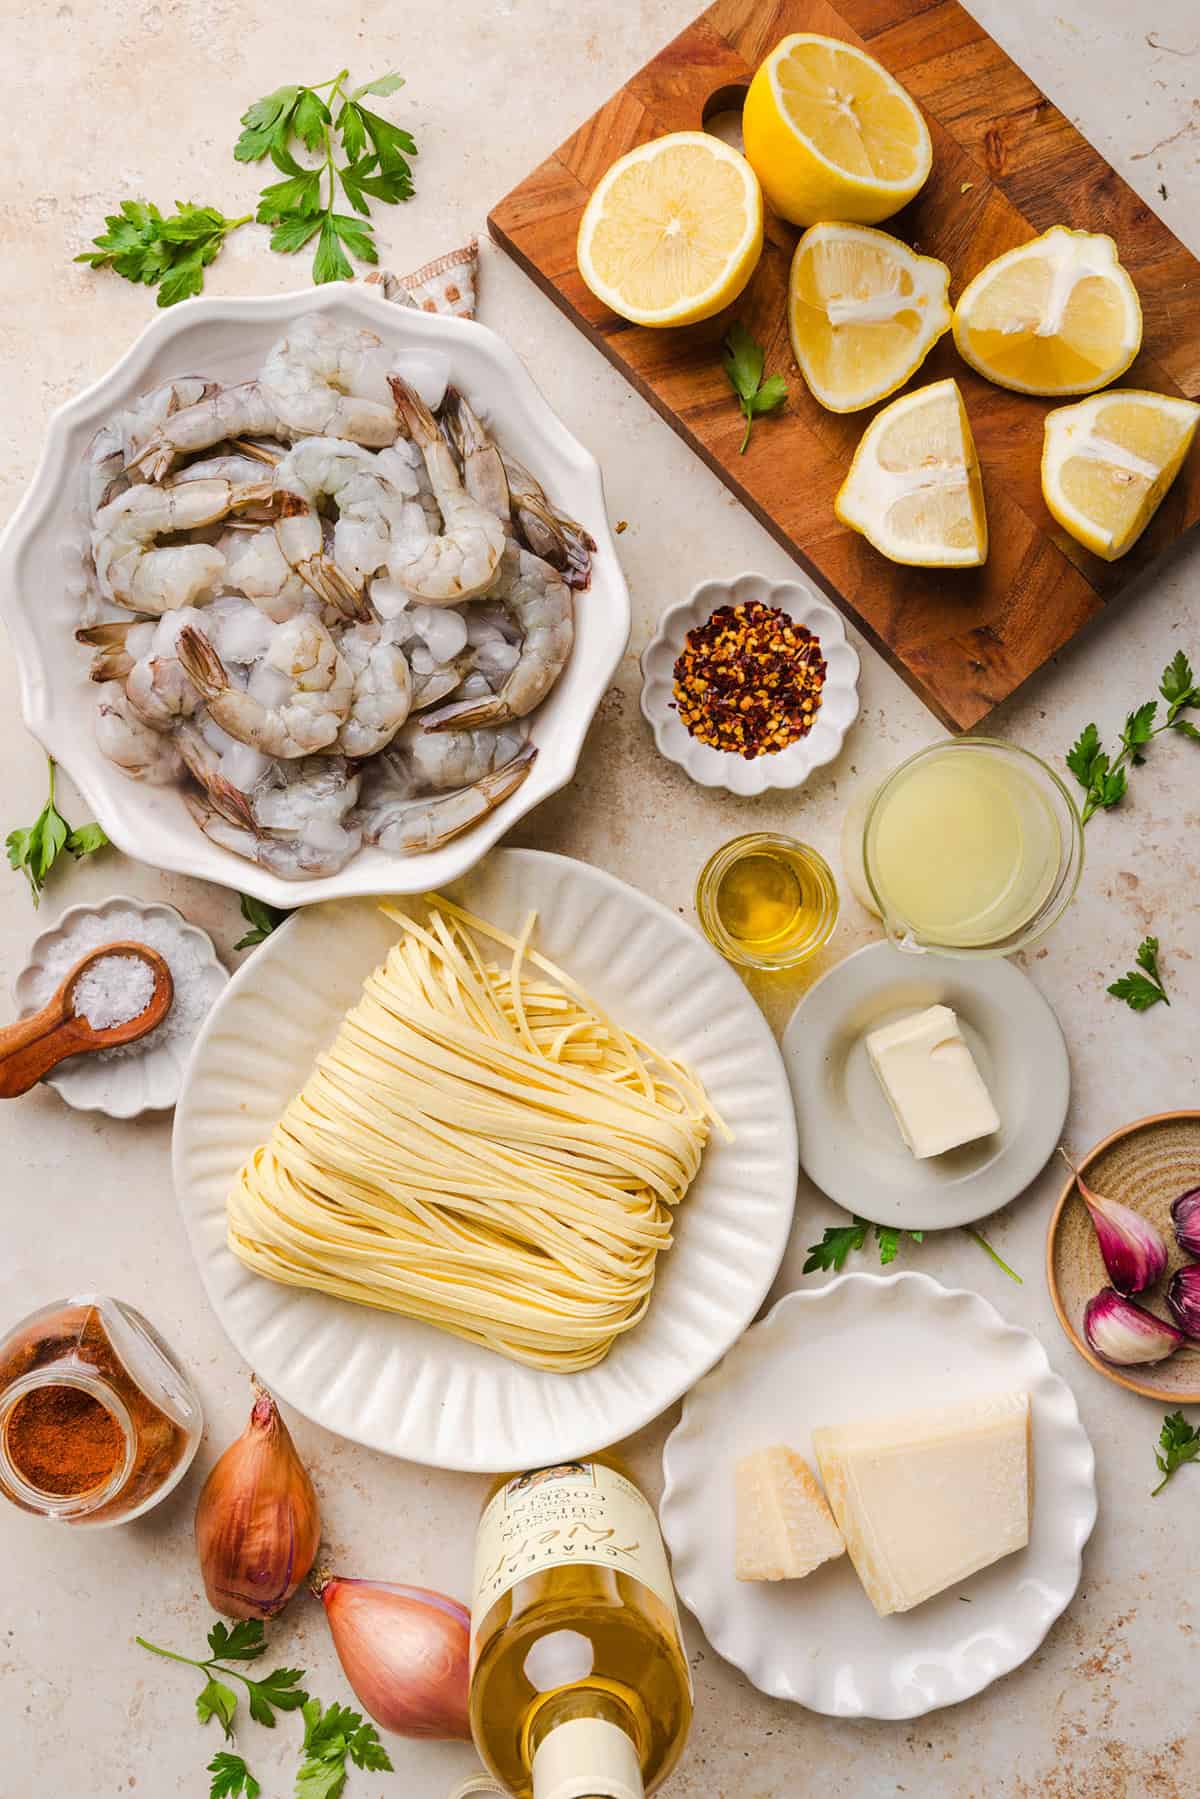
Ingredients You’ll Need

  • shrimp – large shrimp cook quickly while staying juicy and tender. Buy peeled and deveined shrimp to save prep time. Fresh shrimp or frozen shrimp both work great, just thaw frozen shrimp completely before cooking.
  • linguine – I used whole wheat linguine, but you could use spaghetti, angel hair, fettuccine, or you could even use zucchini noodles to keep this low in carbs.
  • olive oil + butter – using both olive oil and butter gives you the best of both worlds. Olive oil keeps the dish lighter while butter adds the rich flavor that makes shrimp scampi so irresistible.
  • shallots – provide a delicate sweetness that’s milder than onions and pairs perfectly with seafood.
  • garlic – fresh garlic is essential here. Since garlic is the star flavor of shrimp scampi, freshly minced cloves provide the boldest flavor.
  • chicken broth – adds depth while helping create a silky sauce without relying entirely on butter. You could also use chicken stock or vegetable broth.
  • dry white wine – a dry white wine such as Sauvignon Blanc, Pinot Grigio, or Chardonnay adds acidity and complexity that balances the richness of the butter.
  • fresh lemon – you’ll use both the zest and juice to brighten the entire dish. Fresh lemon makes all the difference!
  • parmesan cheese – freshly grated Parmesan melts perfectly into the sauce and adds a subtle salty, nutty flavor.
  • fresh parsley –  chopped fresh parsley adds color, freshness, and the perfect finishing touch. You could also add in other herbs such as fresh thyme
  • red pepper flakes – just enough chili flakes to give the sauce a subtle kick without making it overly spicy.
  • salt + black pepper – needed to season the shrimp and enhance all the flavors.
The BEST Healthy Shrimp Scampi recipe lightened up without sacrificing flavor! Juicy shrimp, garlic, lemon, white wine, and Parmesan are tossed with tender linguine in a silky, buttery sauce that’s ready in just 30 minutes.

How to Make Healthy Shrimp Scampi

  1. Cook the pasta. Bring a large pot of salted water to a boil and cook the linguine until al dente according to the package directions. Before draining, reserve ½ cup of the pasta water to help create a silky sauce later.
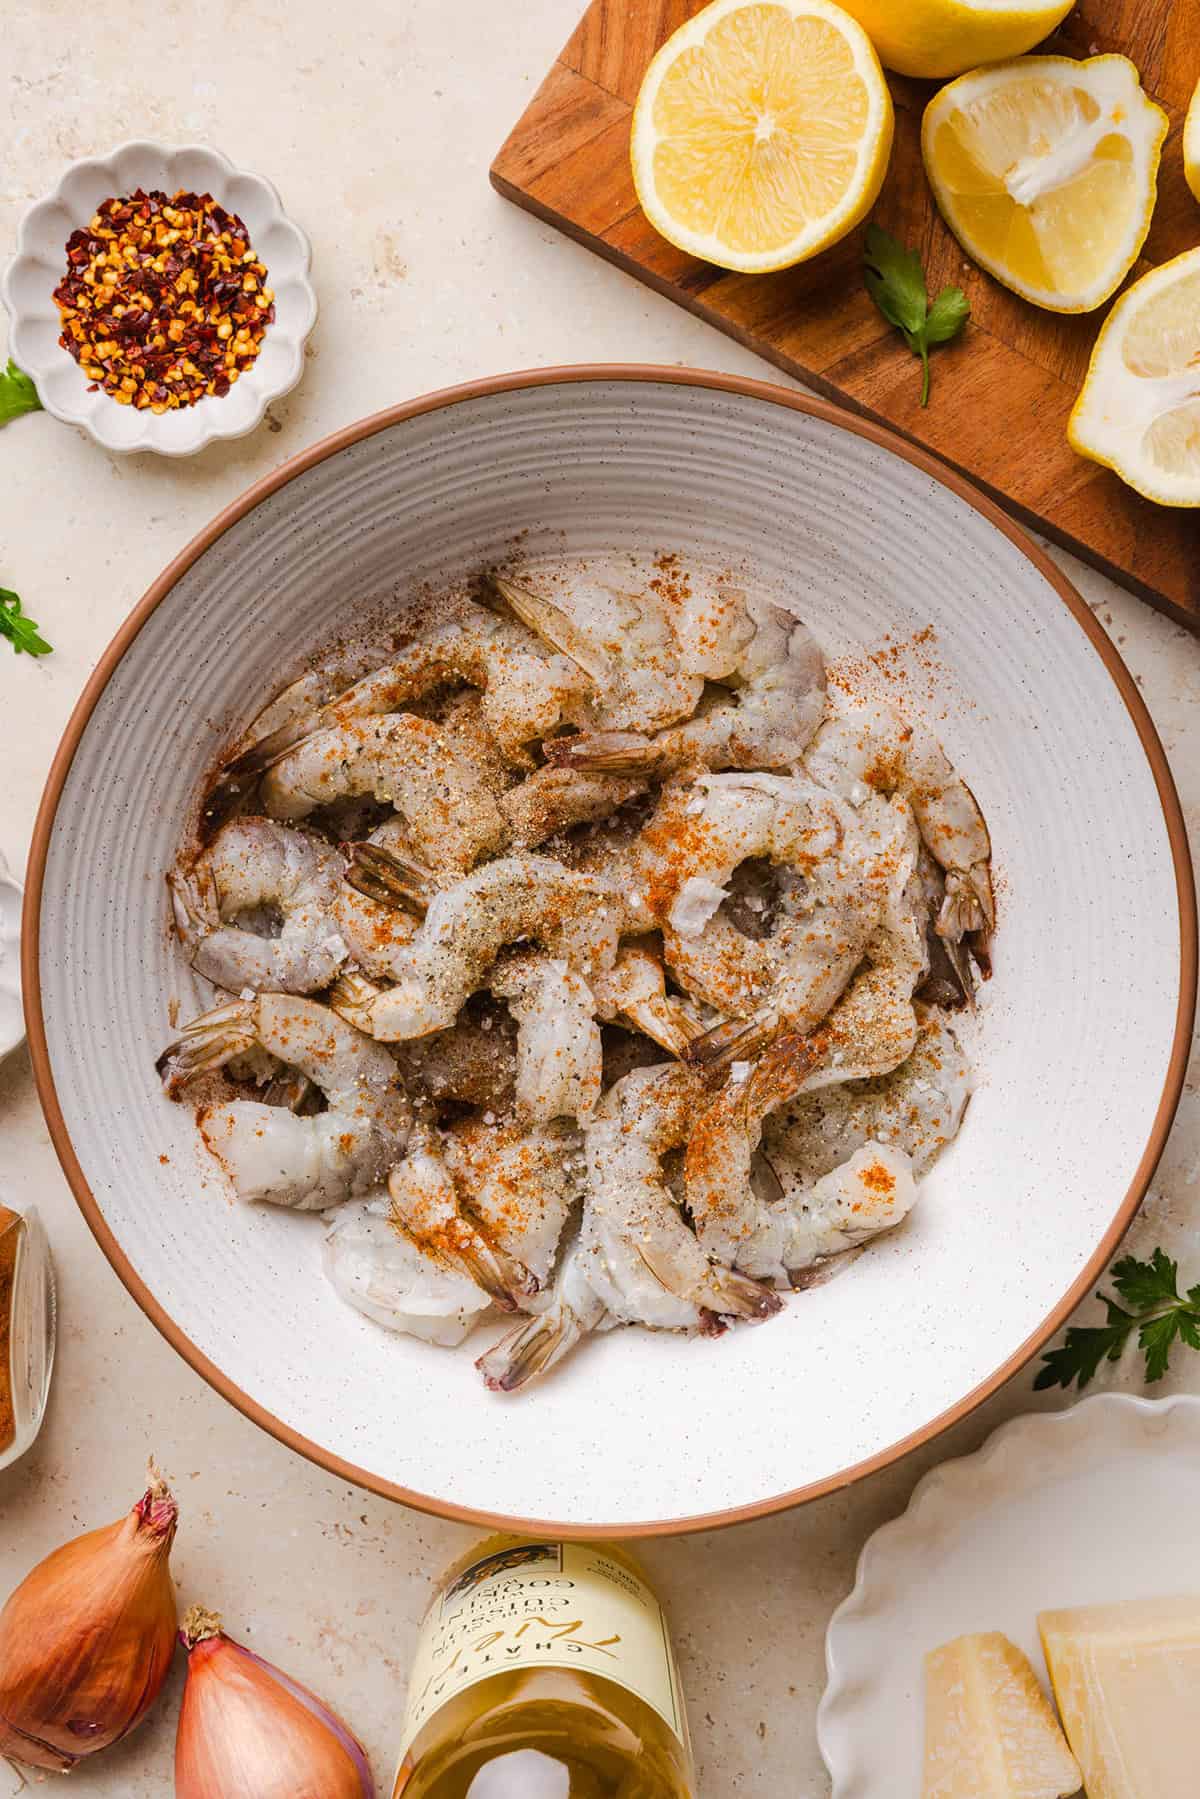
  2. Season the shrimp. Pat the shrimp dry with paper towels, then season both sides with the salt, pepper, and paprika. Dry shrimp sear better and develop more flavor.
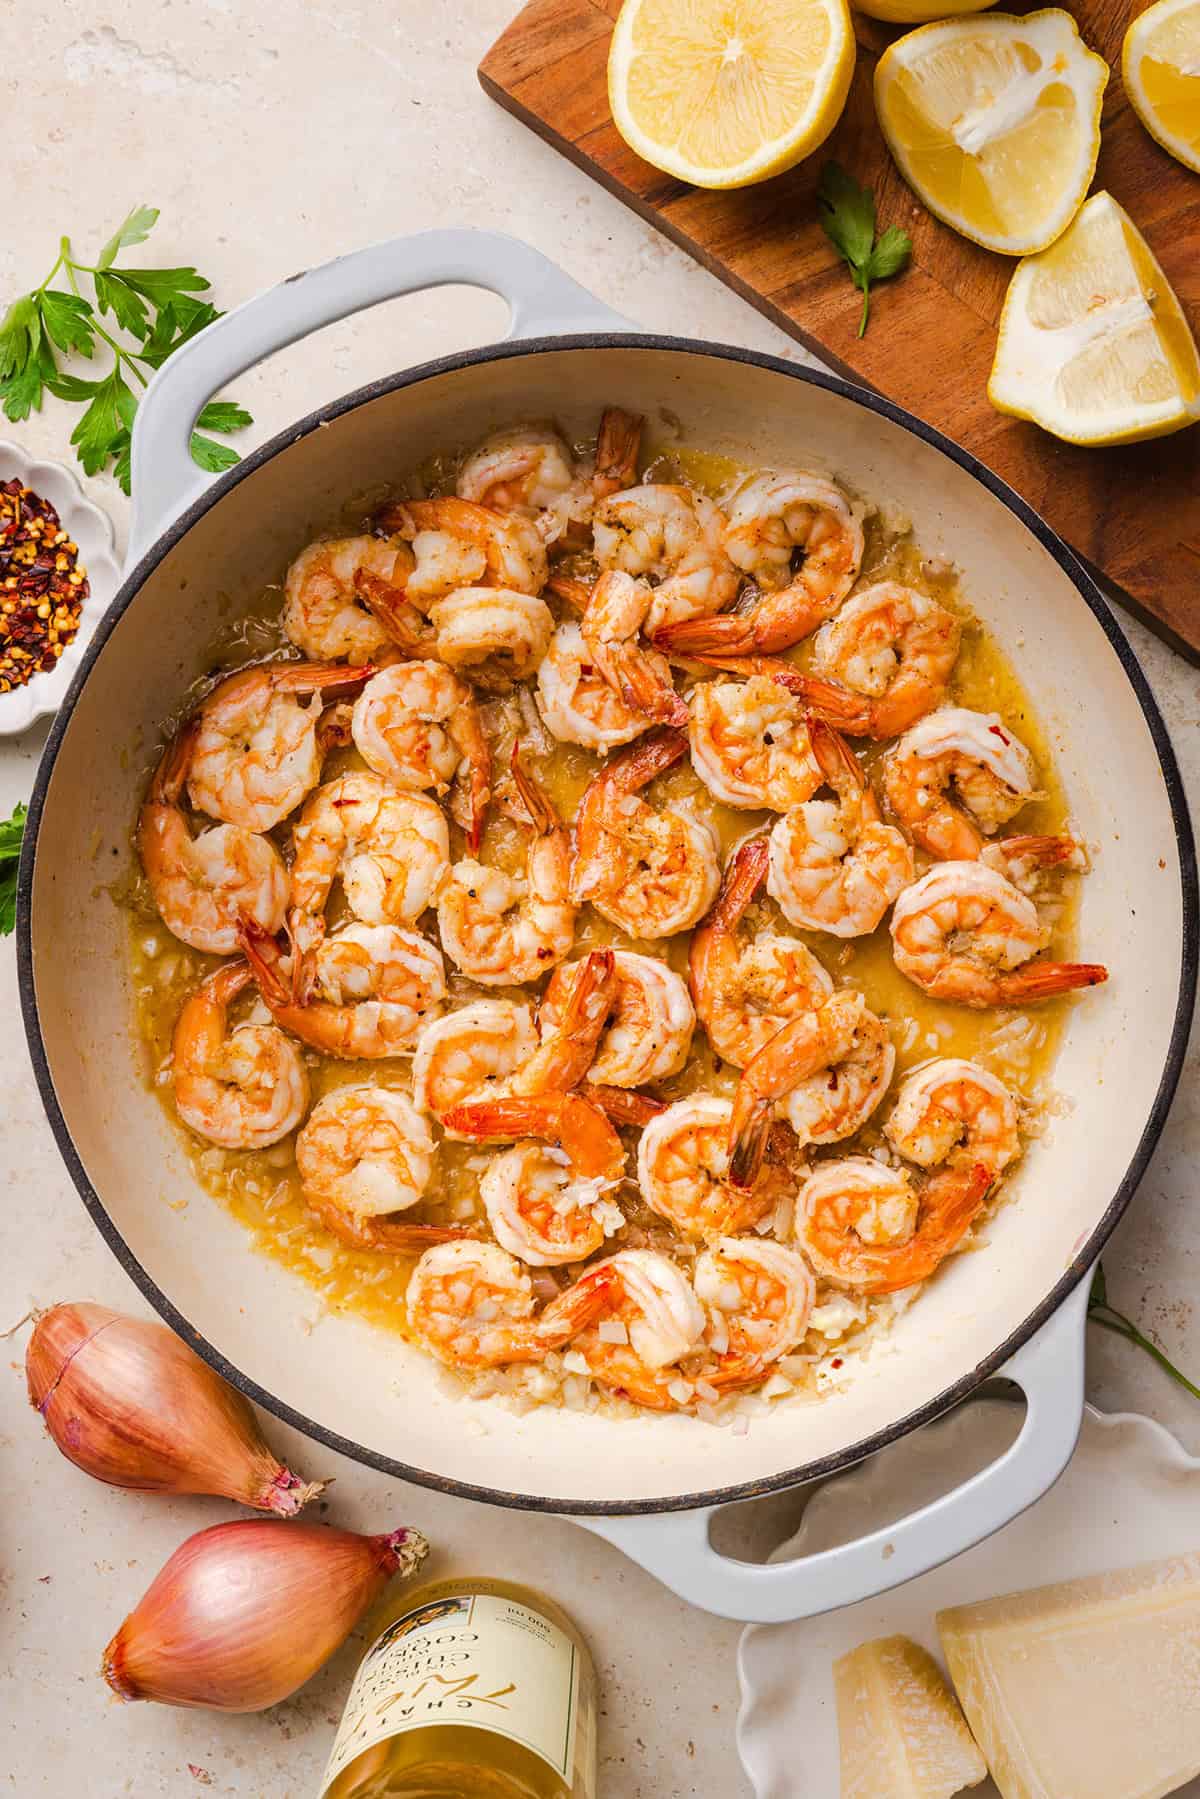
  3. Sauté the shallots and garlic. Heat the olive oil and butter in a large skillet over medium heat. Add the shallots and cook for 2-3 minutes until softened, then stir in the garlic and crushed red pepper flakes and cook for another 30 seconds until fragrant.
  4. Cook the shrimp. Add the shrimp in a single layer and cook on medium-high heat for 1-2 minutes per side, just until pink and opaque. Transfer the shrimp to a plate to prevent overcooking.
  5. Make the sauce. Pour in the chicken broth, white wine, lemon juice, and lemon zest, scraping up any browned bits from the bottom of the skillet. Let the sauce simmer for 2 to 3 minutes until slightly reduced.
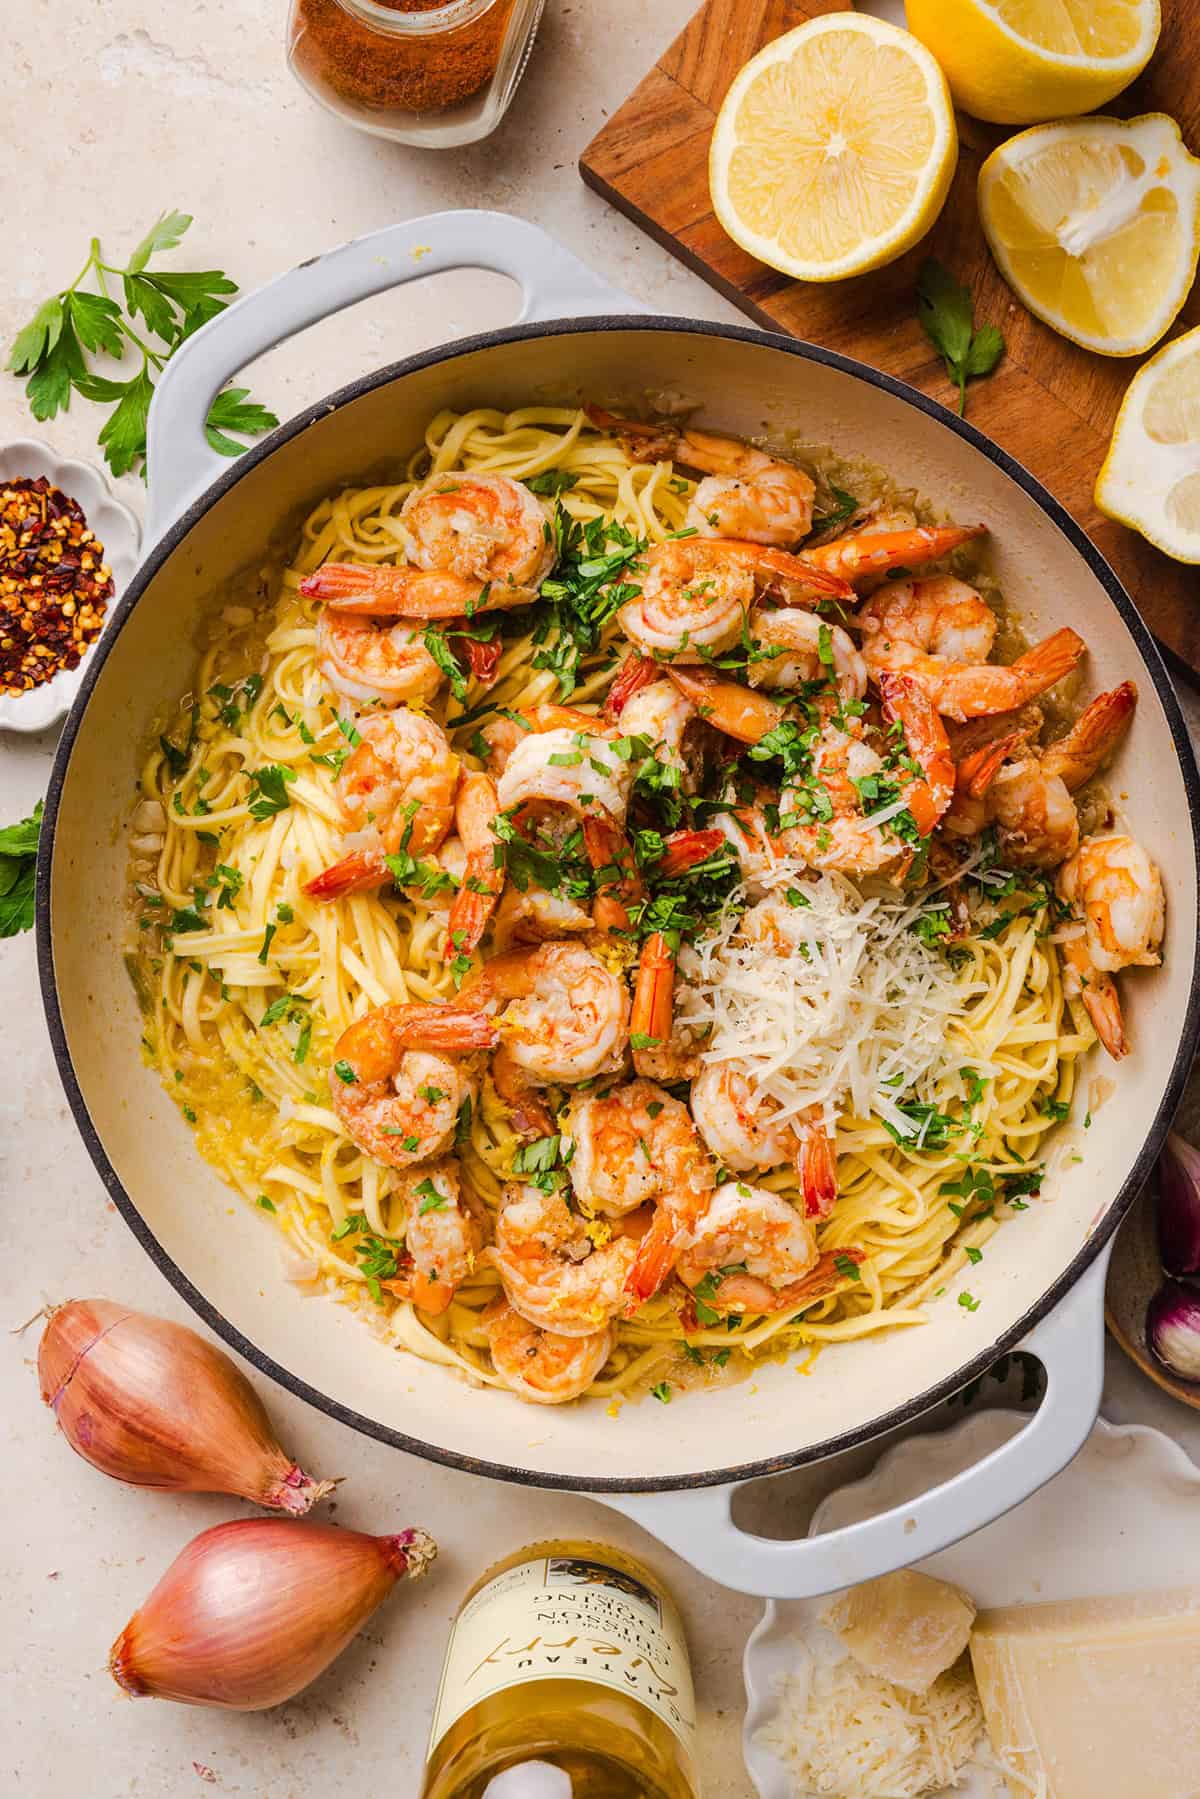
  6. Toss everything together. Return the shrimp to the skillet along with the cooked pasta. Toss everything together, adding a little reserved pasta water as needed until the sauce lightly coats the pasta.
  7. Finish and serve. Stir in the Parmesan cheese and fresh parsley, then taste and adjust the seasoning with additional salt, pepper, or lemon juice if needed. Serve immediately with extra Parmesan, parsley, and fresh lemon wedges.
The BEST Healthy Shrimp Scampi recipe lightened up without sacrificing flavor! Juicy shrimp, garlic, lemon, white wine, and Parmesan are tossed with tender linguine in a silky, buttery sauce that’s ready in just 30 minutes.

Tips for the Best Healthy Shrimp Scampi

  • Pat the shrimp dry before cooking – excess moisture prevents the shrimp from searing properly and can water down the sauce.
  • Don’t overcook the shrimp – shrimp cook incredibly fast. As soon as they turn pink and curl into a loose “C” shape, they’re done. Overcooked shrimp become rubbery.
  • Reserve plenty of pasta water – the starchy pasta water is the secret to creating a silky, restaurant-quality sauce that perfectly coats the noodles.
  • Use freshly minced garlic – jarred garlic won’t provide the same bold, fresh flavor that makes shrimp scampi so delicious.
  • Fresh lemon is a must – both the juice and zest add brightness that bottled lemon juice simply can’t replicate.
  • Grate your own Parmesan – freshly grated Parmesan melts smoothly into the sauce, while pre-shredded cheese can leave it grainy.
  • Cook the pasta just until al dente – the noodles will continue cooking slightly when tossed with the hot sauce.
  • Choose quality shrimp – wild-caught shrimp often have the best flavor, but any good-quality shrimp will work well.
  • Simmer the sauce gently – a gentle simmer allows the wine to reduce while keeping the sauce light and balanced.
  • Serve immediately – shrimp scampi is at its absolute best fresh off the stove while the sauce is silky and the shrimp are perfectly tender.
The BEST Healthy Shrimp Scampi recipe lightened up without sacrificing flavor! Juicy shrimp, garlic, lemon, white wine, and Parmesan are tossed with tender linguine in a silky, buttery sauce that’s ready in just 30 minutes.

Variations and Substitutions

  • Make it gluten-free – to make this gluten-free, you can easily substitute your favorite gluten-free pasta.
  • Use zucchini noodles – for a lower-carb option that is more veggie forward, replace all or half of the linguine with zucchini noodles using a spiralizer.
  • Add veggies – stir in fresh spinach, asparagus, cherry tomatoes, broccoli, zucchini, peas, or mushrooms for extra nutrition and color.

  • Swap the protein – scallops, chicken breast, salmon, or even chunks of lobster work beautifully with this same garlic lemon sauce.
  • Skip the wine – some people don’t like to cook with alcohol so feel free to replace the white wine with additional chicken broth plus an extra squeeze of lemon juice.
  • Increase the heat – add extra crushed red pepper flakes or a pinch of cayenne for a spicier version.
  • Try fresh herbs – basil, chives, thyme, or oregano all pair nicely with the garlic lemon flavors.
The BEST Healthy Shrimp Scampi recipe lightened up without sacrificing flavor! Juicy shrimp, garlic, lemon, white wine, and Parmesan are tossed with tender linguine in a silky, buttery sauce that’s ready in just 30 minutes.

What to Serve with Healthy Shrimp Scampi

The BEST Healthy Shrimp Scampi recipe lightened up without sacrificing flavor! Juicy shrimp, garlic, lemon, white wine, and Parmesan are tossed with tender linguine in a silky, buttery sauce that’s ready in just 30 minutes.

Frequently Asked Questions

Can I use frozen shrimp?

Absolutely! Frozen shrimp work perfectly. Just thaw them completely in the refrigerator overnight or under cold running water, then pat them dry before cooking.

Can I make shrimp scampi without wine?

Yes! Simply replace the wine with additional chicken broth. Adding an extra tablespoon of fresh lemon juice helps recreate some of the brightness that wine provides.

How do I know when shrimp are fully cooked?

Shrimp are done when they turn opaque and pink and curl into a loose “C” shape. This usually takes only 1 to 2 minutes per side depending on their size.

Can I use pre-cooked shrimp?

You can, but raw shrimp produce the best flavor and texture. If using cooked shrimp, add them at the very end just long enough to warm through so they don’t become tough.

Can I make this dairy-free?

Yes! Replace the butter with additional olive oil and simply omit the Parmesan cheese or use your favorite dairy-free alternative.

What is the best pasta for shrimp scampi?

Linguine is the traditional choice because it holds onto the silky sauce beautifully, but spaghetti, angel hair pasta, fettuccine, or even orzo all work well.

Can I add vegetables?

Definitely! Spinach, asparagus, broccoli, peas, zucchini, mushrooms, and cherry tomatoes all make wonderful additions.

Why is my sauce watery?

The sauce likely didn’t reduce long enough, or too much pasta water was added. Simmer the sauce for a few minutes before adding the pasta, then stir in the reserved pasta water gradually until you reach the desired consistency.

Can I make this ahead of time?

Shrimp scampi is best enjoyed fresh since shrimp cook so quickly. However, you can prep the ingredients ahead of time so dinner comes together in minutes.

The BEST Healthy Shrimp Scampi recipe lightened up without sacrificing flavor! Juicy shrimp, garlic, lemon, white wine, and Parmesan are tossed with tender linguine in a silky, buttery sauce that’s ready in just 30 minutes.

Prepping and Storage

  • To Store: Leftovers can be stored in a sealed, airtight container in the refrigerator for up to 3 days.
  • To Reheat: Warm gently in a skillet over medium-low heat with a splash of chicken broth or water to loosen the sauce. Avoid overheating, as shrimp can become rubbery.
  • To Freeze: While you can freeze shrimp scampi for up to 2 months, the pasta may soften after thawing. For best results, freeze only the shrimp and sauce, then prepare fresh pasta when ready to serve.

More Healthy Shrimp Recipes

More Easy One Pan Recipes

Hope you all enjoy this Easy Healthy Shrimp Scampi! If you love this recipe as much as we do, please leave a ⭐⭐⭐⭐⭐ star rating below and don’t forget to tag me on Instagram using the hashtag #eatyourselfskinny!

The BEST Healthy Shrimp Scampi recipe lightened up without sacrificing flavor! Juicy shrimp, garlic, lemon, white wine, and Parmesan are tossed with tender linguine in a silky, buttery sauce that’s ready in just 30 minutes.

Print

Healthy Shrimp Scampi

#wprm-recipe-user-rating-0 .wprm-rating-star.wprm-rating-star-full svg * { fill: #343434; }#wprm-recipe-user-rating-0 .wprm-rating-star.wprm-rating-star-33 svg * { fill: url(#wprm-recipe-user-rating-0-33); }#wprm-recipe-user-rating-0 .wprm-rating-star.wprm-rating-star-50 svg * { fill: url(#wprm-recipe-user-rating-0-50); }#wprm-recipe-user-rating-0 .wprm-rating-star.wprm-rating-star-66 svg * { fill: url(#wprm-recipe-user-rating-0-66); }linearGradient#wprm-recipe-user-rating-0-33 stop { stop-color: #343434; }linearGradient#wprm-recipe-user-rating-0-50 stop { stop-color: #343434; }linearGradient#wprm-recipe-user-rating-0-66 stop { stop-color: #343434; }

The BEST Healthy Shrimp Scampi recipe lightened up without sacrificing flavor! Juicy shrimp, garlic, lemon, white wine, and Parmesan are tossed with tender linguine in a silky, buttery sauce that’s ready in under 30 minutes.
Course Main Course
Cuisine American, Italian
Keyword Healthy Shrimp Scampi
Prep Time 15 minutes
Cook Time 15 minutes
Total Time 30 minutes
Servings 6
Calories 425kcal

Ingredients

  • 12 oz linguine noodles
  • 1 1/2 lbs large shrimp peeled and deveined
  • 1/2 tsp each salt + pepper
  • 1/4 tsp paprika
  • 3 Tbsp salted butter
  • 2 Tbsp olive oil
  • 2 medium shallots finely shopped
  • 6 cloves garlic minced
  • 1/2 tsp crushed red pepper flakes
  • 1/3 cup chicken broth
  • 1/4 cup dry white wine
  • 1 large lemon, juice + zest (about 3 Tbsp juice)
  • 2 Tbsp fresh parsley finely chopped
  • 2 Tbsp freshly grated parmesan cheese

Instructions

  • Cook the pasta. Bring a large pot of salted water to a boil and cook the linguine until al dente according to the package directions. Before draining, reserve ½ cup of the pasta water to help create a silky sauce later.
  • Season the shrimp. Pat the shrimp dry with paper towels, then season both sides with the salt, pepper, and paprika. Dry shrimp sear better and develop more flavor.
  • Sauté the shallots and garlic. Heat the olive oil and butter in a large skillet over medium heat. Add the shallots and cook for 2-3 minutes until softened, then stir in the garlic and crushed red pepper flakes and cook for another 30 seconds until fragrant.
  • Cook the shrimp. Add the shrimp in a single layer and cook for 1-2 minutes per side, just until pink and opaque. Transfer the shrimp to a plate to prevent overcooking.
  • Make the sauce. Pour in the chicken broth, white wine, lemon juice, and lemon zest, scraping up any browned bits from the bottom of the skillet. Let the sauce simmer for 2 to 3 minutes until slightly reduced.
  • Toss everything together. Return the shrimp to the skillet along with the cooked linguine. Toss everything together, adding a little reserved pasta water as needed until the sauce lightly coats the pasta.
  • Finish and serve. Stir in the Parmesan cheese and fresh parsley, then taste and adjust the seasoning with additional salt, pepper, or lemon juice if needed. Serve immediately with extra Parmesan, parsley, and fresh lemon wedges.

Nutrition
Serving: 1/6th of recipe | Calories: 425kcal | Carbohydrates: 36g | Protein: 34g | Fat: 15g | Saturated Fat: 4g | Cholesterol: 235mg | Sodium: 520mg | Fiber: 6g | Sugar: 3g