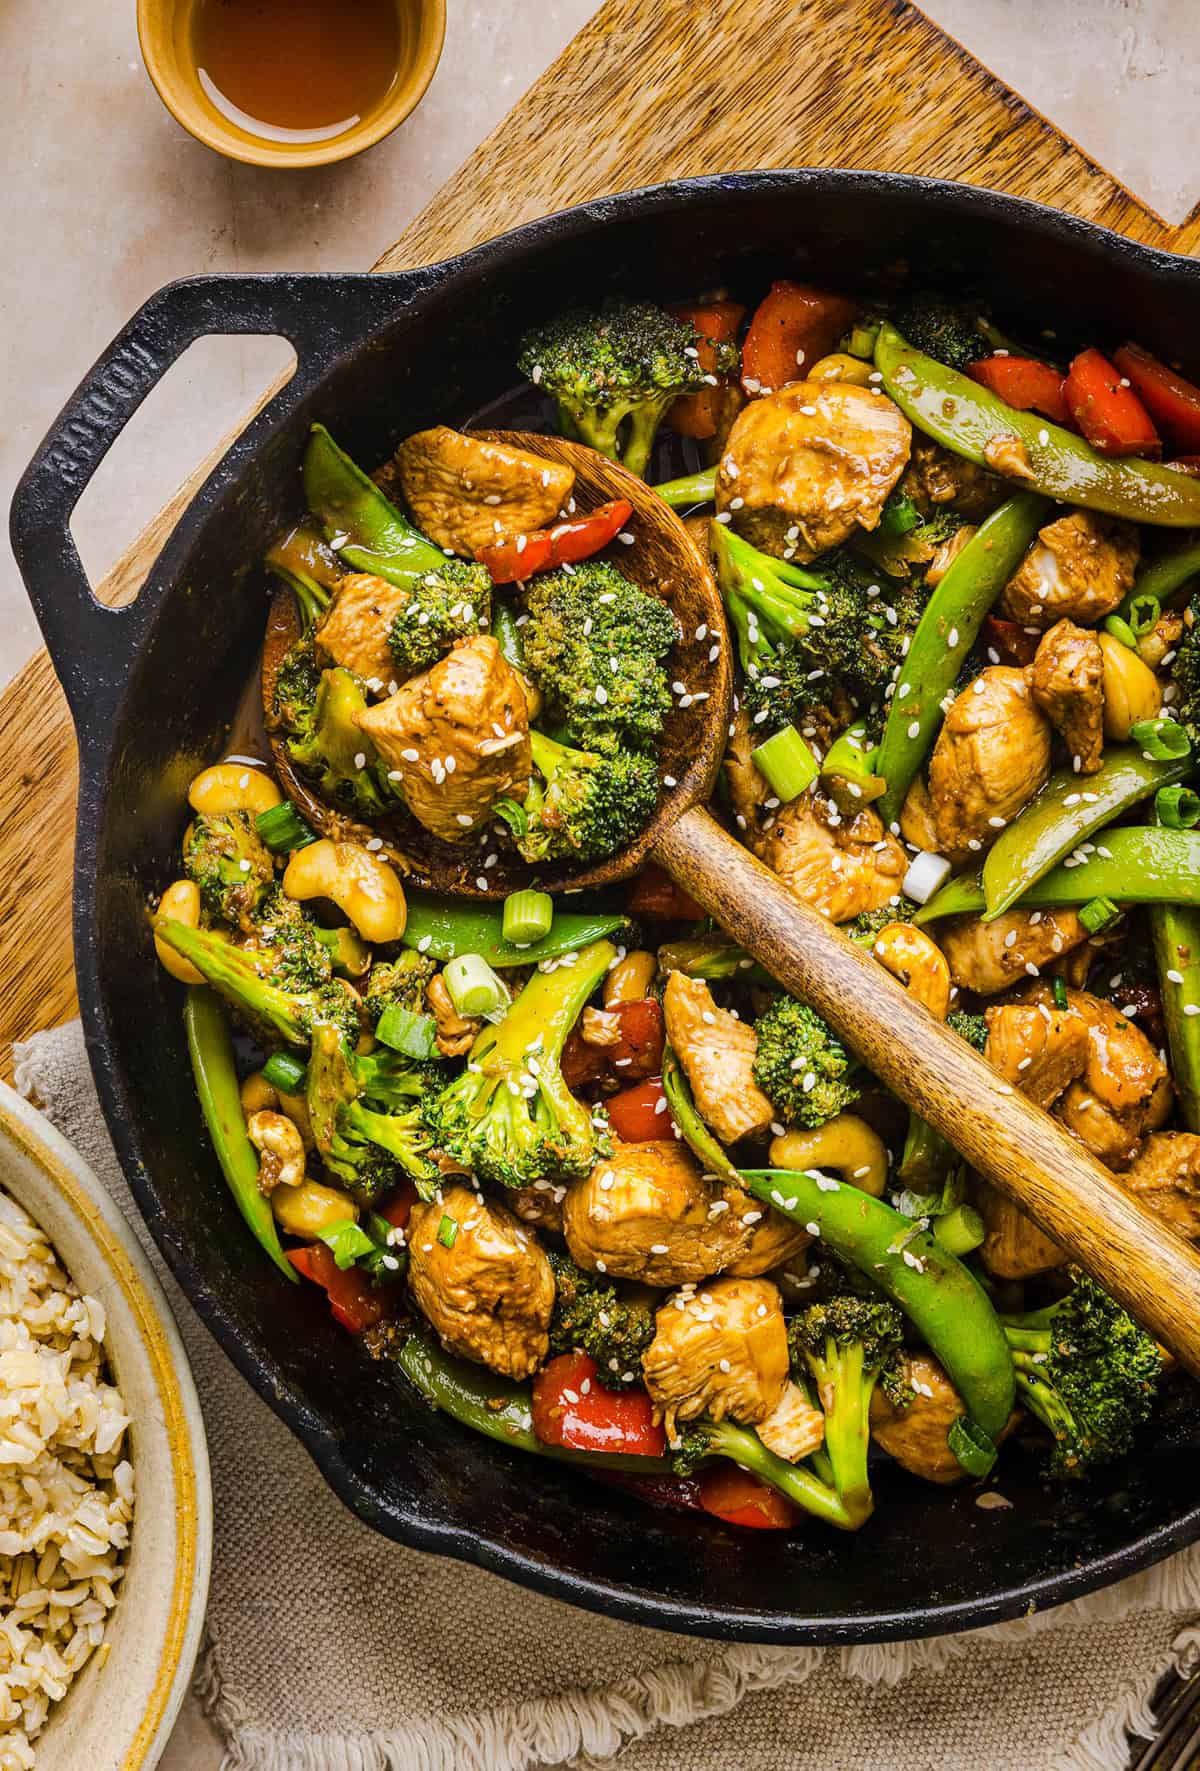
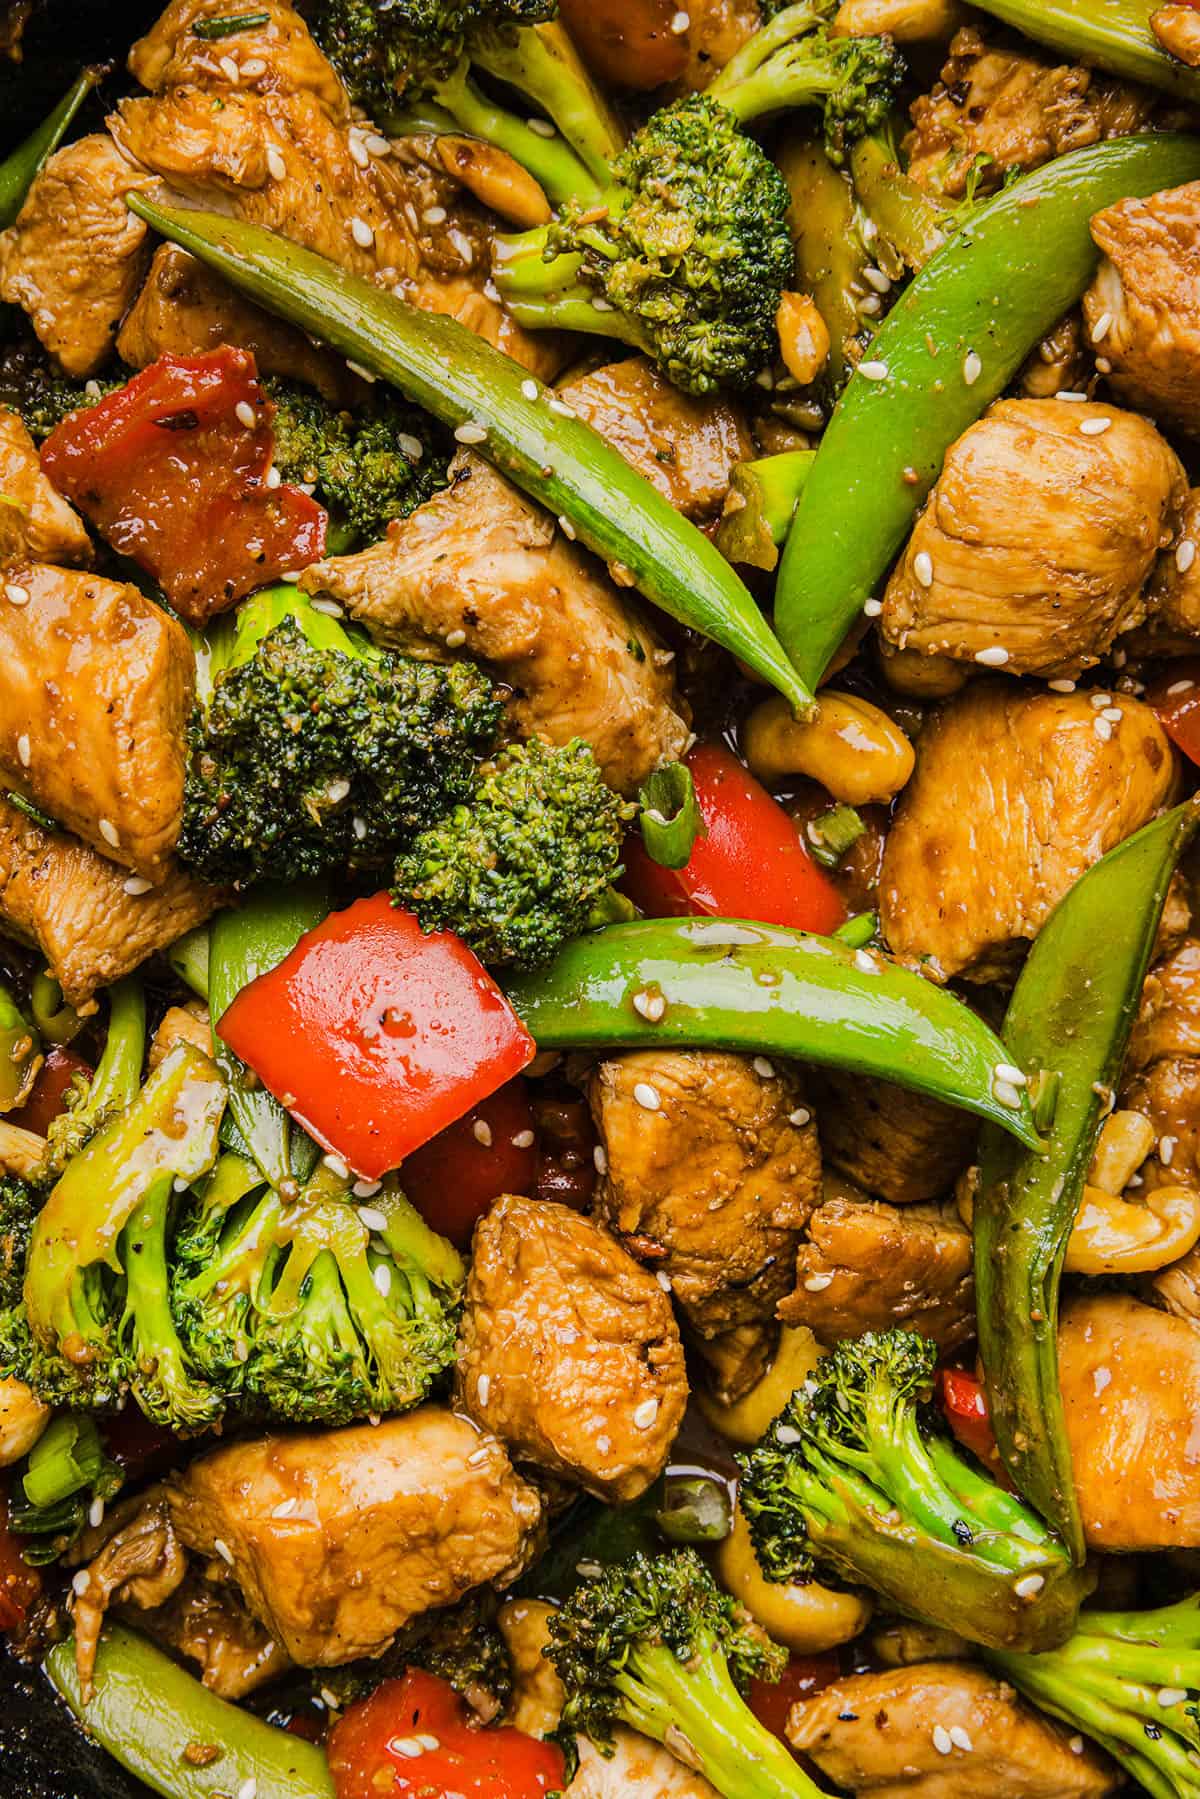
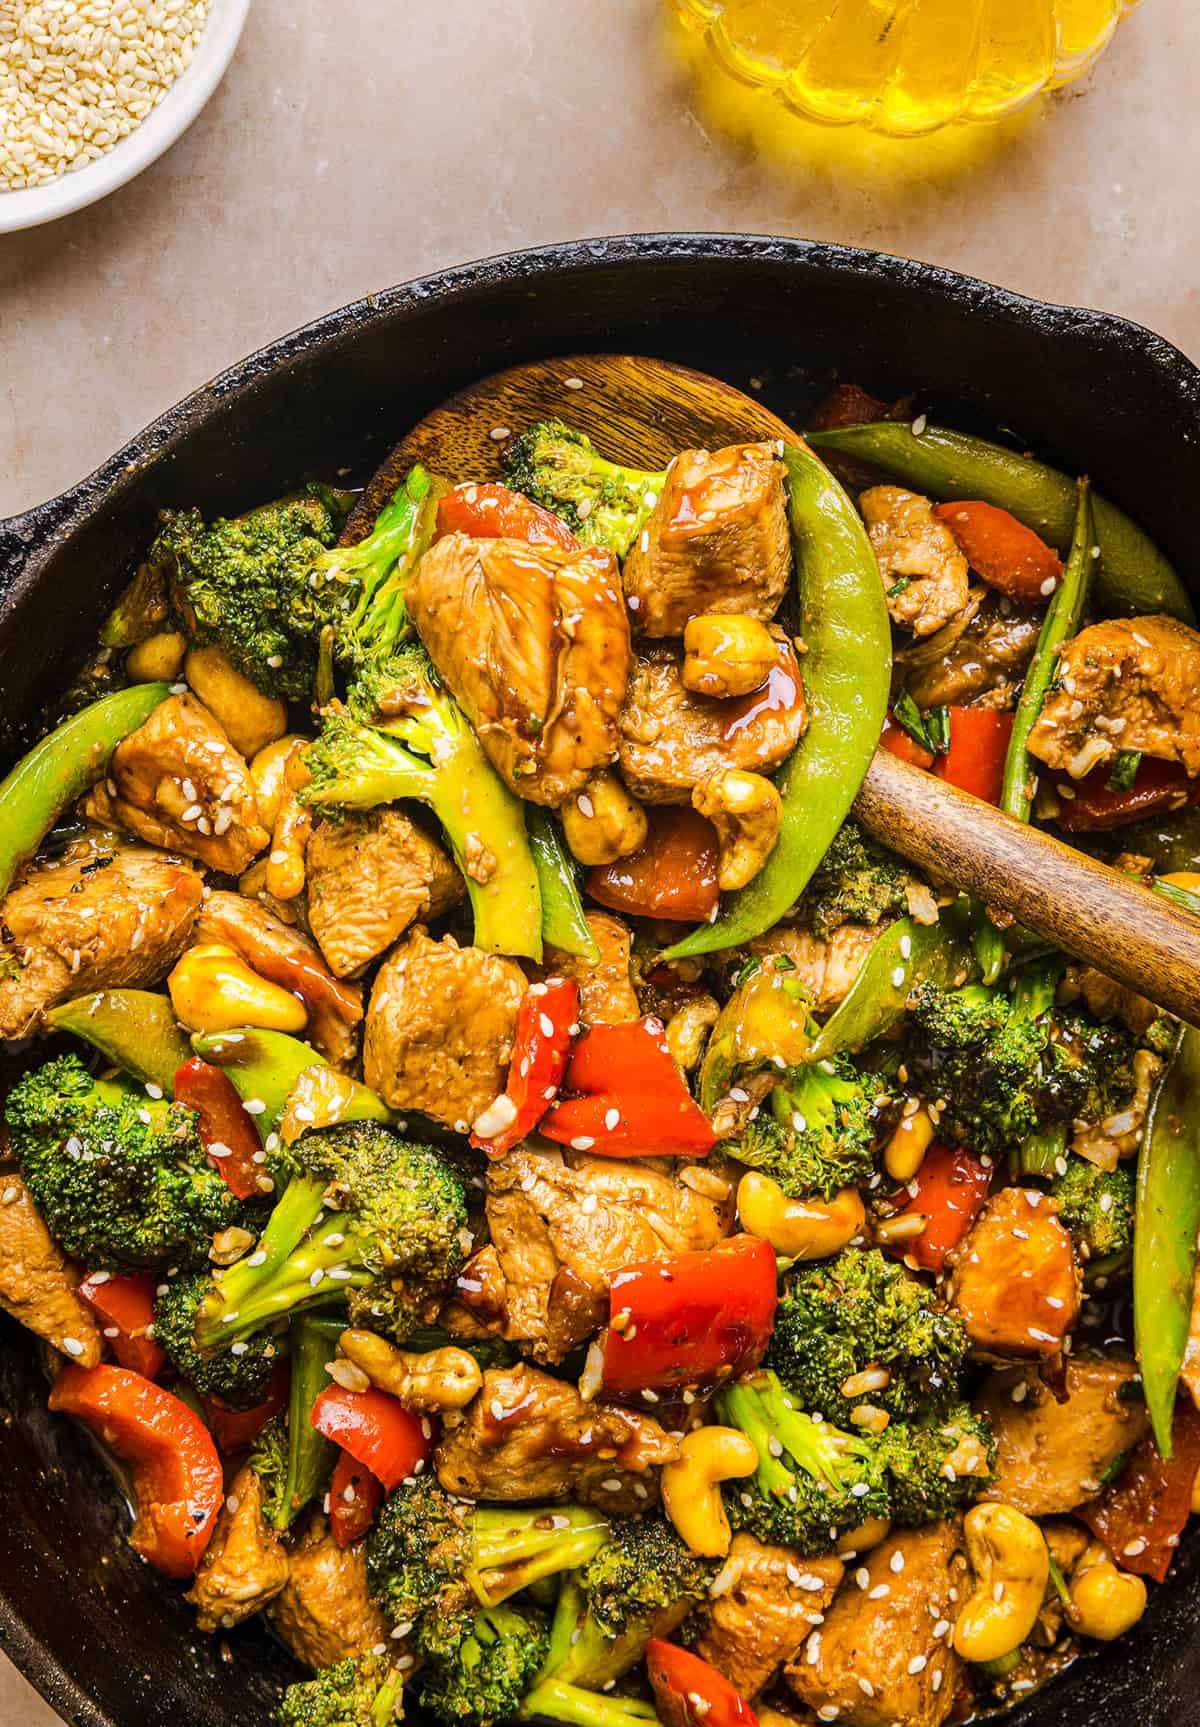
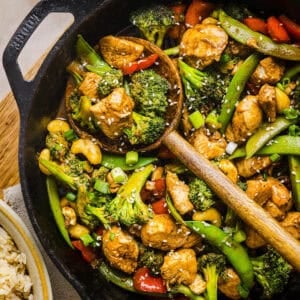
This Healthy Cashew Chicken Stir Fry is the perfect weeknight meal that is quick and easy to make, full of fresh veggies and tossed together in a delicious homemade peanut sauce!
Please enable JavaScript in your browser to complete this form.
If you love take-out style meals, but want something lighter, fresher and more nourishing, you need to make this Healthy Cashew Chicken Stir Fry! This is one of our weeknight staples because it is packed with lean protein, crunchy vegetables, heart-healthy fats from cashews and drizzled with the most delicious peanut sauce. Not only does this make an easy dinner your whole family will love, but the leftovers taste even better the next day for a healthy lunch!
Why You’ll Love This
- Quick and easy – everything cooks together all in one skillet in under 30 minutes for a delicious and flavorful easy weeknight dinner.
- Healthier than take-out – this meal is lower in sodium, sugar and unhealthy fats making this dish a much better option than ordering your favorite takeout!
- Nourishing – this meal is packed with lean protein and loaded with a rainbow of veggies that add fiber and nutrients.
- Perfect for meal prep – this cashew chicken stir fry reheats beautifully for healthy lunches or dinners. You can also easily customize this to your liking!

Ingredients You’ll Need
- chicken – I used boneless, skinless chicken breasts that I cut into 1-inch pieces, but you could use chicken thighs as well.
- garlic – I always like to use fresh garlic, but a teaspoon of dried minced garlic or garlic powder will work if that is all you have on hand.
- veggies – a combination of broccoli florets, red bell pepper, snap peas, and green onions.
- soy sauce – I always use low sodium soy sauce as I find that regular soy sauce can make dishes too salty. You could also swap the soy sauce with tamari or coconut aminos to make this gluten-free or paleo.
- peanut butter – the base of this sauce and my favorite ingredient! I used all-natural creamy peanut butter in this, but you could also use chunky peanut butter, processed or even other nut butters for a different taste.
- honey – not only does this add some sweetness to the sauce without using refined sugars, but it also makes a nice sticky sweet glaze! Feel free to swap the honey with maple syrup or other natural sweetener if you don’t have any on hand.
- sesame oil – this adds the BEST nutty flavor to this sauce.
- ginger – adds a little zip to the sauce and amazing flavor.
- cashews – these add a nice crunch to the stir fry and tastes great with the peanut sauce. They are also rich in healthy fats, magnesium and plant-based protein.
- salt + pepper – needed to season the dish and add flavor.
How to Make Cashew Chicken Stir Fry
- Chop, chop, chop! Cut the chicken into 1-inch pieces and chop all the veggies.
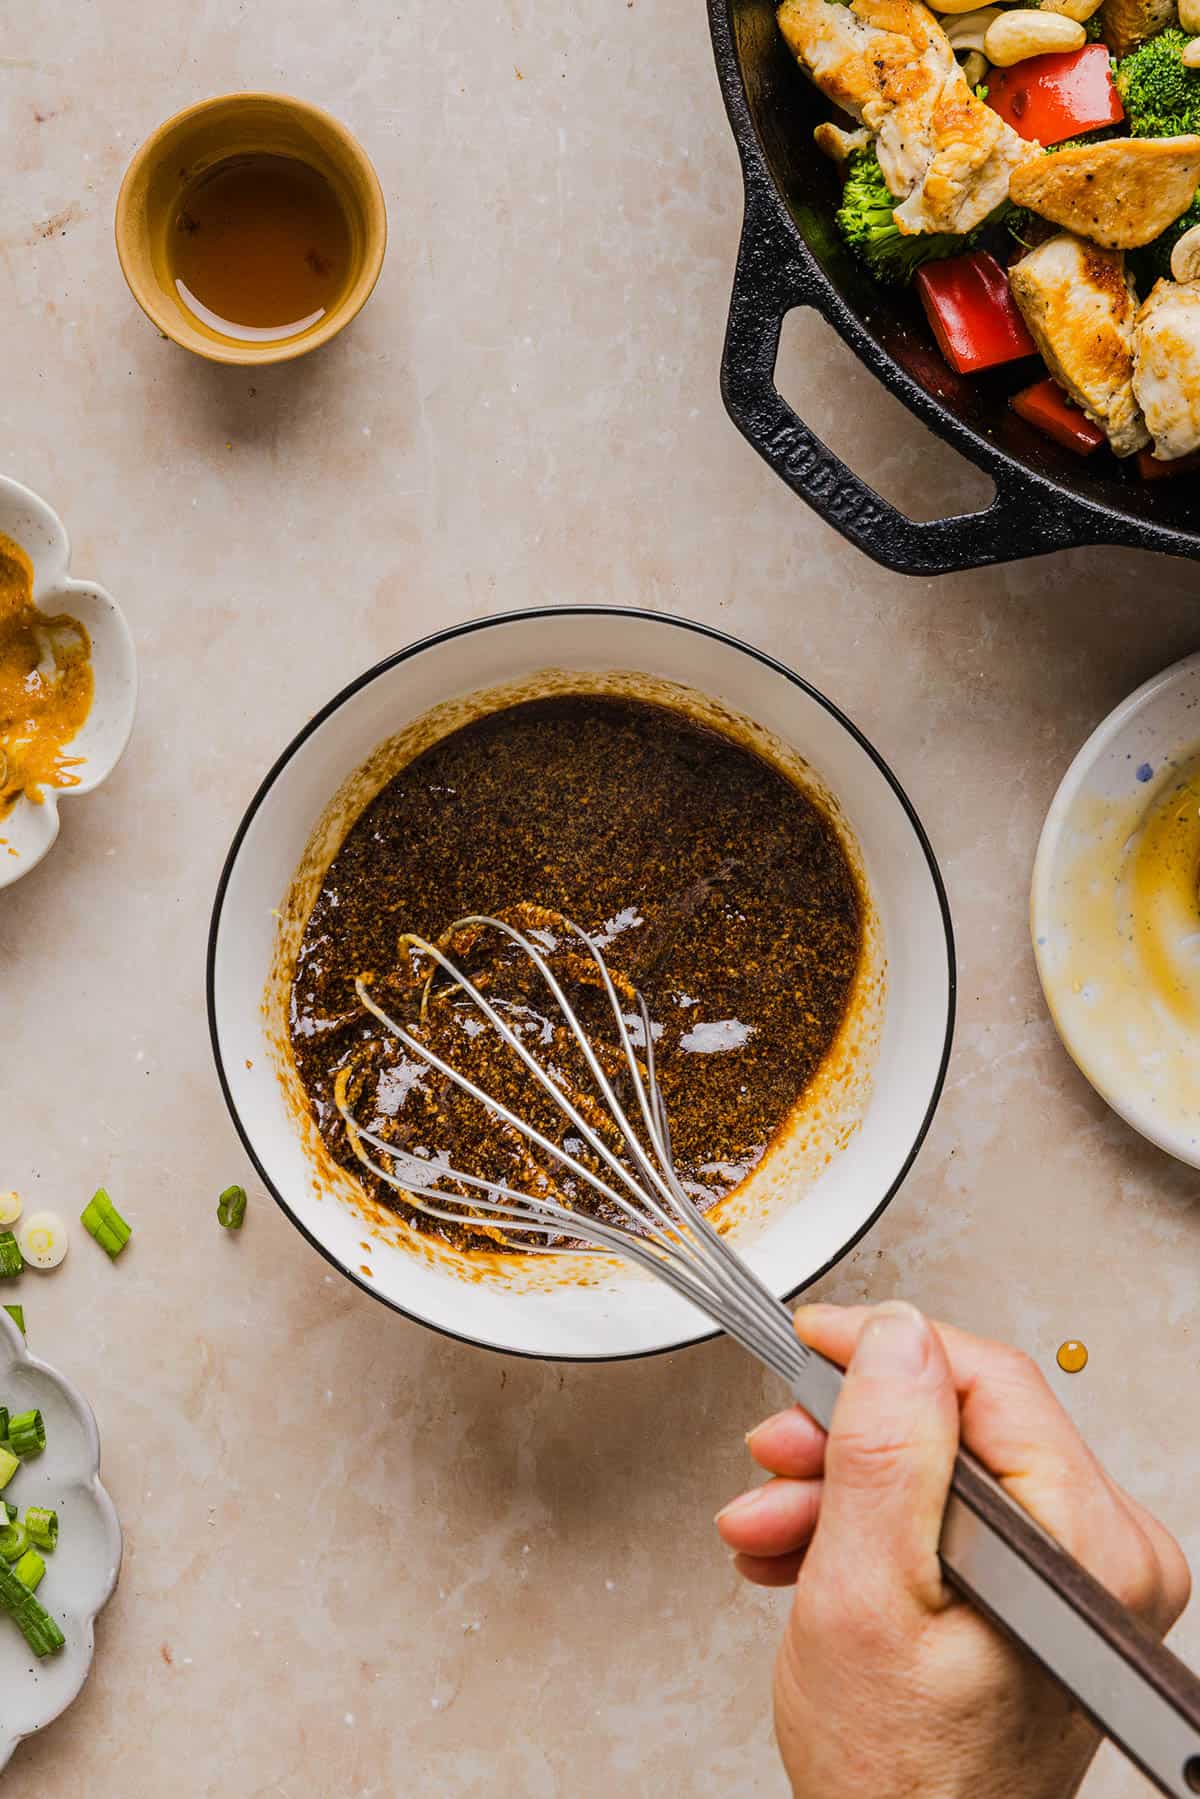
- Prepare the sauce. In a small bowl, whisk together the soy sauce, peanut butter, honey, sesame oil, and grated ginger. Whisk in 2 or 3 tablespoons of water (or chicken broth for more flavor!), depending on how thick or thin you want the sauce.
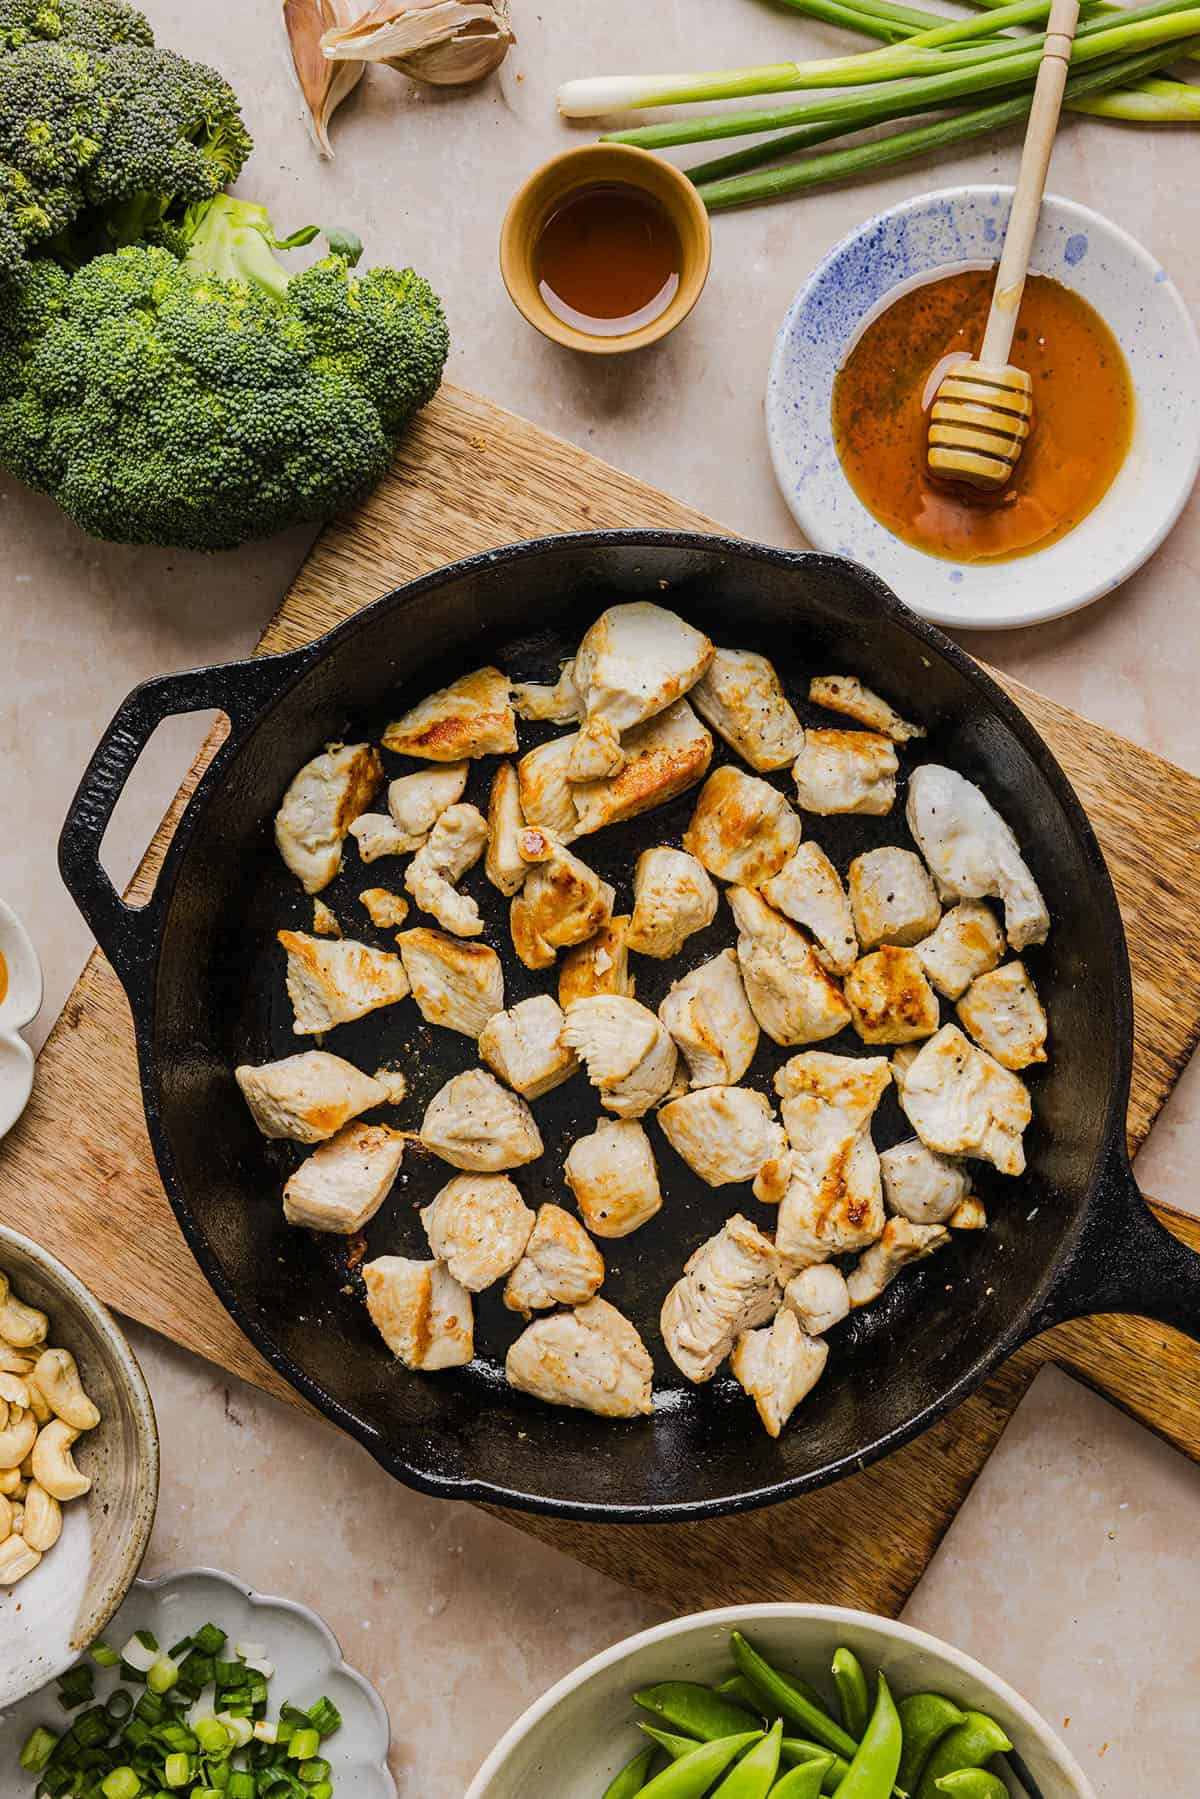
- Brown the chicken. In a large skillet (my FAVORITE pan!) over medium-high heat, drizzle one tablespoon of olive oil to coat the pan. Once the pan is hot, add the chicken in an even layer. Season with salt and pepper and cook until lightly browned, about 4 to 5 minutes. Once the chicken is cooked, transfer to a plate and set aside.
- Cook the veggies. Drizzle another tablespoon of olive oil onto the hot skillet and add the broccoli, bell pepper and snap peas. Cook the vegetables until they are tender, about 4 to 5 minutes, stirring frequently.
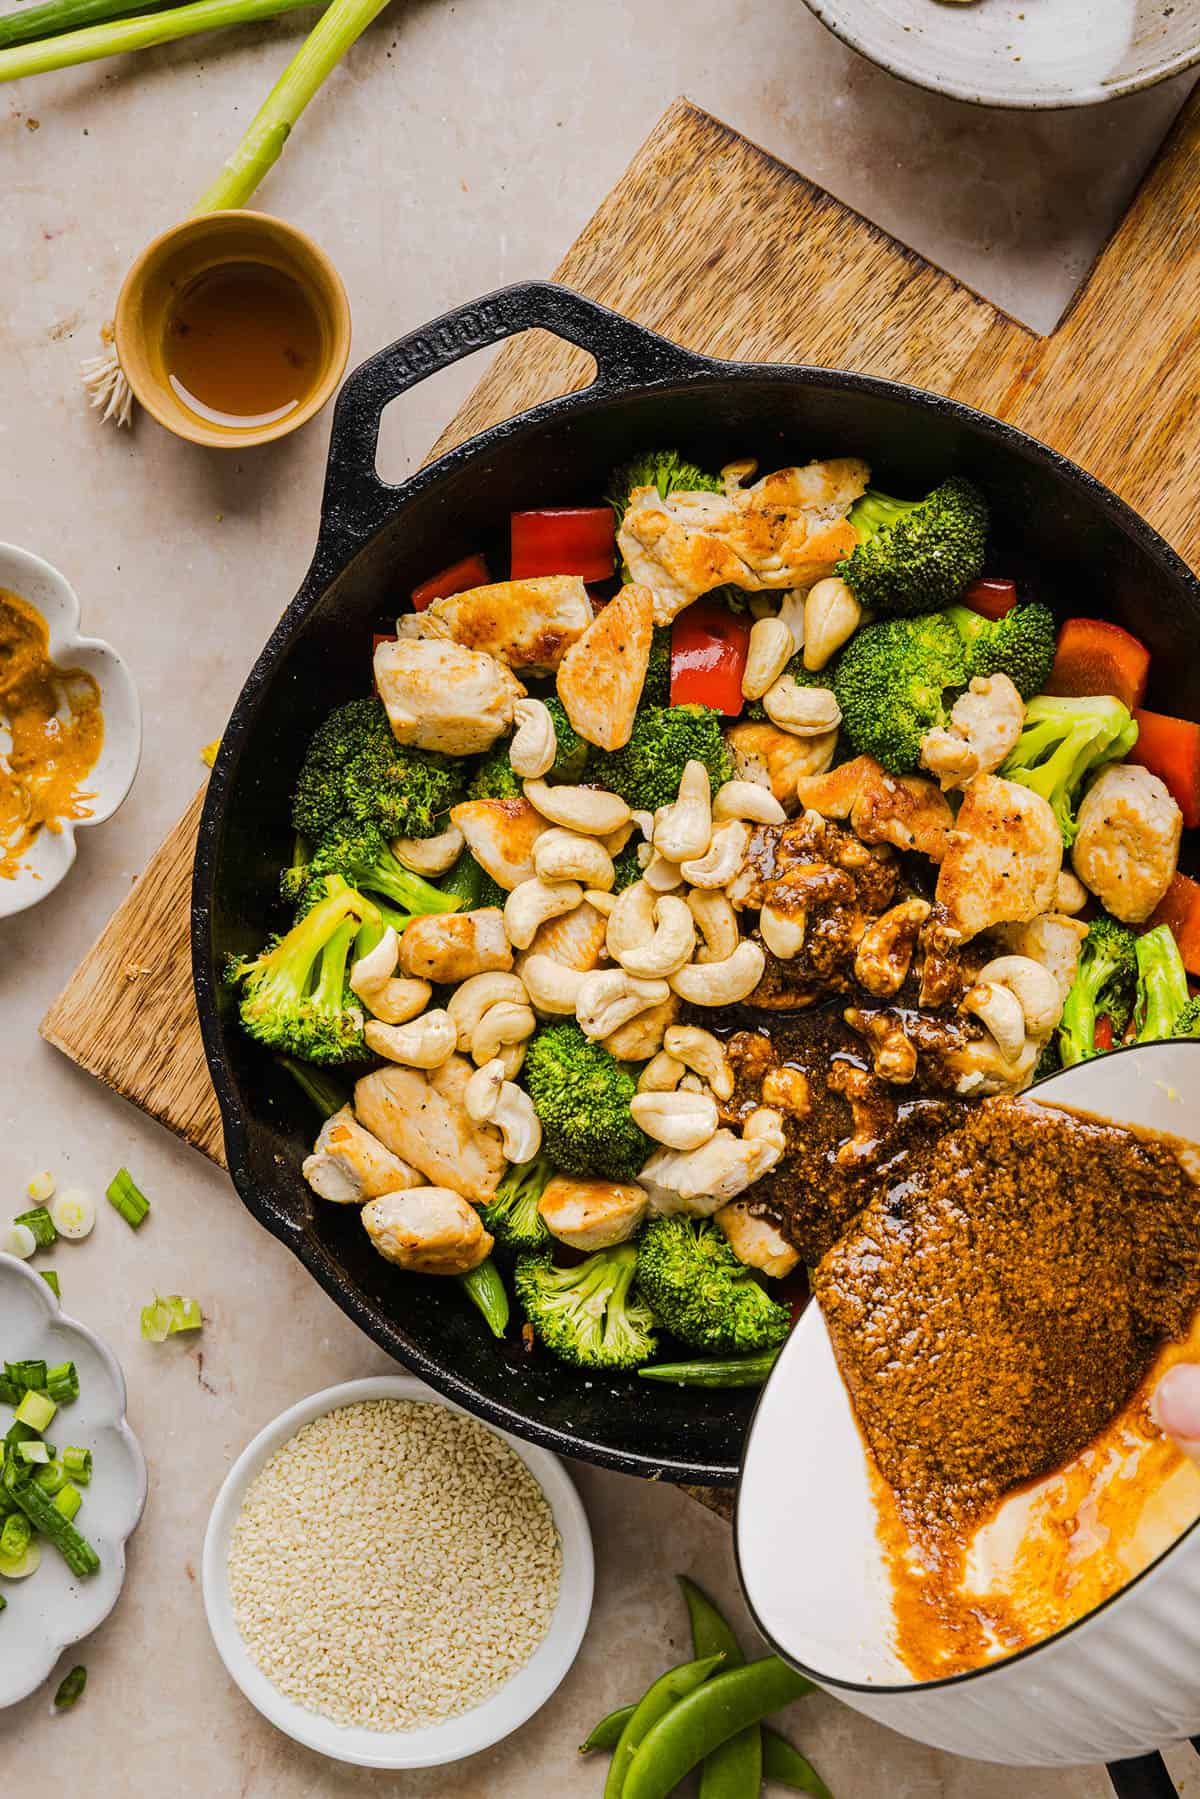
- Mix everything together. Once the veggies are tender, add the chicken back to the pan and mix together. Add in the garlic and cook for about a minute, then add in the cashews and pour the peanut sauce over top. Mix well, making sure everything is coated, and bring the sauce to a boil. Turn down the heat and simmer until sauce has thickened up and everything is incorporated. Sprinkle with green onions and sesame seeds, serve and enjoy!
Tips for the Best Cashew Chicken
- Prep ingredients first – this stir fry cooks quickly, so I like to chop and measure everything ahead of time so I can quickly throw this meal together.
- Cut chicken evenly – this helps the chicken cook quickly and evenly, while also keeping the chicken tender.
- Don’t overcrowd the pan – feel free to cook this stir fry in batches if your pan isn’t large enough. You want everything to cook and brown evenly for the best flavor.
- Make this to your liking – you can easily make this stir fry to your liking by adding in more garlic (or less), adding in some crushed red pepper for added spice or use toasted sesame oil for a more nutty flavor.
- Add cashews at the end – this helps keeps the cashews nice and crunchy!
- Taste and adjust – this peanut sauce is one of my favorites, but feel free to taste and adjust the sauce as needed so it’s to your liking.
- Serving suggestions – this cashew chicken stir fry tastes great served over brown rice, quinoa, cauliflower rice or even noodles.
Variations and Substitutions
- Make it gluten-free – you can easily swap out the soy sauce and use tamari or coconut aminos to make this recipe gluten-free.
- Make it spicy – add in some red pepper flakes, dash of cayenne pepper or chili garlic sauce for even more flavor and added spice.
- Low-carb option – we love serving this over brown rice, but feel free to enjoy with cauliflower rice or even zucchini noodles for a lower carb option.
- Vegetarian – swap out the chicken for tofu, tempeh or even your favorite noodles for a meatless option.
- Extra veggies – you could also add in mushrooms, onions, asparagus, green beans, zucchini, carrots, or baby corn.
- Thicker sauce – I personally think this sauce is thick enough for my liking, but if you want a thicker sauce, feel free to add in a teaspoon or two of cornstarch or arrowroot powder.

Meal Prep and Storage
Leftovers will last up to 4 to 5 days in the fridge stored in a sealed, airtight container. The great thing is this meal tastes even better the next day so it is perfect for your weekly meal prep!

Pin this now to find it later
Follow on Instagram
More Stir Fry Recipes
- Asian Ground Turkey and Green Bean Stir Fry
- Teriyaki Chicken Stir Fry
- One Pan Pineapple Teriyaki Chicken
- Simple Sautéed Vegetables
- Honey Garlic Shrimp Stir Fry
- Spicy Sausage and Veggie Stir Fry
Hope you all enjoy this Healthy Cashew Chicken Stir Fry! If you love this recipe as much as we do, please leave a  star rating below and don’t forget to tag me on Instagram using the hashtag #eatyourselfskinny! I love seeing all your delicious recreations!
Healthy Cashew Chicken Stir Fry
#wprm-recipe-user-rating-0 .wprm-rating-star.wprm-rating-star-full svg * { fill: #343434; }#wprm-recipe-user-rating-0 .wprm-rating-star.wprm-rating-star-33 svg * { fill: url(#wprm-recipe-user-rating-0-33); }#wprm-recipe-user-rating-0 .wprm-rating-star.wprm-rating-star-50 svg * { fill: url(#wprm-recipe-user-rating-0-50); }#wprm-recipe-user-rating-0 .wprm-rating-star.wprm-rating-star-66 svg * { fill: url(#wprm-recipe-user-rating-0-66); }linearGradient#wprm-recipe-user-rating-0-33 stop { stop-color: #343434; }linearGradient#wprm-recipe-user-rating-0-50 stop { stop-color: #343434; }linearGradient#wprm-recipe-user-rating-0-66 stop { stop-color: #343434; }
Ingredients
- 2 Tbsp olive oil divided
- 1 lb boneless skinless chicken breasts cut into 1-inch pieces
- Salt and pepper to taste
- 2 cups broccoli florets
- 1 red bell pepper cut into small chunks
- 1 cup sugar snap peas
- 1 Tbsp garlic minced
- 1/3 cup unsalted cashews
- Garnish with green onions and sesame seeds
For the Peanut Sauce:
- 1/4 cup low sodium soy sauce (or tamari)
- 3 Tbsp all-natural peanut butter
- 2 Tbsp honey
- 1 tsp sesame oil
- 1 Tbsp grated ginger
- 2 to 3 Tbsp water
Instructions
-
In a large skillet over medium heat, drizzle one tablespoon of olive oil to coat the pan. Once the pan is hot, add the chicken in an even layer. Season with salt and pepper and cook until lightly browned, about 4 to 5 minutes, stirring the chicken as needed. Once the chicken is cooked, transfer to a plate and set aside.
-
Drizzle another tablespoon of olive oil onto the hot skillet and add the broccoli, bell pepper, and snap peas. Cook the vegetables until tender, about 4 to 5 minutes, stirring frequently.
-
To make the peanut sauce, whisk together soy sauce, peanut butter, honey, sesame oil, and grated ginger in a small bowl. Whisk in 2 or 3 tablespoons of water, depending on the consistency you prefer, and set aside.
-
Once the veggies are tender, add the chicken back to the pan and mix together. Add in the garlic and cook for about a minute, then add in cashews and pour the peanut sauce over top. Mix well, making sure everything is coated, and bring the sauce to a boil. Turn down the heat and simmer until sauce has thickened up and everything is incorporated.
-
Sprinkle with green onions and sesame seeds, serve and enjoy!
Nutrition
The post Healthy Cashew Chicken Stir Fry appeared first on Eat Yourself Skinny.