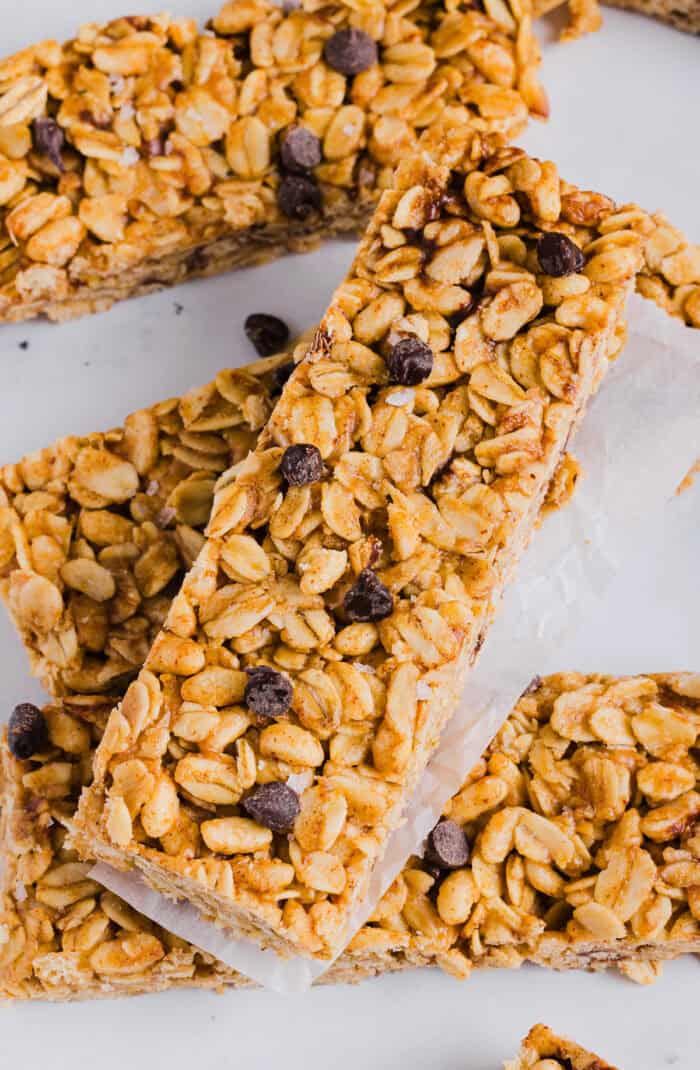
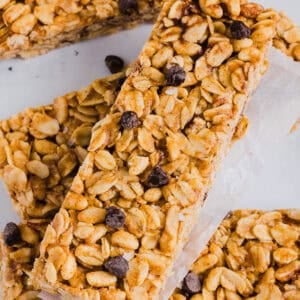
These No Bake Almond Butter Granola Bars are a wholesome, delicious snack that easily comes together in just 15 minutes using simple pantry ingredients! Perfect for busy mornings, a healthy snack or for your kid’s lunchbox!
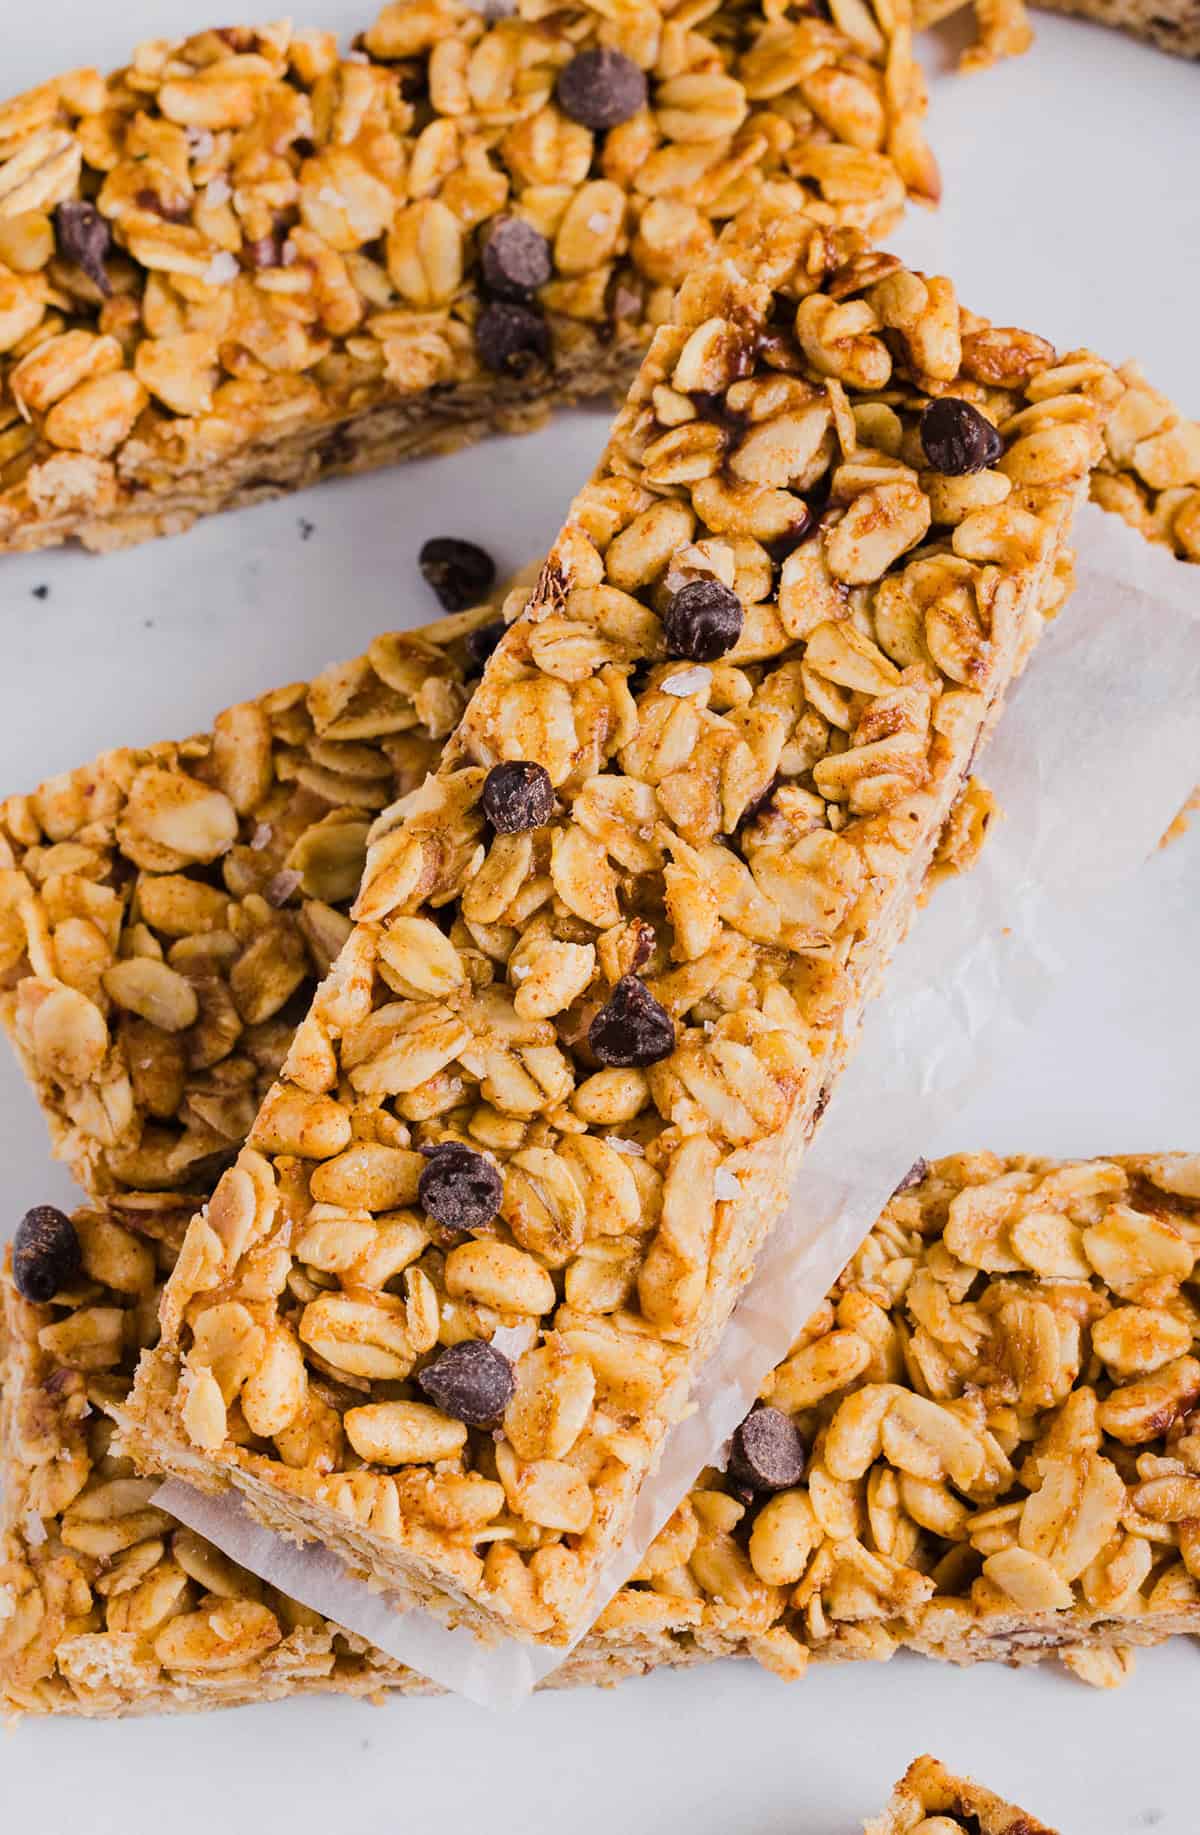
If you’re looking for a wholesome snack that is quick to make, naturally sweetened and requires zero oven time, these No Bake Almond Butter Granola Bars are about to become a staple in your house! Perfect for busy mornings, lunchboxes, post-workout fuel or a healthy afternoon snack bar, this recipe comes together in just 15 minutes using simple pantry ingredients. No baking, no complicated steps, just chewy, nutty and lightly sweet bars that taste indulgent while still being nourishing.
Why You’ll Love These
- Wholesome – these bars are made with hearty rolled oats and are naturally sweetened without using any refined sugar. So much better than store-bought granola bars!
- No oven required – these healthy granola bars come together in just 15 minutes with zero baking necessary making them the perfect snack to grab on-the-go.
- Customizable – feel free to make these homemade granola bars to your liking by using a variety of your favorite mix-ins or swapping the almond butter for peanut butter!
- Kids will love these – these bars are so fun to make with your kids and are made with wholesome ingredients so you can feel good about putting them in their lunchbox.
Ingredients You’ll Need
- rolled oats – wholesome whole grain old fashioned oats (I used gluten-free oats) make these bars deliciously chewy! You can also use quick-cooking oats if that’s all you have on hand, but they won’t have that great chewy texture.
- puffed rice cereal – I used puffed brown rice cereal with no added sugar (not Rice Krispies) which adds a delicious crunch to these bars.
- almond butter – creamy, rich and packed with healthy fats and protein. You could also use peanut butter or other nut butter if you prefer.
- coconut oil – helps to bind these bars together along with the honey.
- honey – this is needed to naturally sweeten the bars and help bind them together, but feel free to use maple syrup or other natural sweetener.
- vanilla extract – for a boost of flavor.
- mini chocolate chips – you could also use chopped up chocolate or other mix-ins like chopped almonds, shredded coconut, chia seeds or dried fruit.
- sea salt – to bring out all these flavors!
How to Make Almond Butter Granola Bars
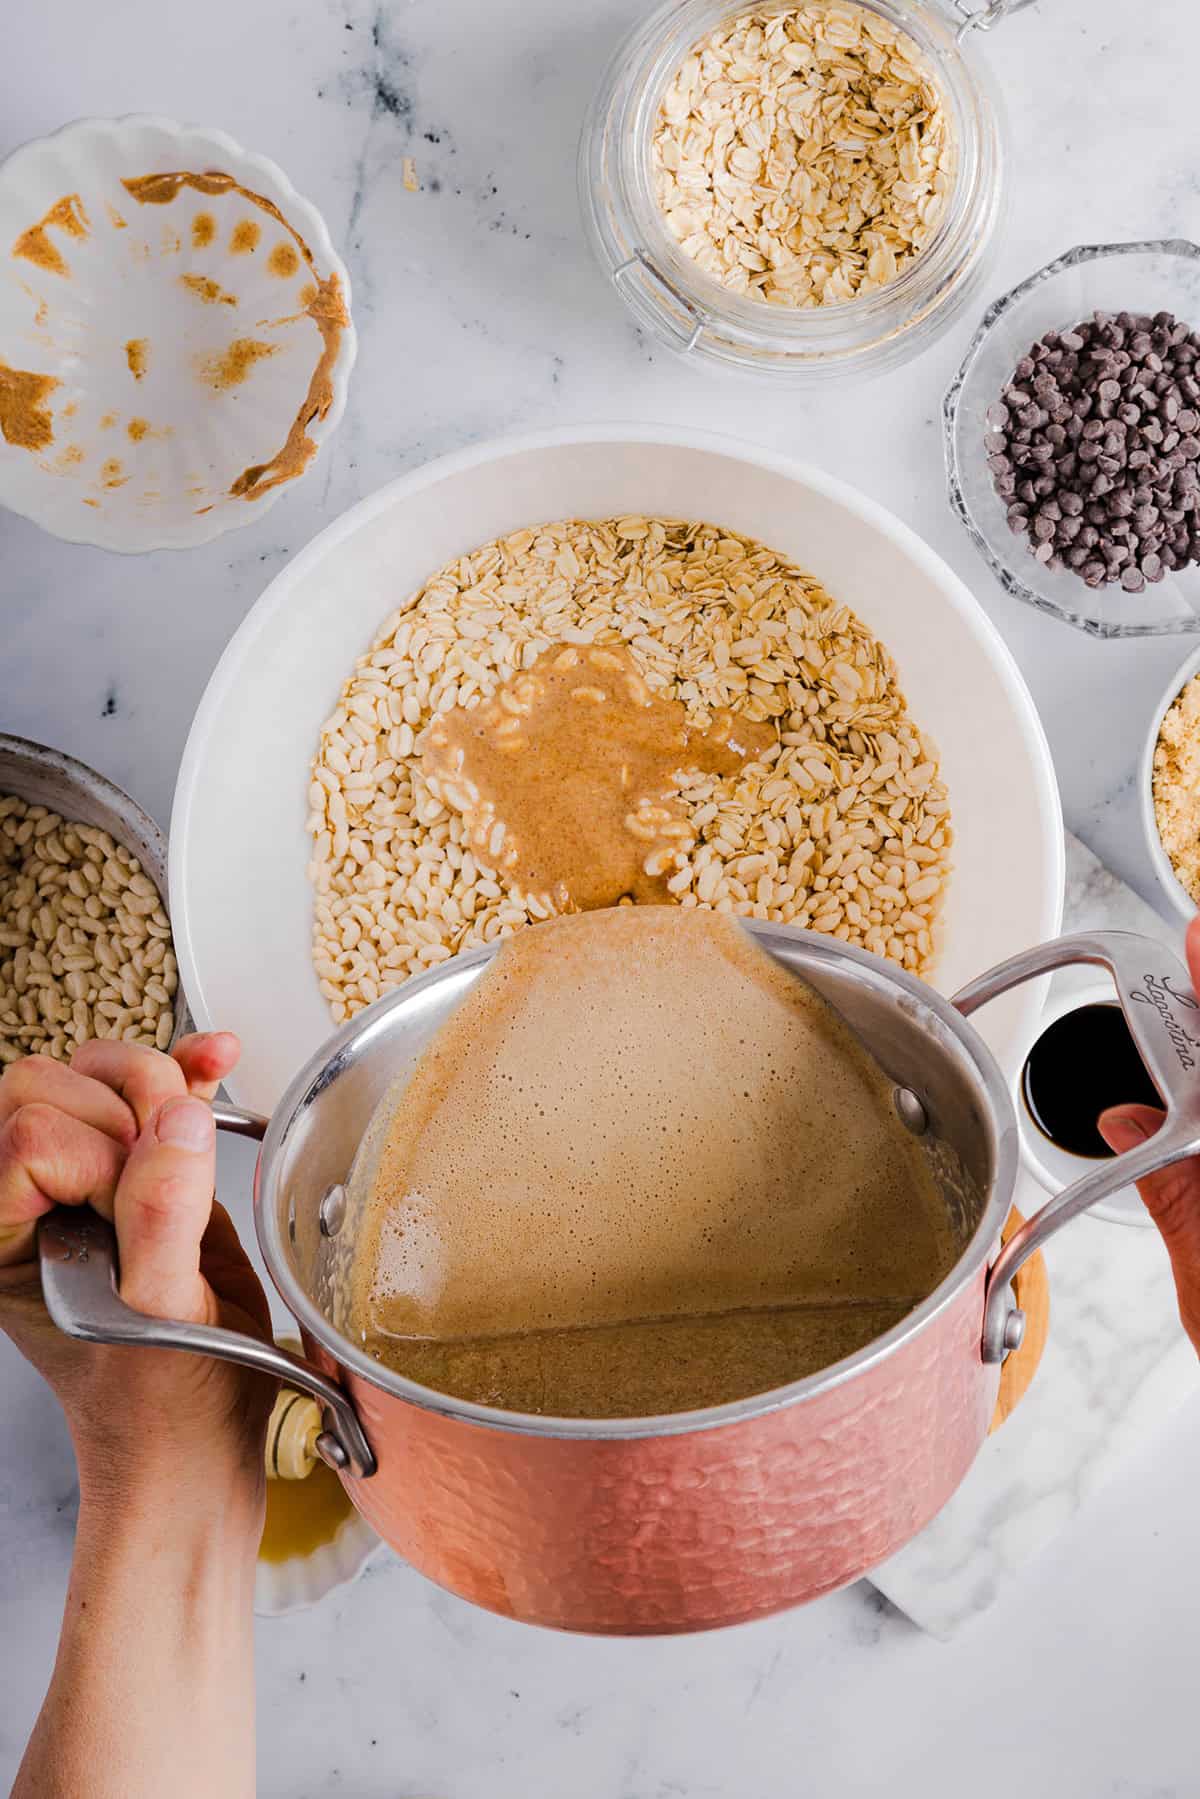
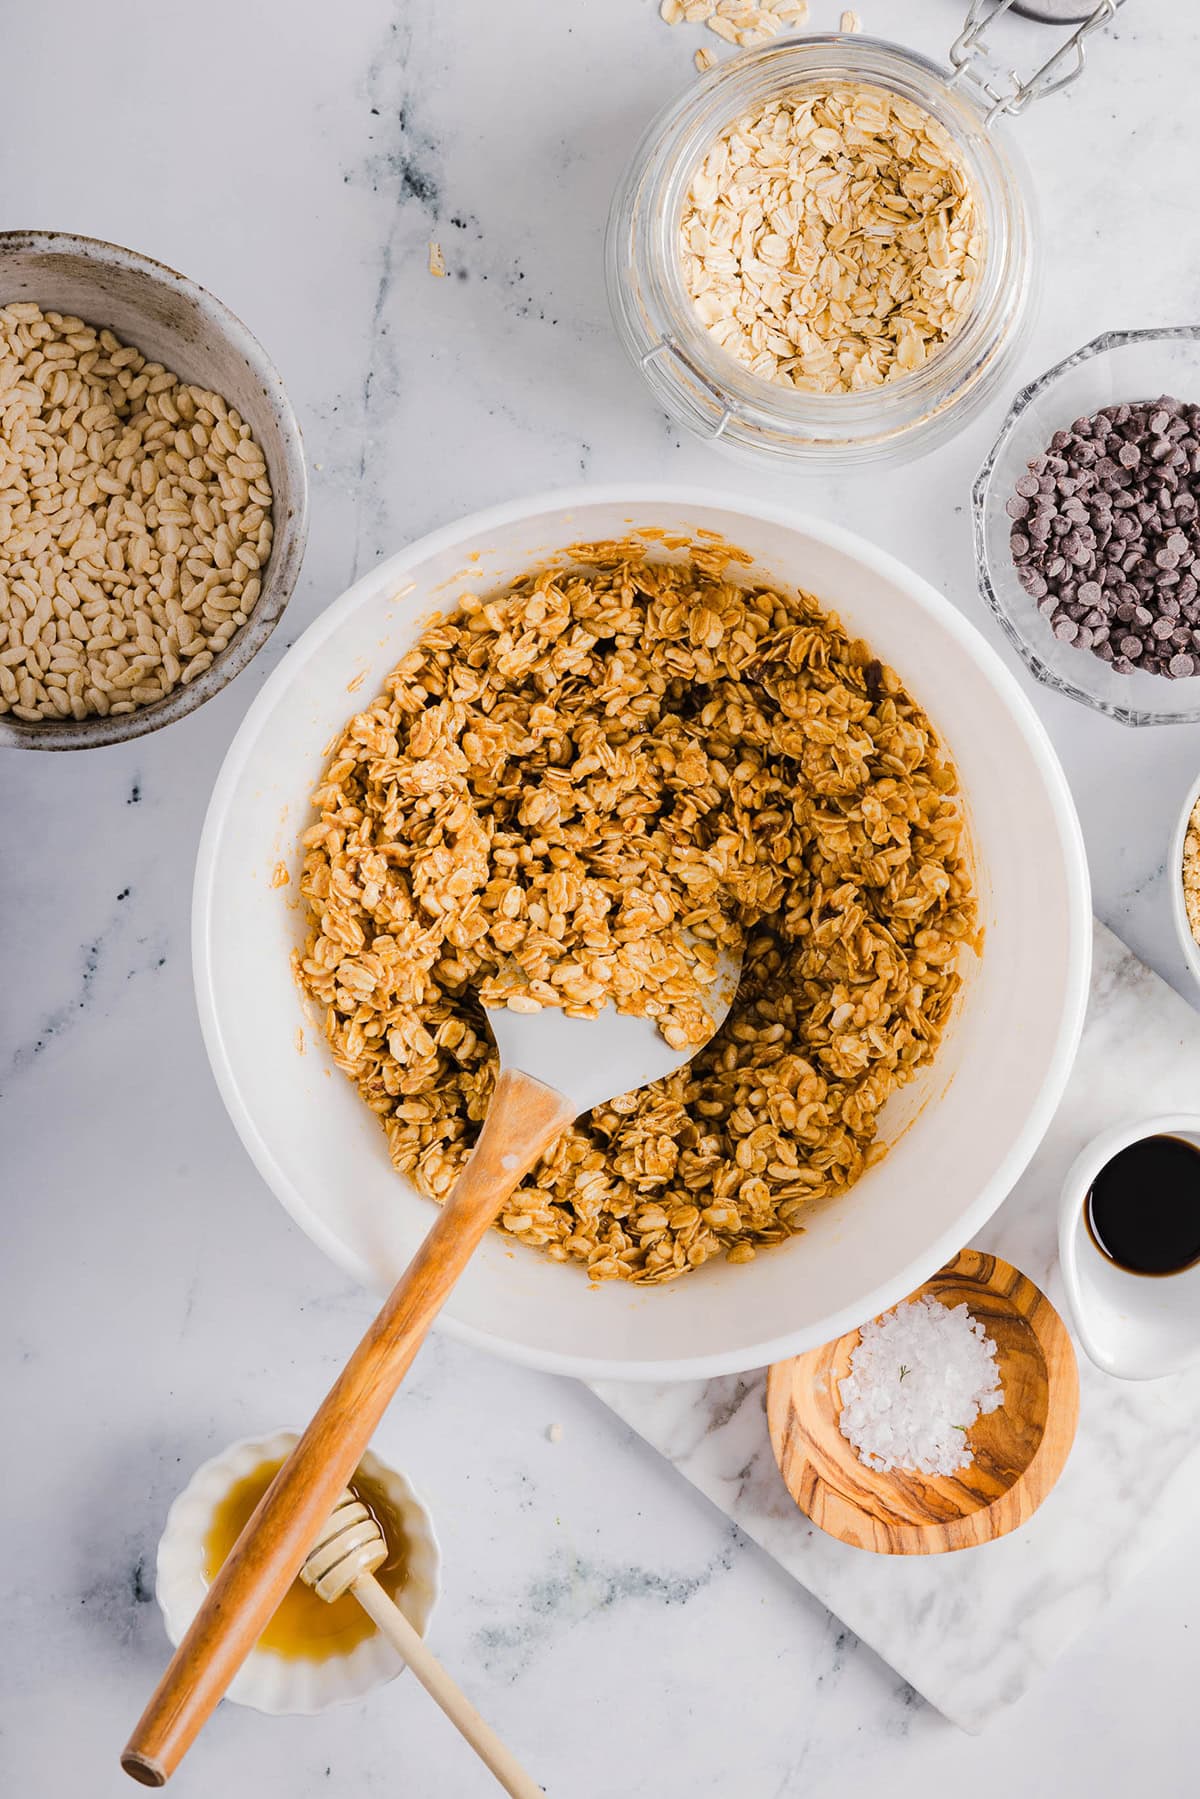
- Mix dry ingredients. In a large mixing bowl, combine rolled oats and puffed rice cereal. Set aside.
- Heat up wet ingredients. In a small saucepan on medium-high heat, whisk together the almond butter, honey and coconut oil and bring to a boil. Lower the heat to medium-low, continually whisking, and allow mixture to simmer for about 2 minutes on low heat. Remove mixture from heat and stir in the vanilla extract.
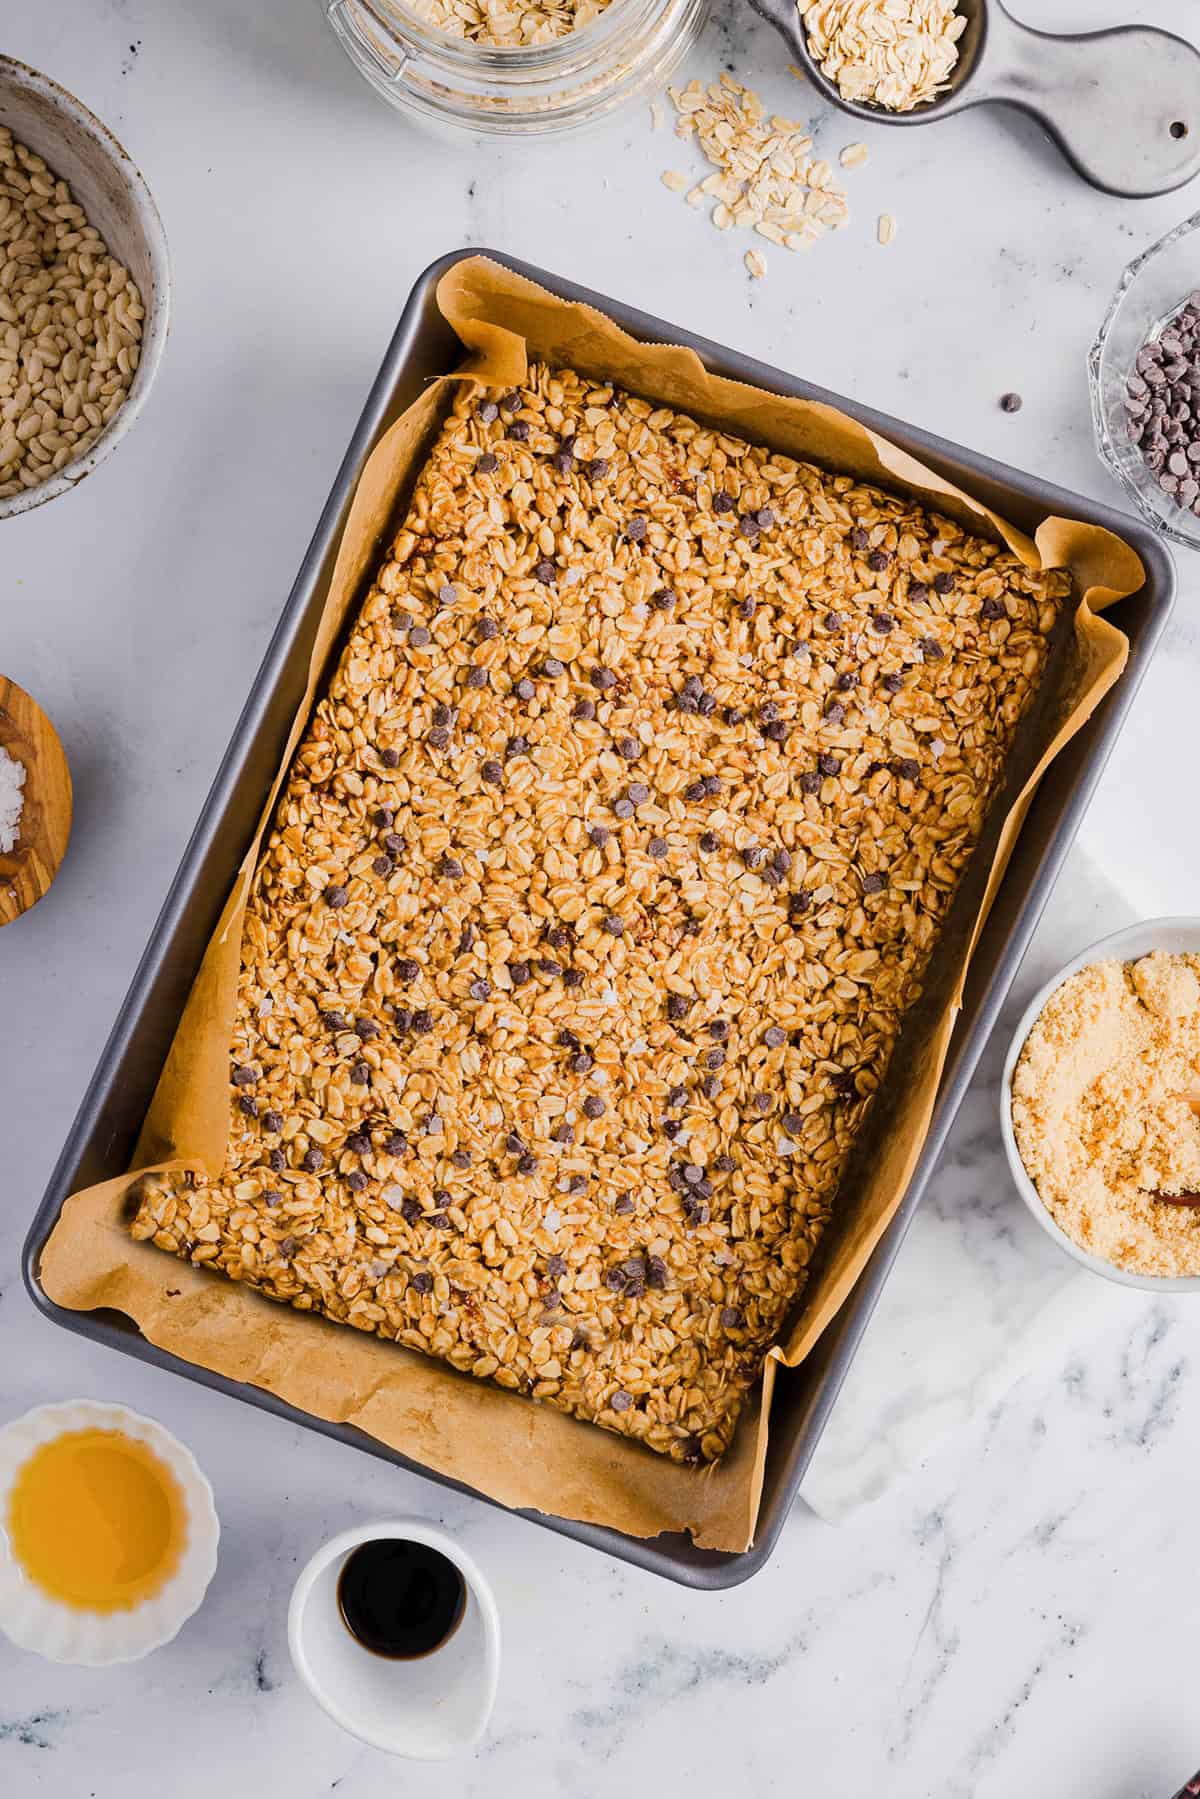
- Combine the oat mixture. Pour mixture over the dry oat mixture and fold together so everything is evenly coated. Stir in one tablespoon of chocolate chips and transfer to a prepared 9×13-inch baking dish lined with parchment paper.
- Press into the pan. Press the granola mixture firmly into the prepared pan. I used extra parchment paper to press down to avoid the granola from sticking to my fingers. Sprinkle the remaining chocolate chips over top, lightly pressing them into the mixture, and top with a little sea salt.
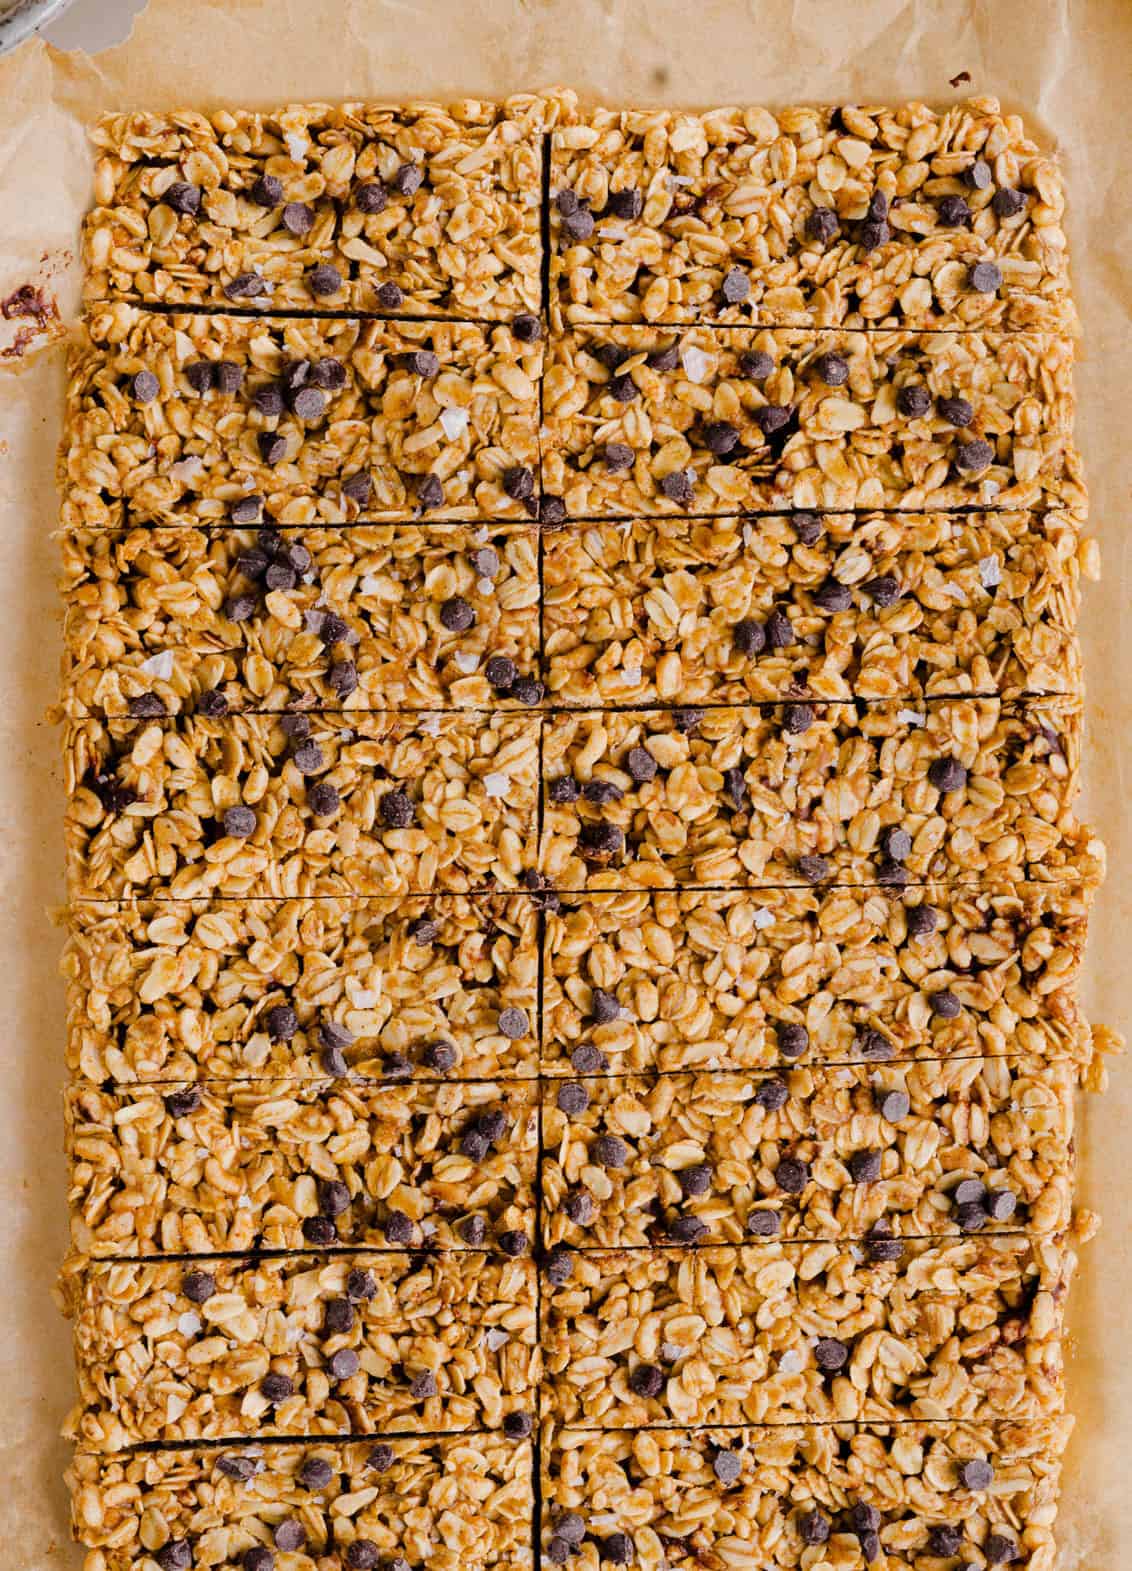
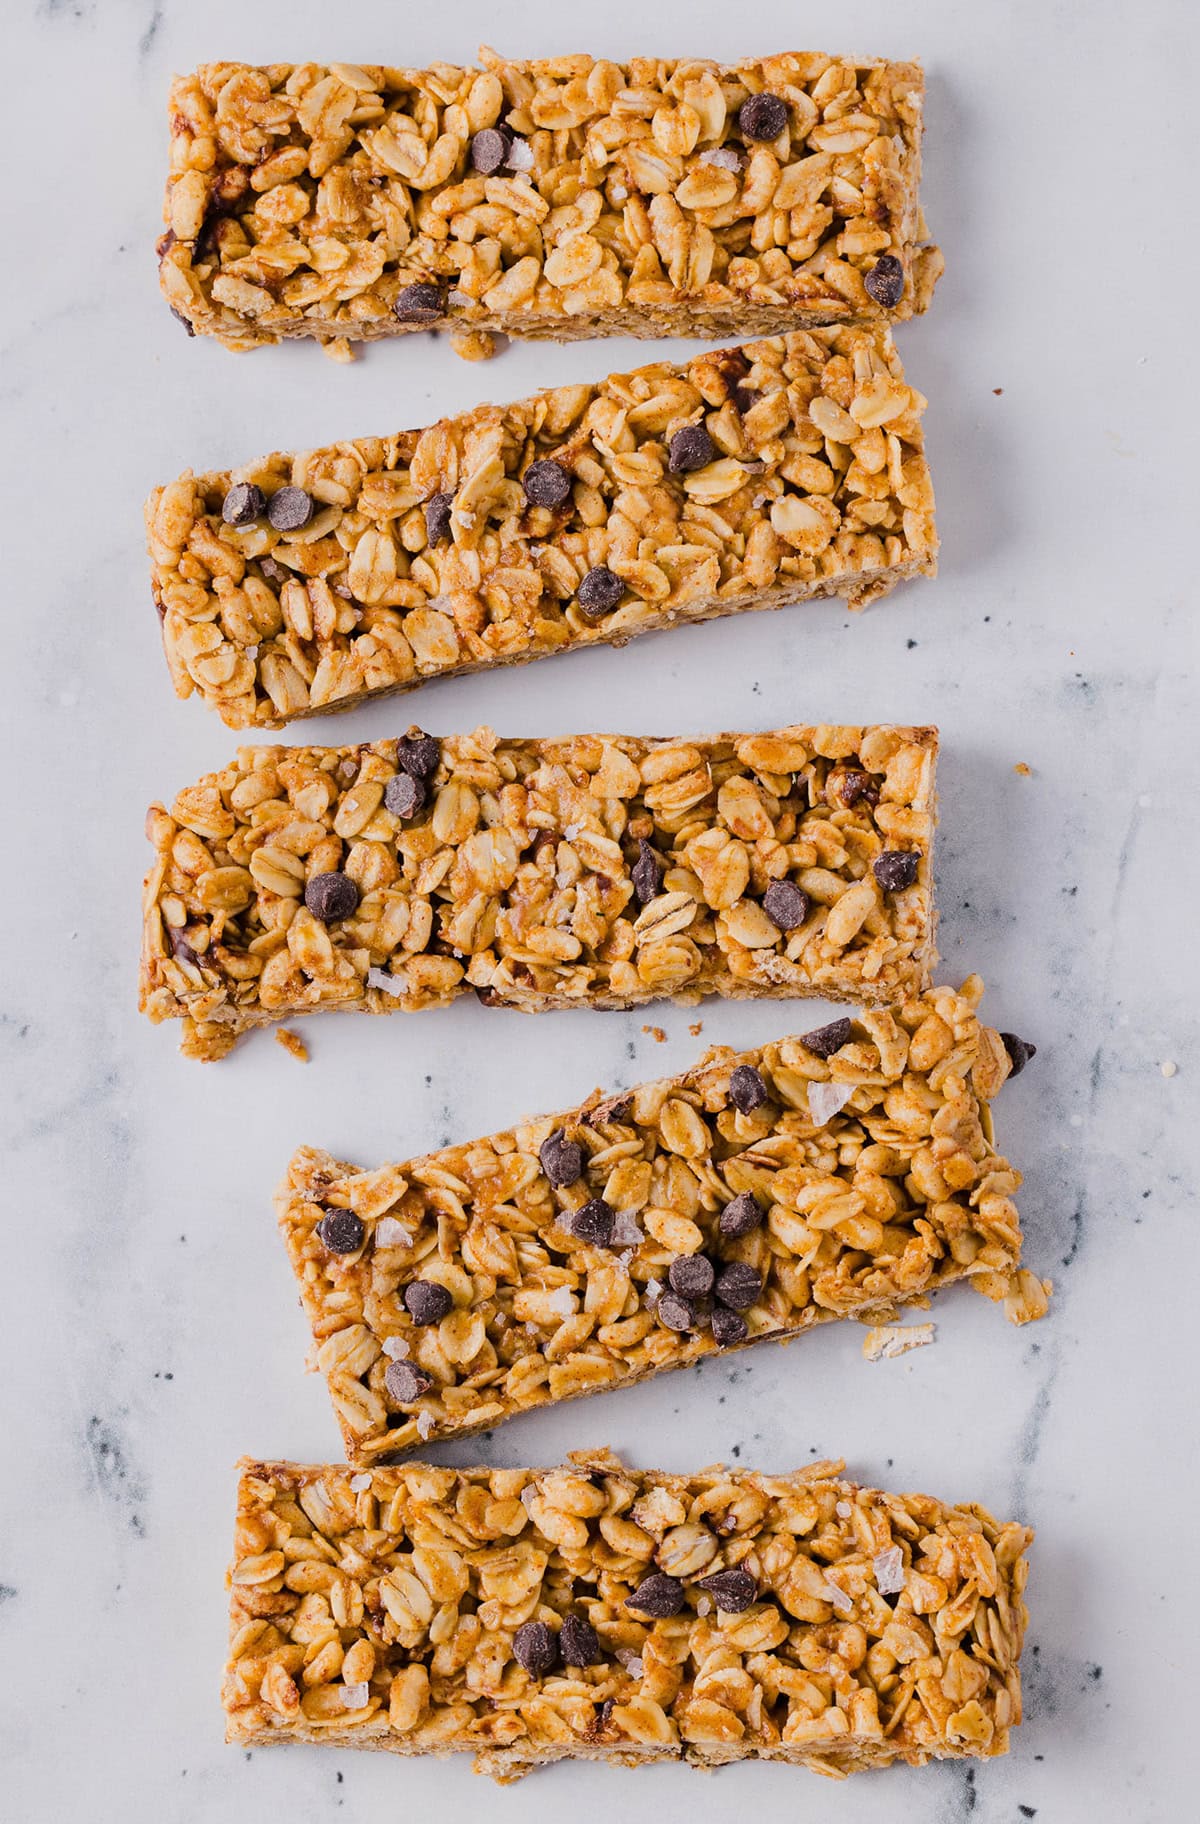
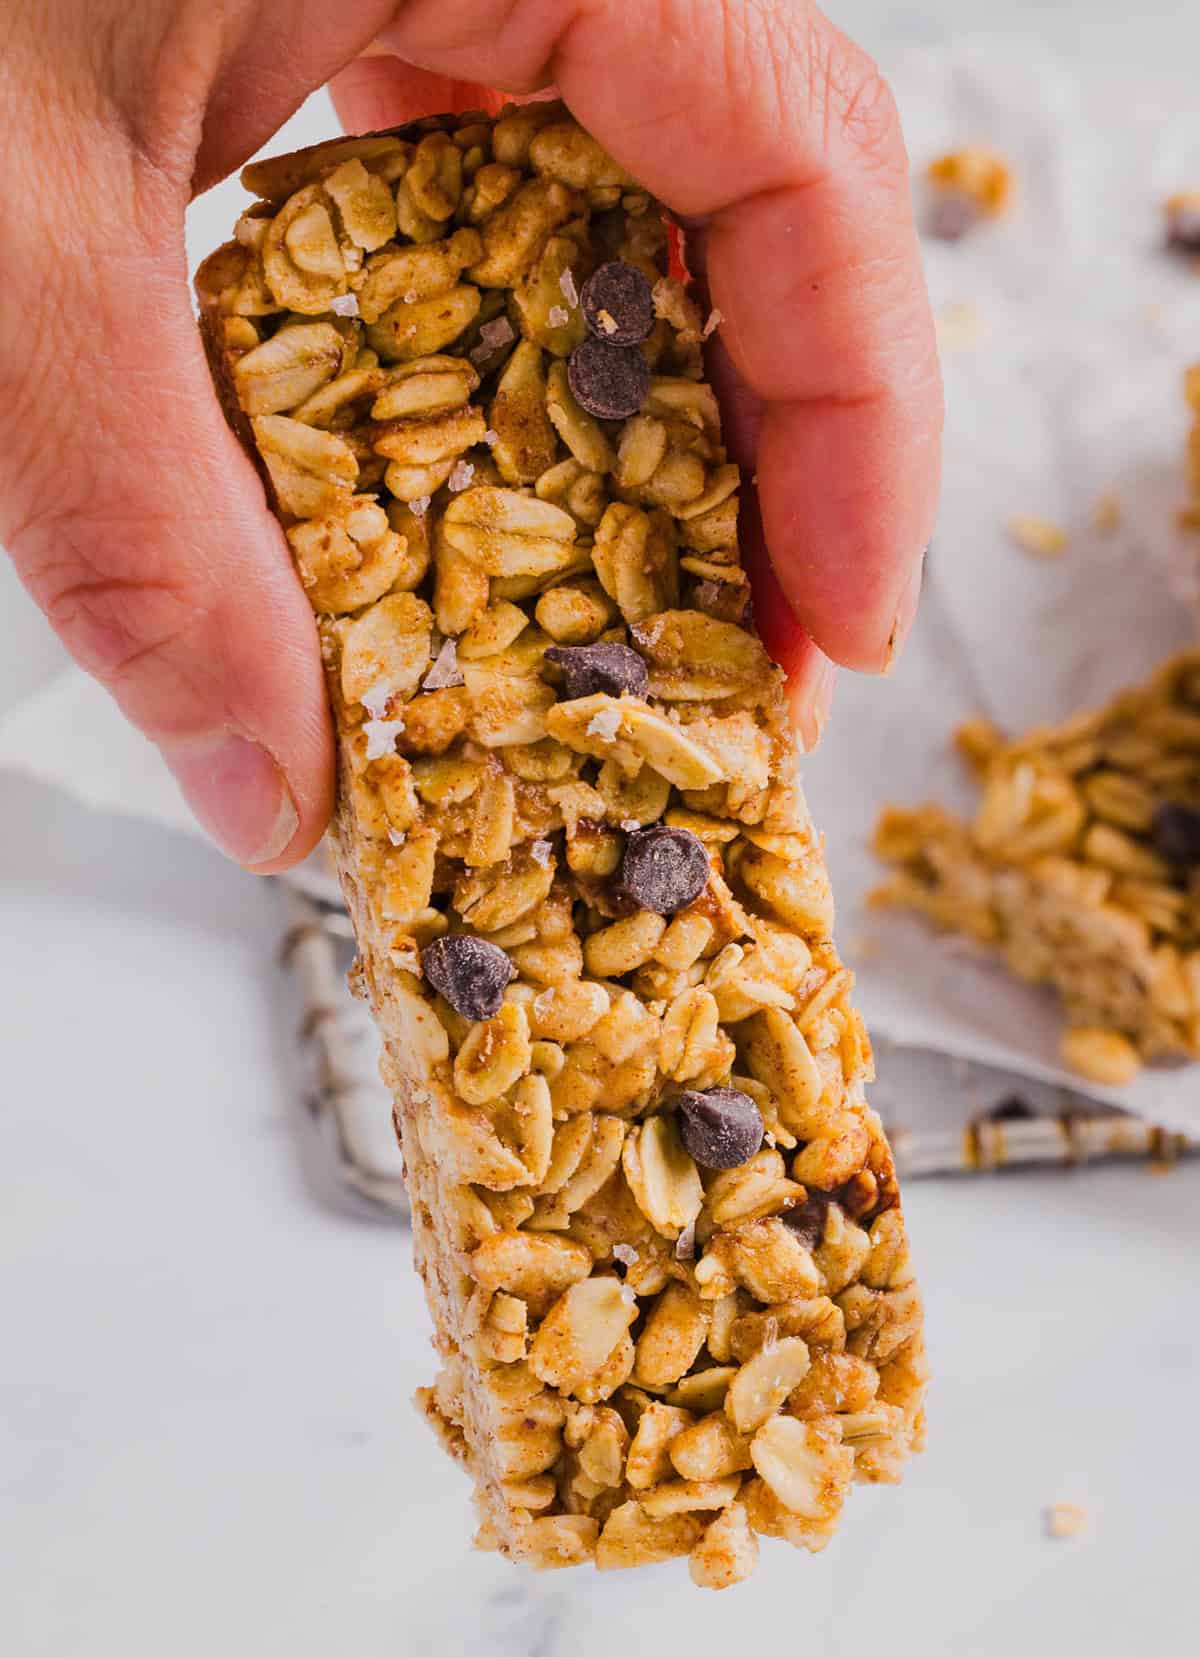
- Refrigerate. Cover the pan tightly with plastic wrap or aluminum foil and refrigerate for at least 2 hours. Once bars are set and firm, lift the parchment paper so that bars are easily removed from the baking dish and slice into 18 bars.
Tips for Making the Best Granola Bars
- Use the right nut butter – the almond butter acts as both our flavor base and the glue that holds these bars together so make sure to choose a creamy, well-stirred almond butter (or other nut butter) for the best texture.
- Measure oats carefully – too many oats can make your granola bars dry and crumbly, while using too few can make them overly soft. Spoon the oats into your measuring cup and level them off rather than packing them down.
- Boil the mixture for 2 minutes – I found that this is really the secret to helping these bars stick together. Make sure to whisk constantly so that the bottom of the peanut butter doesn’t burn.
- Press firmly into the pan – this is one of the most important steps to ensure your bars set properly and hold together. I like to use a little parchment paper to evenly press down on the bars and help prevent the mixture from sticking to my hands.
- Don’t skip the salt – sprinkling a little sea salt at the end is essential! It enhances the sweetness, balances the flavors and prevents the bars from tasting flat.
- Chill long enough to set – these bars need to chill for at least 2 hours in the fridge to give them time to firm up, but feel free to let them chill even longer. Slicing them too early will cause them to crumble.
Variations and Substitutions
- Make them nut-free – you can simply swap out the creamy almond butter for a seed-based alternative such as sunflower seed butter or pumpkin seed butter.
- Make them dairy-free – just make sure you use dairy-free chocolate chips or cacao nibs when mixing in the chocolate.
- Make them vegan – swap out the honey for maple syrup or agave nectar and make sure to use dairy-free chocolate chips.
- Flavor variations – switch up the flavor profile by adding in cinnamon, shredded coconut, cocoa powder, pumpkin spice or dried fruit.
- For chewier bars – if you like your bars more on the chewier side, feel free to add in extra almond butter, honey or brown sugar.
- For crunchier bars – if you like your bars with more of a crunch, add in some chopped nuts or sunflower seeds.
- For thicker bars – these bars are on the thinner side as I was trying to recreate those classic Chewy granola bars, but if you want thicker bars that won’t crumble as easy, try using a 9×9-inch square pan and slicing about 12 bars.
- Extra protein – you can also mix in 2 to 3 tablespoons of your favorite protein powder or even some flax seeds, hemp seeds or chia seeds for a little protein boost.
Prepping and Storage
- To Store: These chewy almond butter granola bars can be stored in a sealed, airtight container for up to 7 days in the refrigerator. I like to place a piece of parchment paper between the layers when stacking them to prevent them from sticking together.
- To Freeze: These bars can be stored in the freezer for up to 3 months making them great for meal prep! Pull out individual bars to thaw anytime you’re craving something sweet.
Pin this now to find it later
Follow on Instagram
More Bars You’ll Love
- Peanut Butter Protein Bars
- Dark Chocolate Almond Butter Bars
- Blueberry Oatmeal Breakfast Bars
- Carrot Cake Oatmeal Breakfast Bars
- Healthy Pumpkin Bars
More No Bake Desserts
- Chocolate Peanut Butter Balls
- No Bake Chocolate Pumpkin Bars
- Peanut Butter Trail Mix Balls
- Peanut Butter Quinoa Energy Balls
- Homemade KIND Bars
Hope you all enjoy these Almond Butter Granola Bars! If you love this recipe as much as we do, please leave a  star rating below and don’t forget to tag me on Instagram using the hashtag #eatyourselfskinny! I love seeing all your delicious recreations!
No Bake Almond Butter Granola Bars
#wprm-recipe-user-rating-0 .wprm-rating-star.wprm-rating-star-full svg * { fill: #343434; }#wprm-recipe-user-rating-0 .wprm-rating-star.wprm-rating-star-33 svg * { fill: url(#wprm-recipe-user-rating-0-33); }#wprm-recipe-user-rating-0 .wprm-rating-star.wprm-rating-star-50 svg * { fill: url(#wprm-recipe-user-rating-0-50); }#wprm-recipe-user-rating-0 .wprm-rating-star.wprm-rating-star-66 svg * { fill: url(#wprm-recipe-user-rating-0-66); }linearGradient#wprm-recipe-user-rating-0-33 stop { stop-color: #343434; }linearGradient#wprm-recipe-user-rating-0-50 stop { stop-color: #343434; }linearGradient#wprm-recipe-user-rating-0-66 stop { stop-color: #343434; }
Ingredients
- 2 cups old fashioned rolled oats
- 1 cup puffed rice cereal
- 3/4 cup almond butter
- 4 Tbsp coconut oil
- 1/2 cup honey
- 1 tsp vanilla extract
- 3 Tbsp mini chocolate chips divided
- Pinch of sea salt
Instructions
-
In a large bowl, combine rolled oats and puffed rice cereal; set aside.
-
In a small saucepan on medium-high heat, whisk together almond butter, coconut oil and honey and bring to a boil. Lower the heat to medium-low, continually whisking, and allow mixture to simmer for about 2 minutes. Remove mixture from heat and stir in the vanilla extract.
-
Pour mixture over the dry oat mixture and fold together so everything is evenly coated. Stir in one tablespoon of chocolate chips and transfer to a prepared 9×13-inch baking dish lined with parchment paper.
-
Press granola mixture firmly into the baking dish (I used extra parchment paper to press down to avoid granola from sticking to my fingers) and sprinkle remaining chocolate chips over top along with a pinch of sea salt. Cover and refrigerate for two hours.
-
Remove from refrigerator and lift the parchment paper so the bars are easily removed from the baking dish. Cut into 18 bars and store at room temp individually wrapped in plastic wrap or freeze for later.
Video
Nutrition
The post No Bake Almond Butter Granola Bars appeared first on Eat Yourself Skinny.